


A demanding through-trip, the access requires a head for heights and good route finding through the edge of the Olivine Wilderness Area. On the river, the rarely seen north faces of Tititea/Mt Aspiring dominate the scenery, and a healthy serving of III and IV water punctuates long sections of idyllic flatwater.
Thanks to Dan Clearwater for the trip page written Feb 2020, plus Bill Thompson and Nick Ozard for the photos and for being awesome trip-mates.
Planning
Suggested itinerary
The trick is to adapt your timeline to match the clearest and driest conditions for the alpine crossing section. There are plenty of camping options along the entire route, so you can mix and match pretty easily with shorter or longer days. We spent 5 days in total and felt like it was a good way to chunk up the trip. It’s well worth adding an extra day to do a side trip from Top Forks Hut to the Wilkin North Branch.
Track times listed are what it took us (A long-legged and reasonaby fit party of 3).
- Makarora to Jumboland: 7hrs
- Jumboland to near Pearson Saddle: 7hrs
- Pearson Saddle to mid-Bettne River camp: 6hrs
- Mid-Bettne River camp to Ferny Flat: 10hrs
- Ferny Flat to Road end: 6hrs
If you are short on time or need to advance the schedule to hit the right weather window, it is possible to book a Jetboat shuttle with Wilkin River Jets from Makarora to Kerin Forks Hut. Minimum numbers and bookings required.
View full screen on www.Topomap.co.nz
If you want a guide on this trip, ask West Coast Packrafting.
They offer instruction from beginner to advanced, plus guided trips from grade I to IV, 1 day to 6 days, on loads of rivers.
Weather
You really want a stable weather window for this trip. whilst it can be done with some rain in the forecast, you need enough clear weather for the alpine crossing to be dry.
The alpine section between Waterfall Flat and the mid-Bettne River Camp crosses the main divide via a long and exposed route, which would be challenging and potentially dangerous in low visibility or when the ground is wet.
Gauge & flows
Visual.
The Waiatoto has a huge catchment, so whilst a bit of rain could be ok, it is a long walk out if the river floods. Just ask Nick and Bill…. Icefields from Tititea/Mt Aspiring feed the river, so even in long dry spells there’s still plenty of water.
Exposure & routefinding
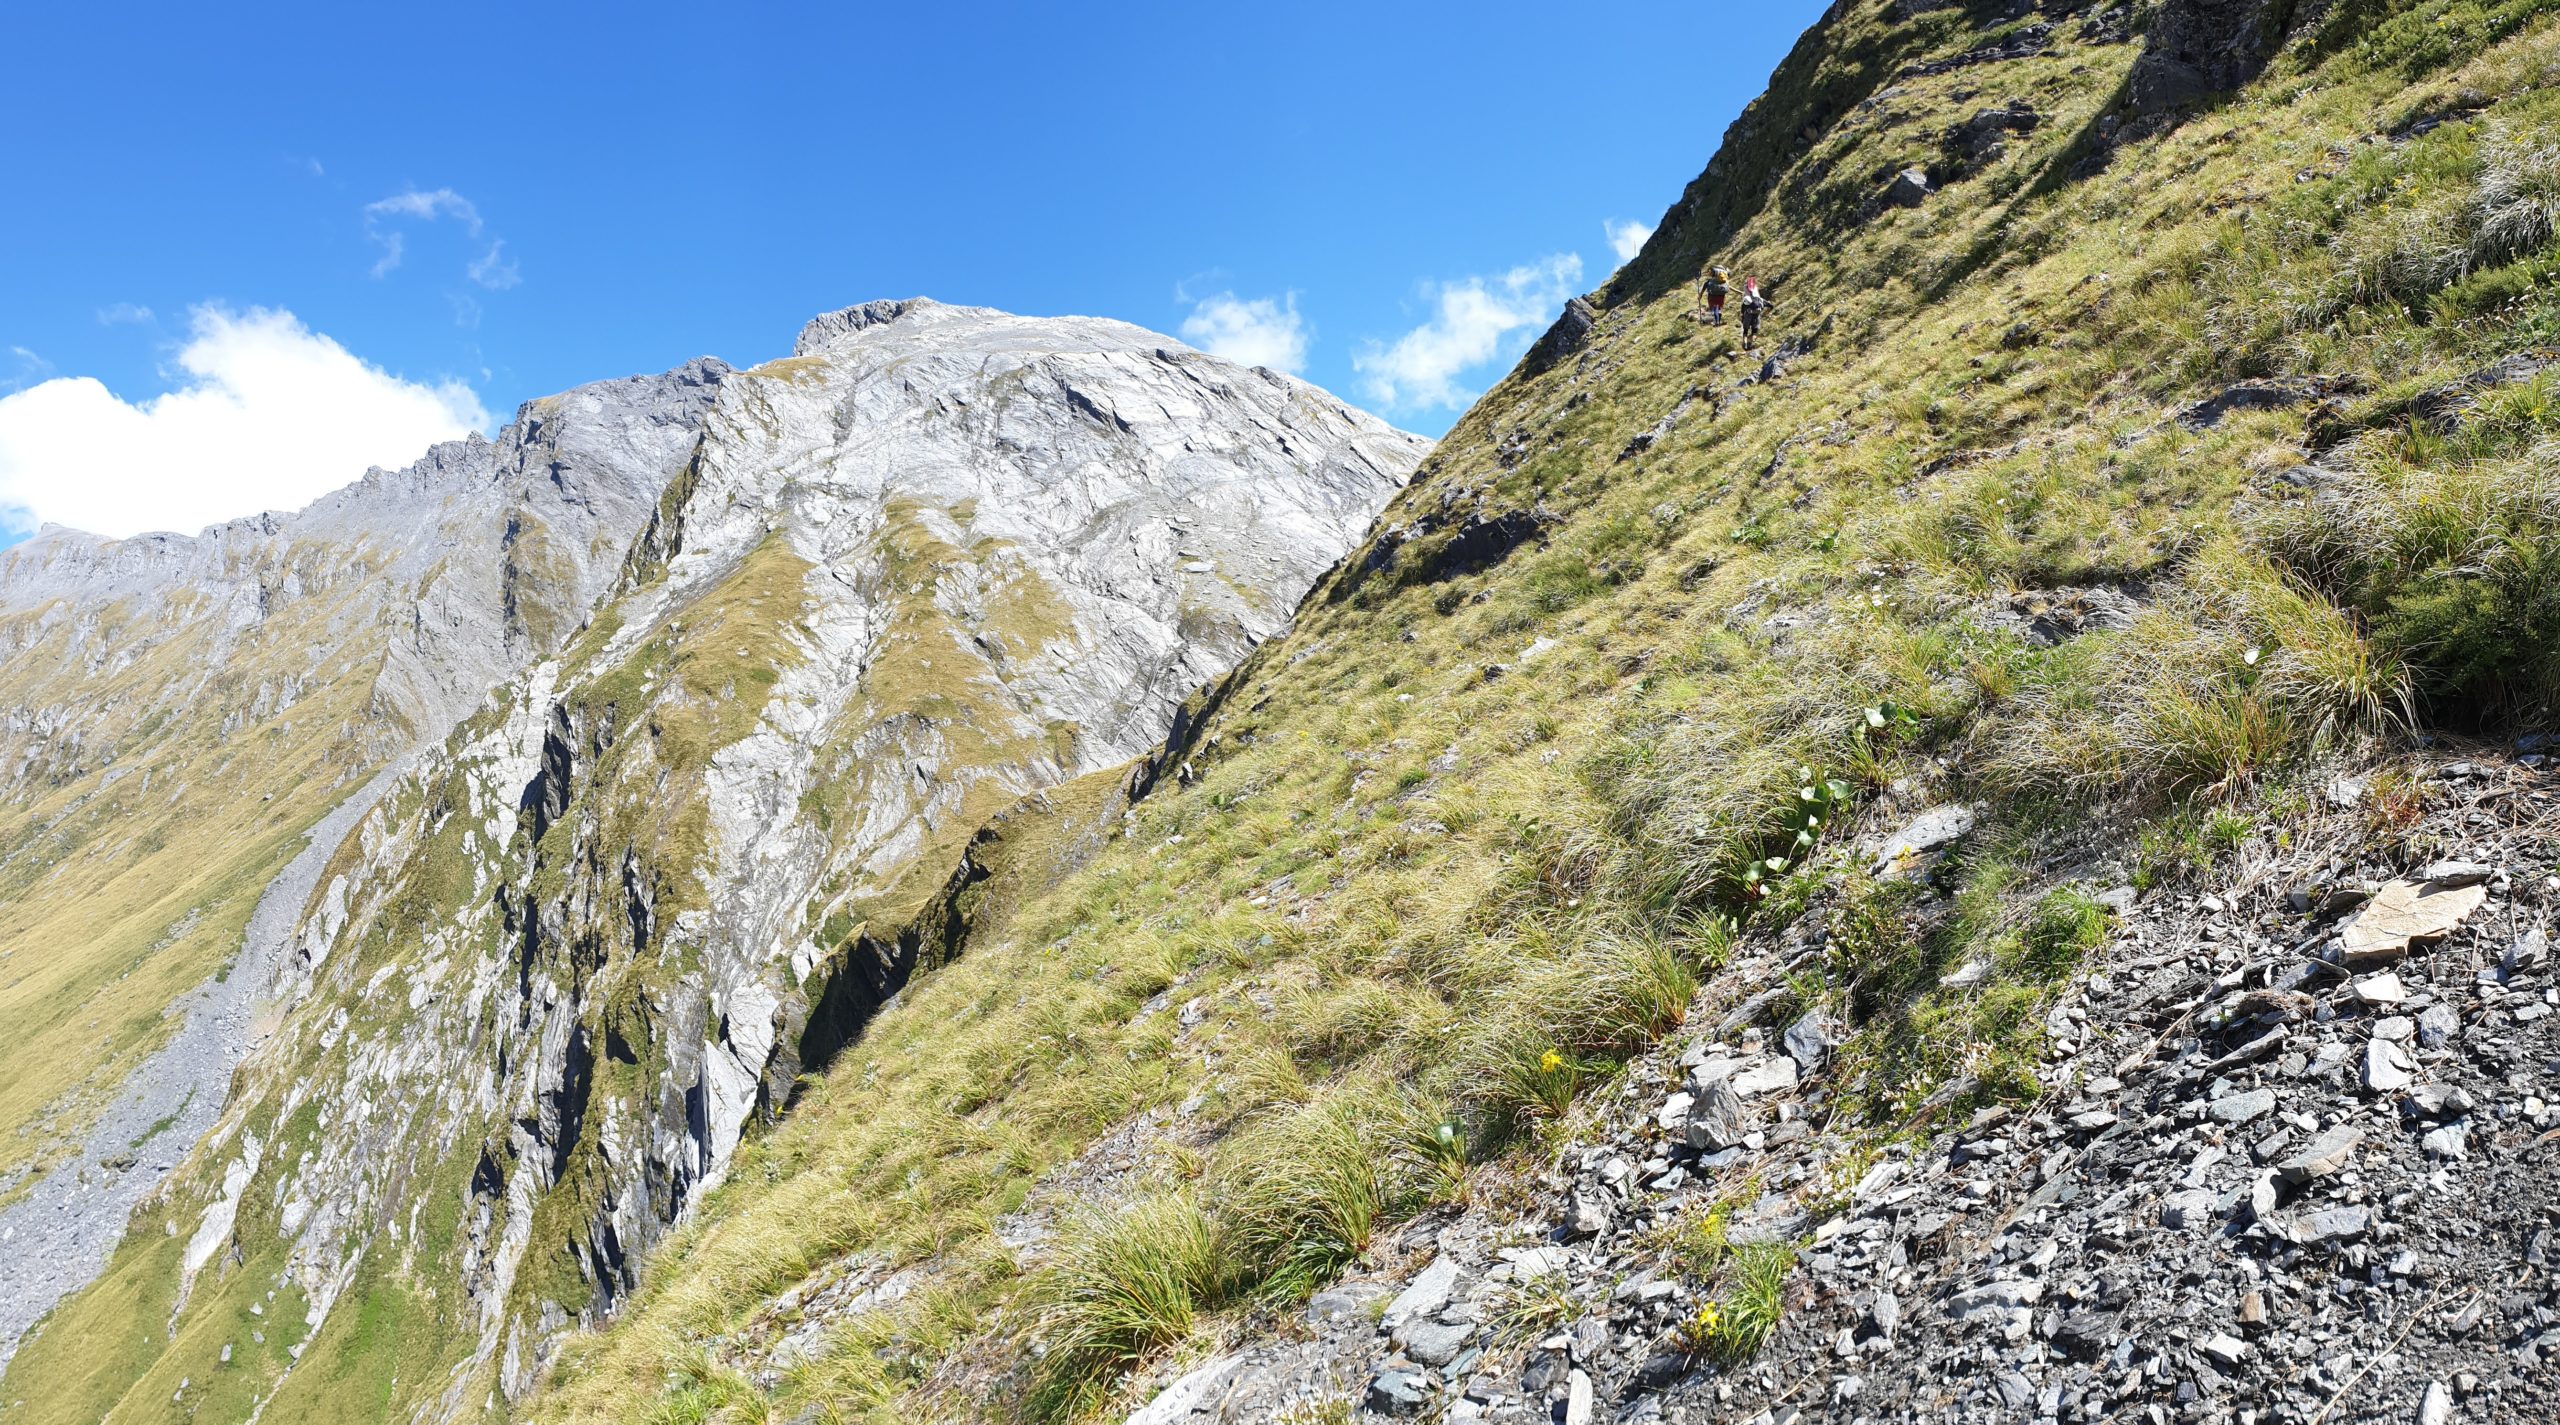
The Waterfall Face has a notorious reputation in tramping lore. It is a steep, exposed ascent via rock bands and tussock, which has seen several fatalities from falls over the years. Descending the waterfall face (ie, if you considered retreating) is described as a ‘mountaineering’ proposition. The route into the Bettnie has sections that are just as exposed. You’ll need a good head for heights and good route-finding skills to safely do the trip.
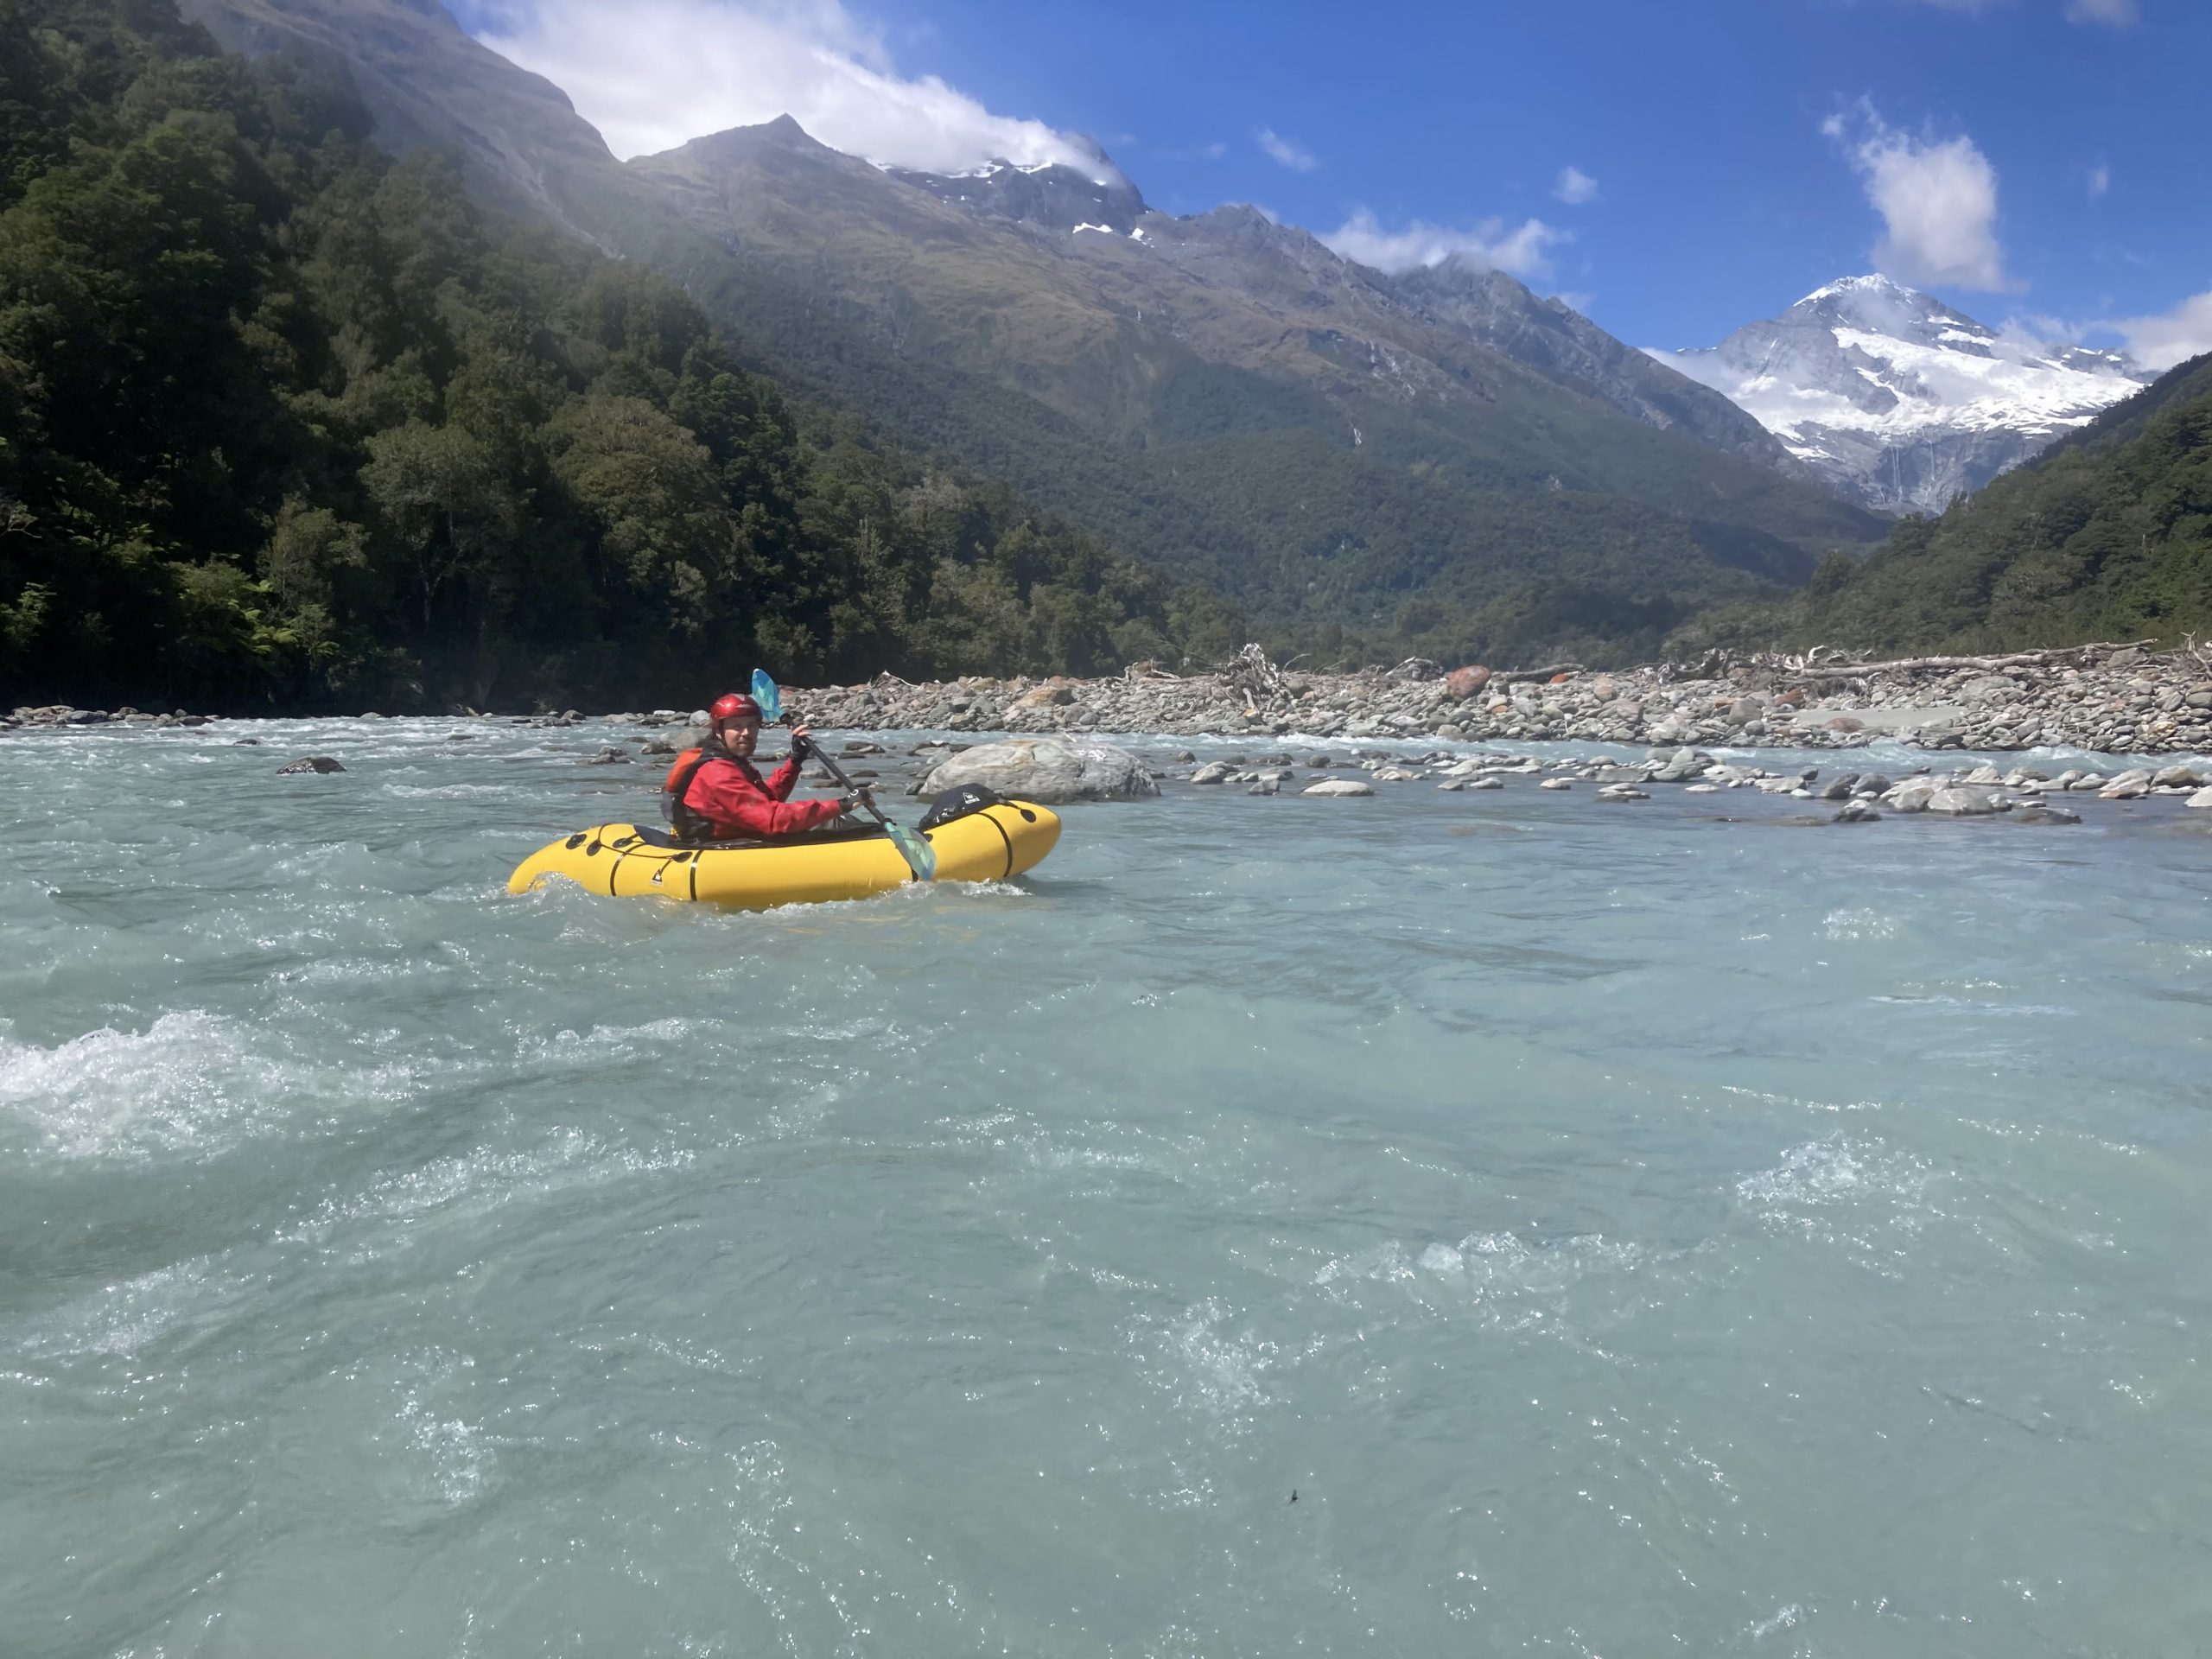
Not a grade IV paddler?
In non-flood levels, the grade IV rapids are obvious and all have portages. These portages are usually strenuous, scrambling up and around car-sized boulders, but they are all possible at or near river level. There is a fair amount of grade III paddling, so being competent at that grade would be the minimum recommended standard. There are very long sections of flat water, and most of the action is between the Drake and Te Naihi rivers. There’s a good track on river left around that section, which means that grade II paddlers could do (and have done) the trip, but that portage and other portages would add significant time to the overall duration.
The Shuttle
Roughly 1.5hrs between road ends. It’s pretty quiet at the Waiatoto end, so I wouldn’t plan on hitching. There is great food at the Hard Antler Cafe in Haast, which is convenient if you’re doing the shuttle after work. Also convenient accomodation at Wonderland Lodge in Makarora
The take out is via a boat ramp by the highway bridge, on the true left. This is used by the jetboats of Waiatoto River Safaris. Access to the boatramp is off Nisson Rd: don’t park your car in the River Safaris area, find a place on the main road!
The start point is accessed from from SH6 near Makarora, follow Wilkin Rd, which is public access, to the end. You may have to go through a couple of unlocked gates, but stick to the main vehicle track. At a hand drawn sign that says ‘no parking within 500m’ keep right untill you find a waratah (metal stake) with a small hand-drawn sign saying ‘parking’.
Trip description:
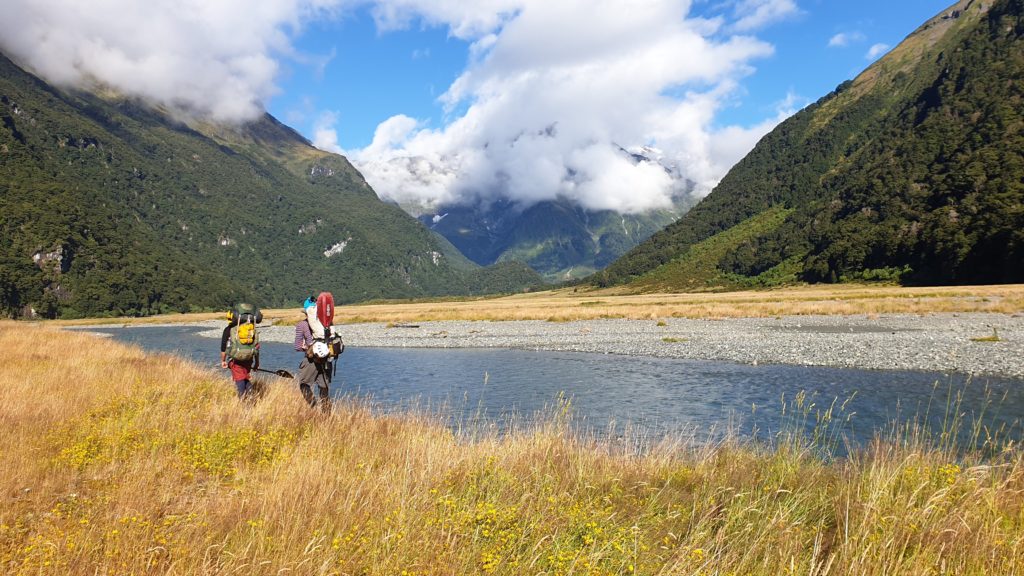
Makarora to Jumboland: 7hrs
- 4hrs Makarora to Kerin Forks
- 3hrs Kerin Forks to Jumboland
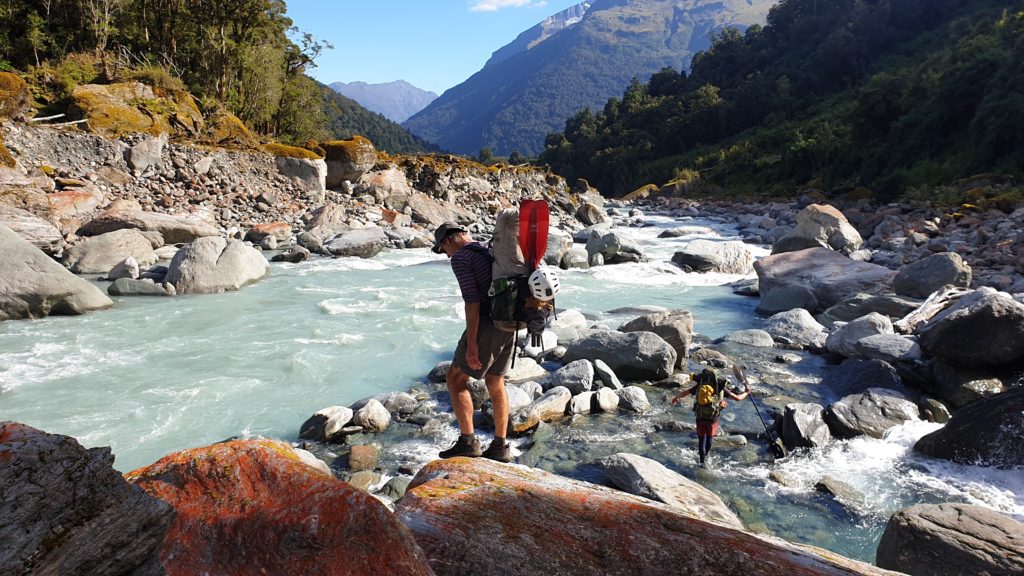
From the end of Wilkin Rd, you’ll need to cross the various braids of the Makarora River. This can be quite a challenging crossing in higher flows so assess it carefully, and if in doubt use your packraft! .
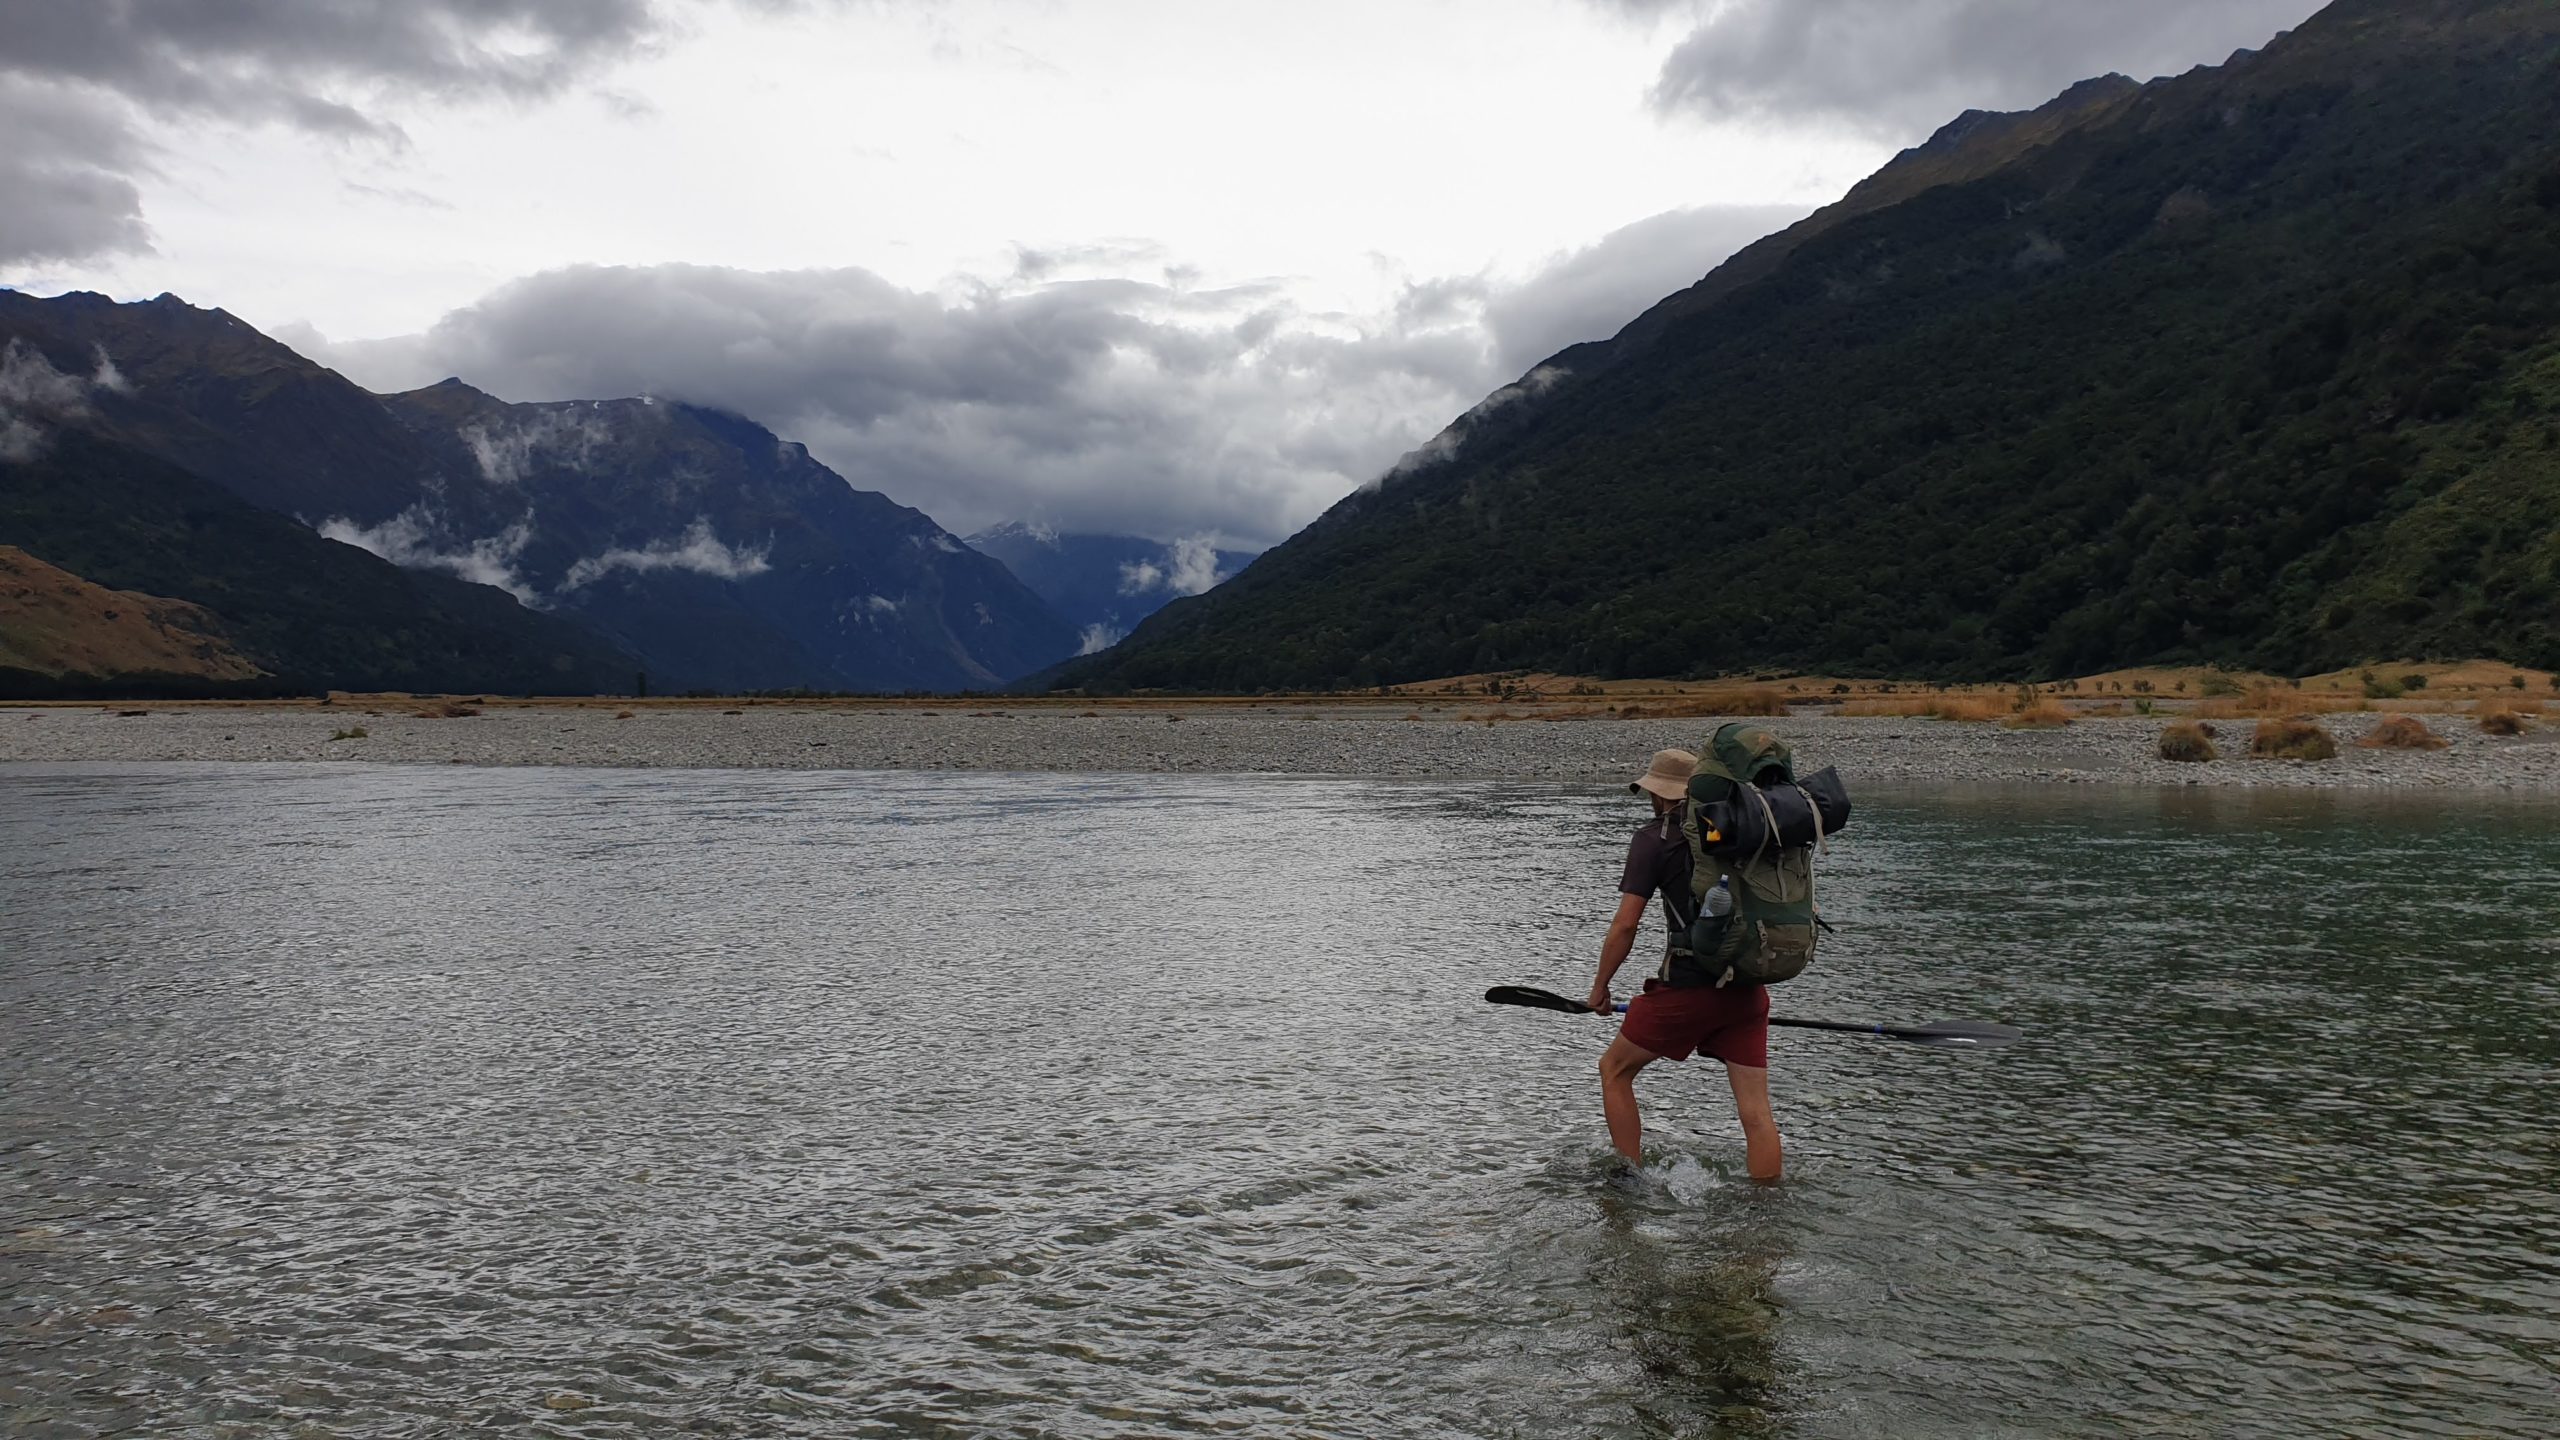
After the crossing, you are on private farmland, so be respectful of the property, leave gates as you found them and don’t disturb any animals. Follow the true right of the Makarora upstream along a fenceline until you find the large orange triangle which indicates the start of the poled route accross farmland.
If the Wilkin is low and simple to cross, it’s generally faster to stay on the flats than using the tracks which ascend into the forest to avoid deeper pools.
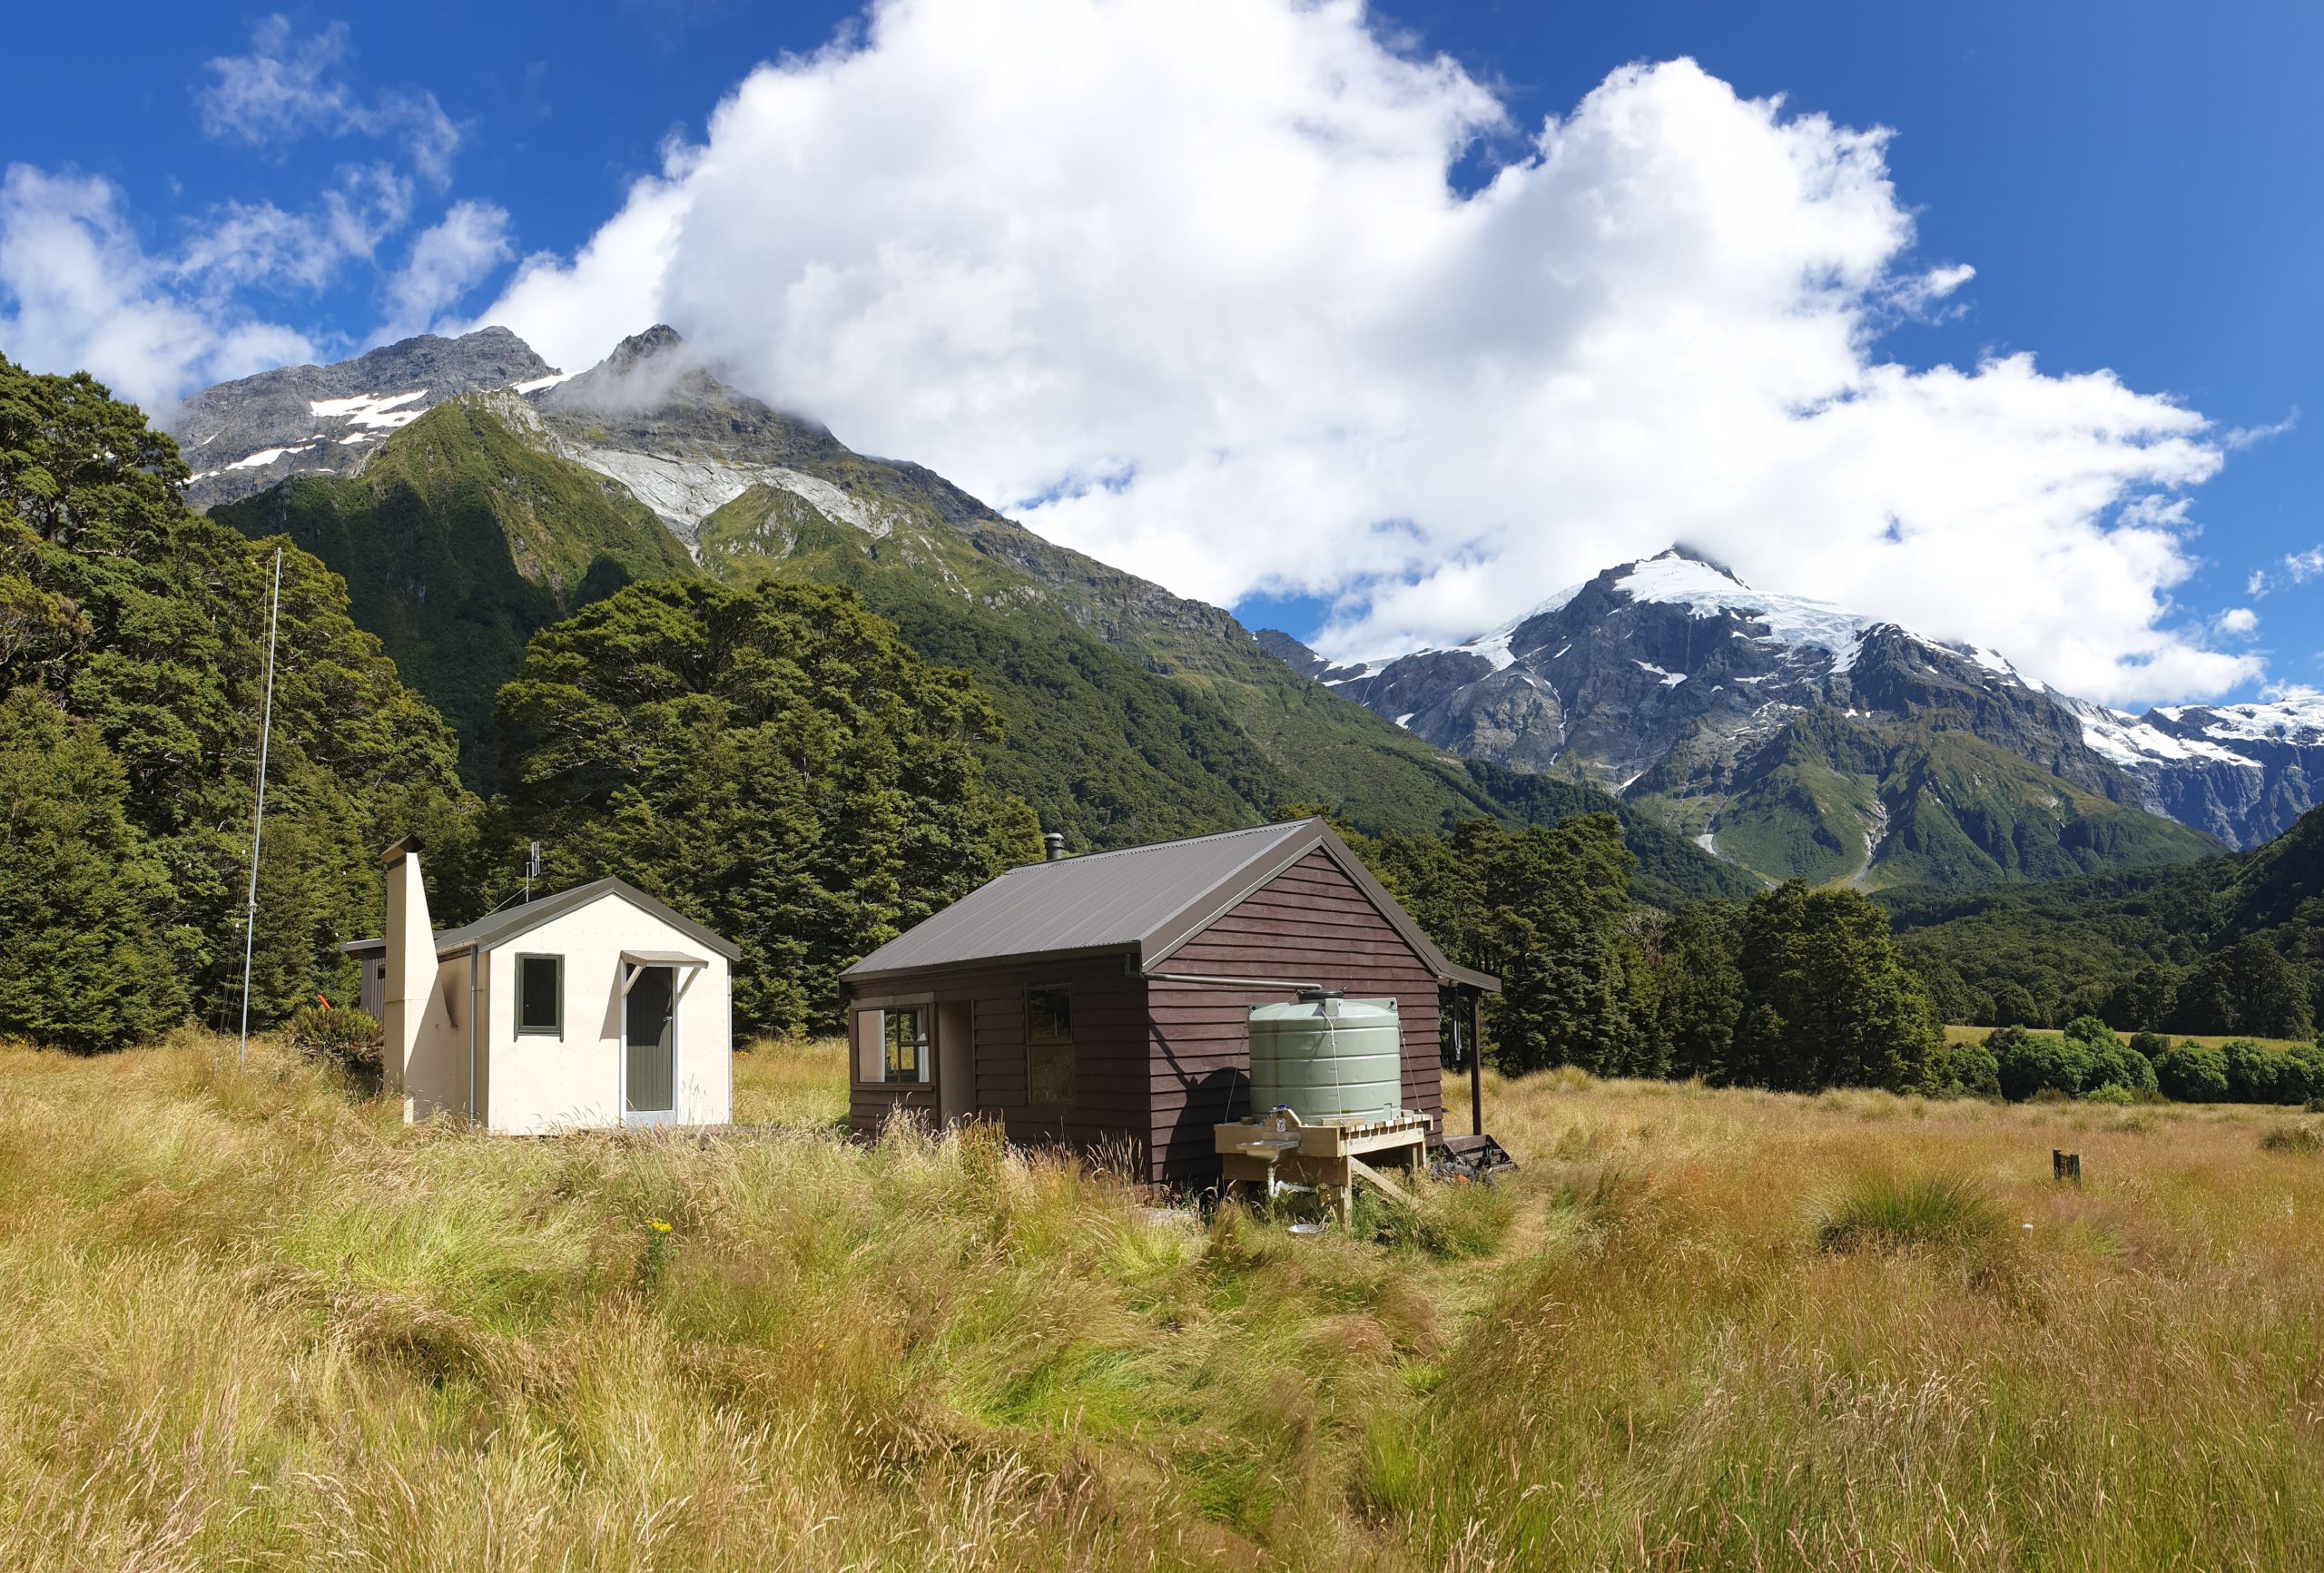
Kerin Forks Hut isn’t visible from the River, so keep an eye out for a large grassy terrace on river left.
The hut is a convenient spot to spend the night if it is raining, or you’re looking for shorter days. It does get a bit of use from Jetboat groups, so consider that in your planning.
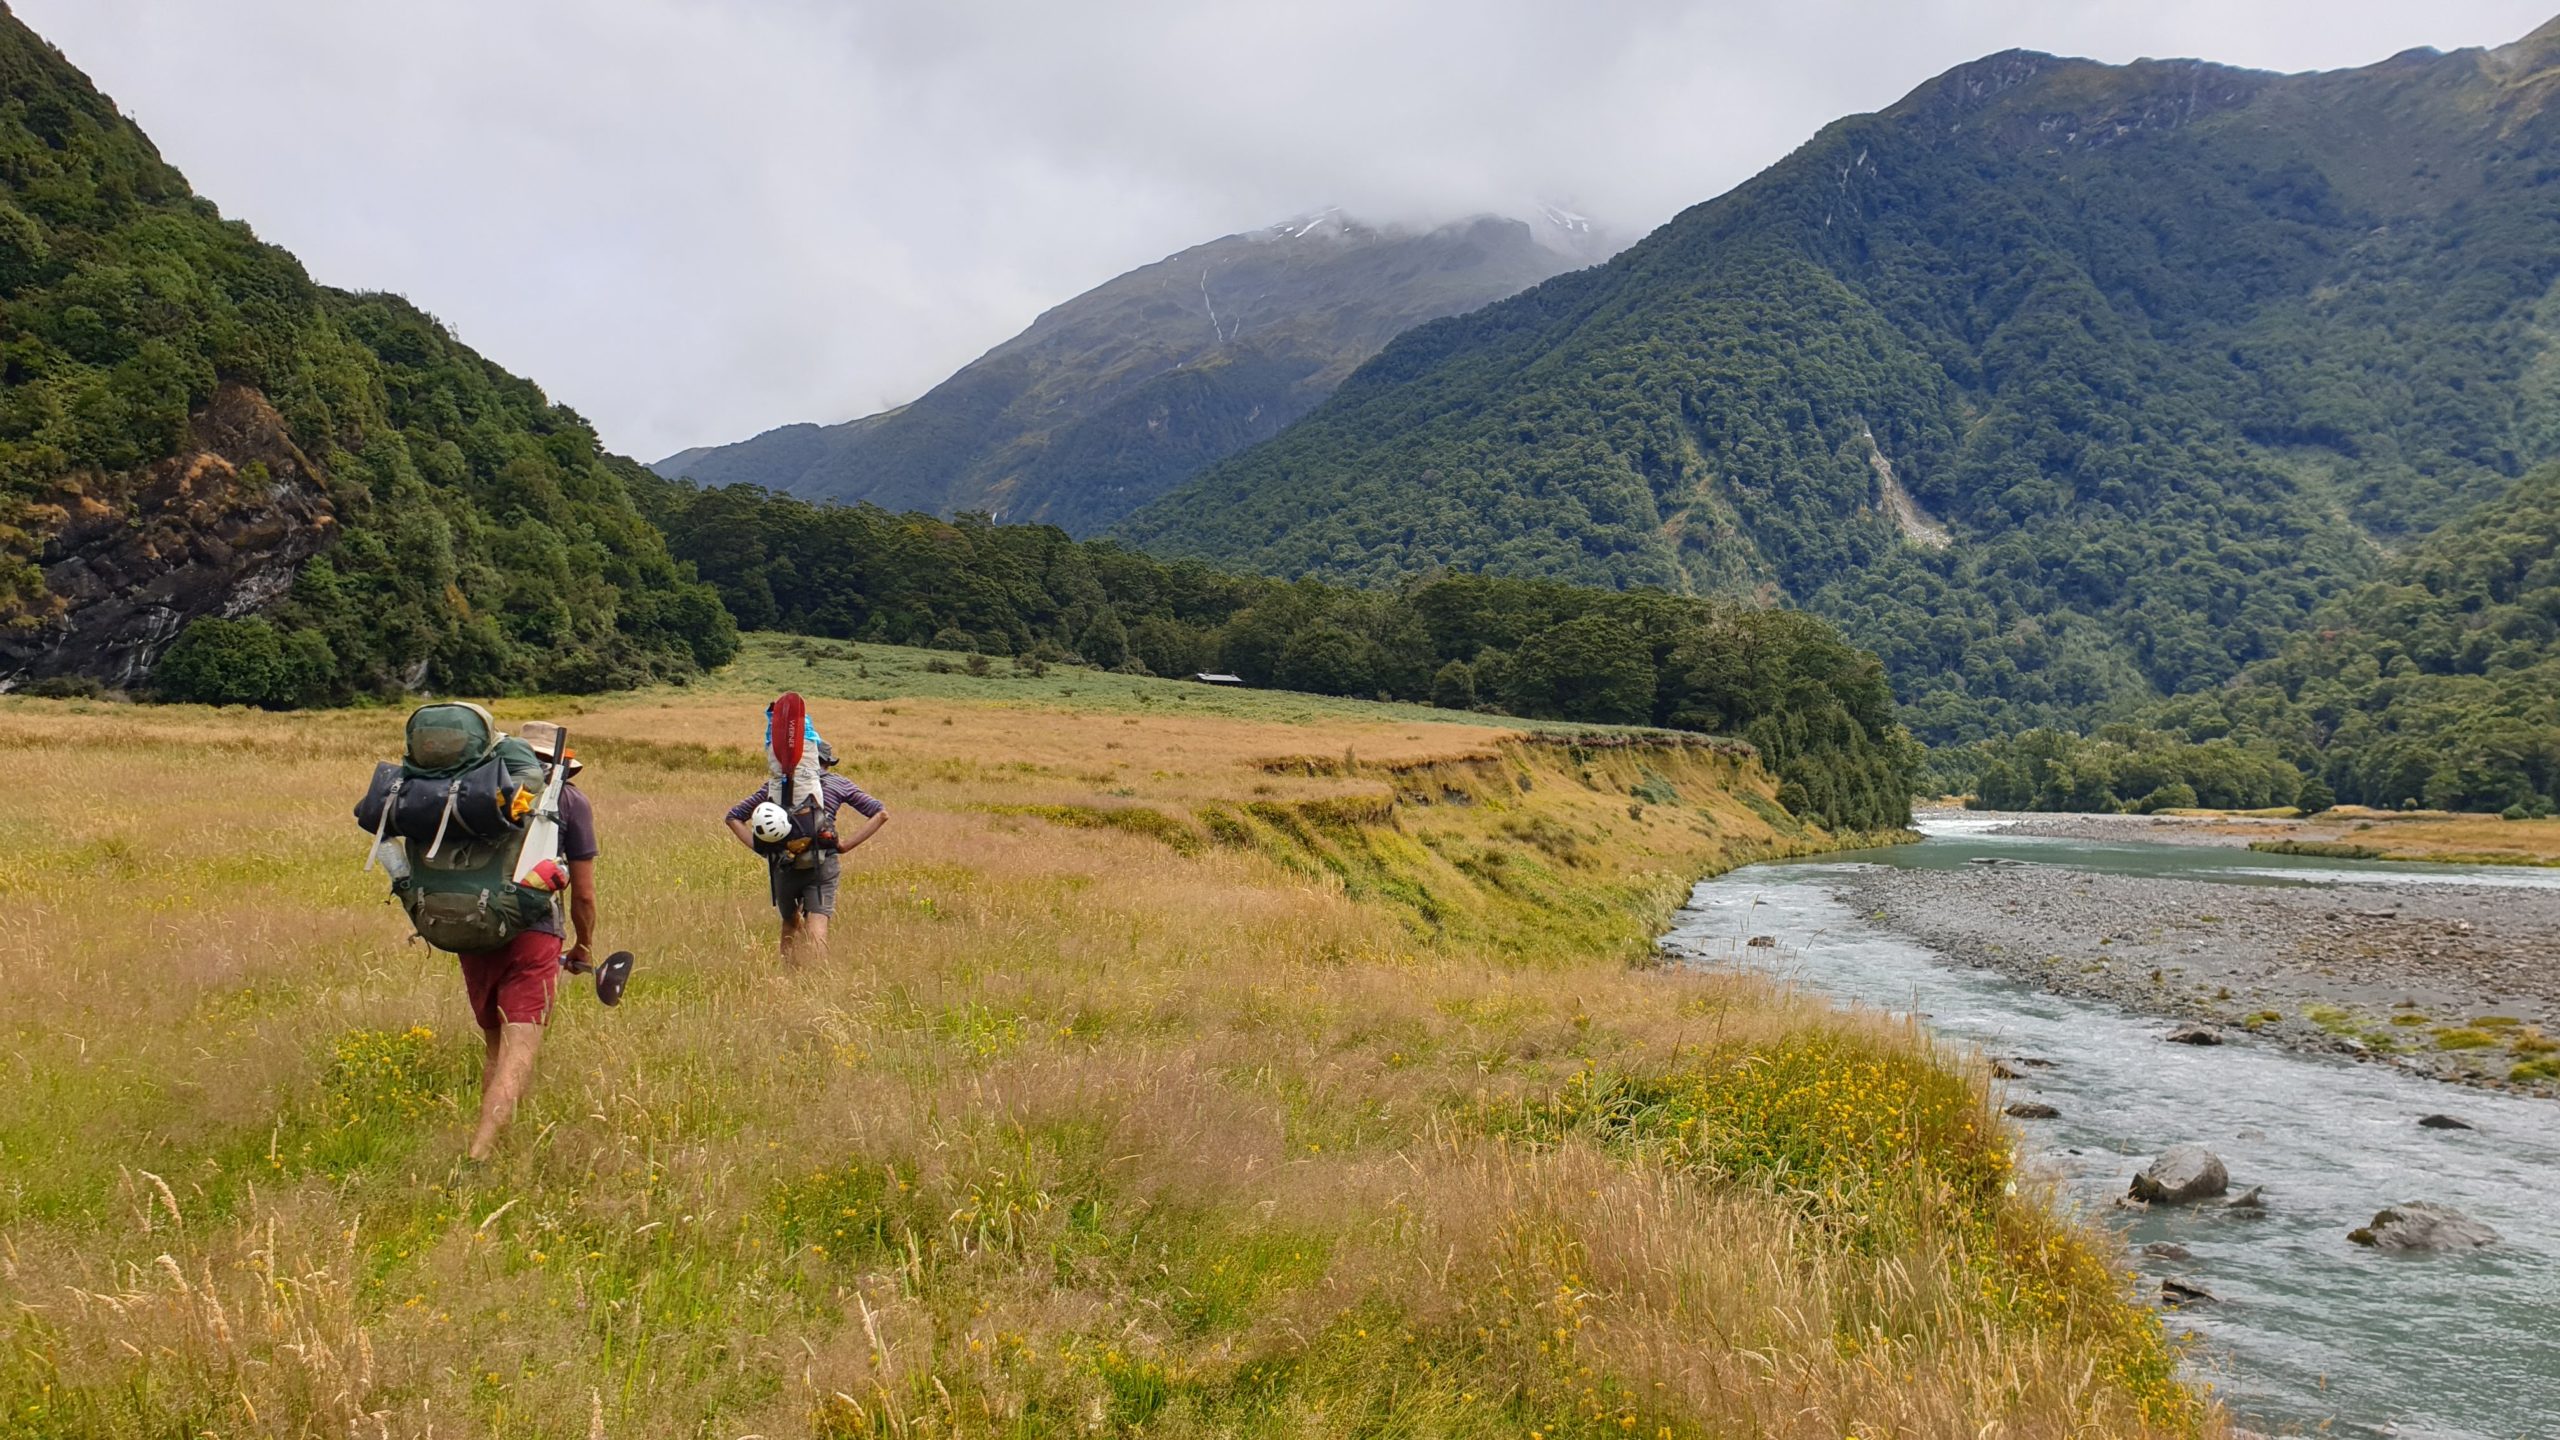
The Wilkin Valley Track is well marked and provides pretty quick travel up the valley.
There are campsites at the western end of the flat opposite Newland Stream, and plenty of options at Jumboland itself.

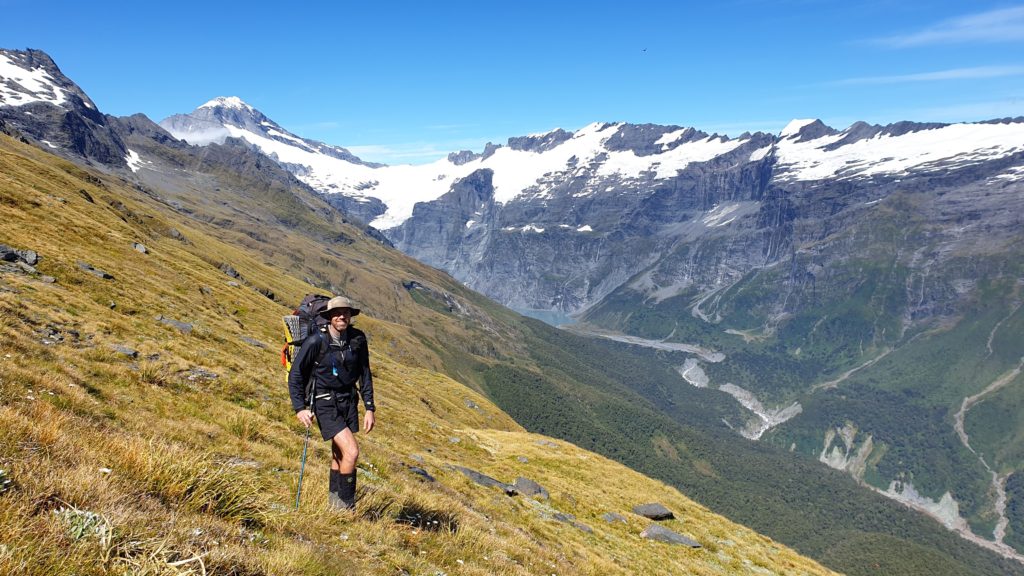
Jumboland to Pearson Saddle via the Waterfall face: 7hrs
- 2.5hrs Jumboland to Top Forks Hut
- 4.5hrs Top Forks Hut to top of Waterfall Face
Once the track emerges again into flats, the quickest route is to cross the Wilkin and then the large grassy flat on the true left as shown on the map.
The flat is a bit swampy in places, but the going is easy and there are deer trails in places.
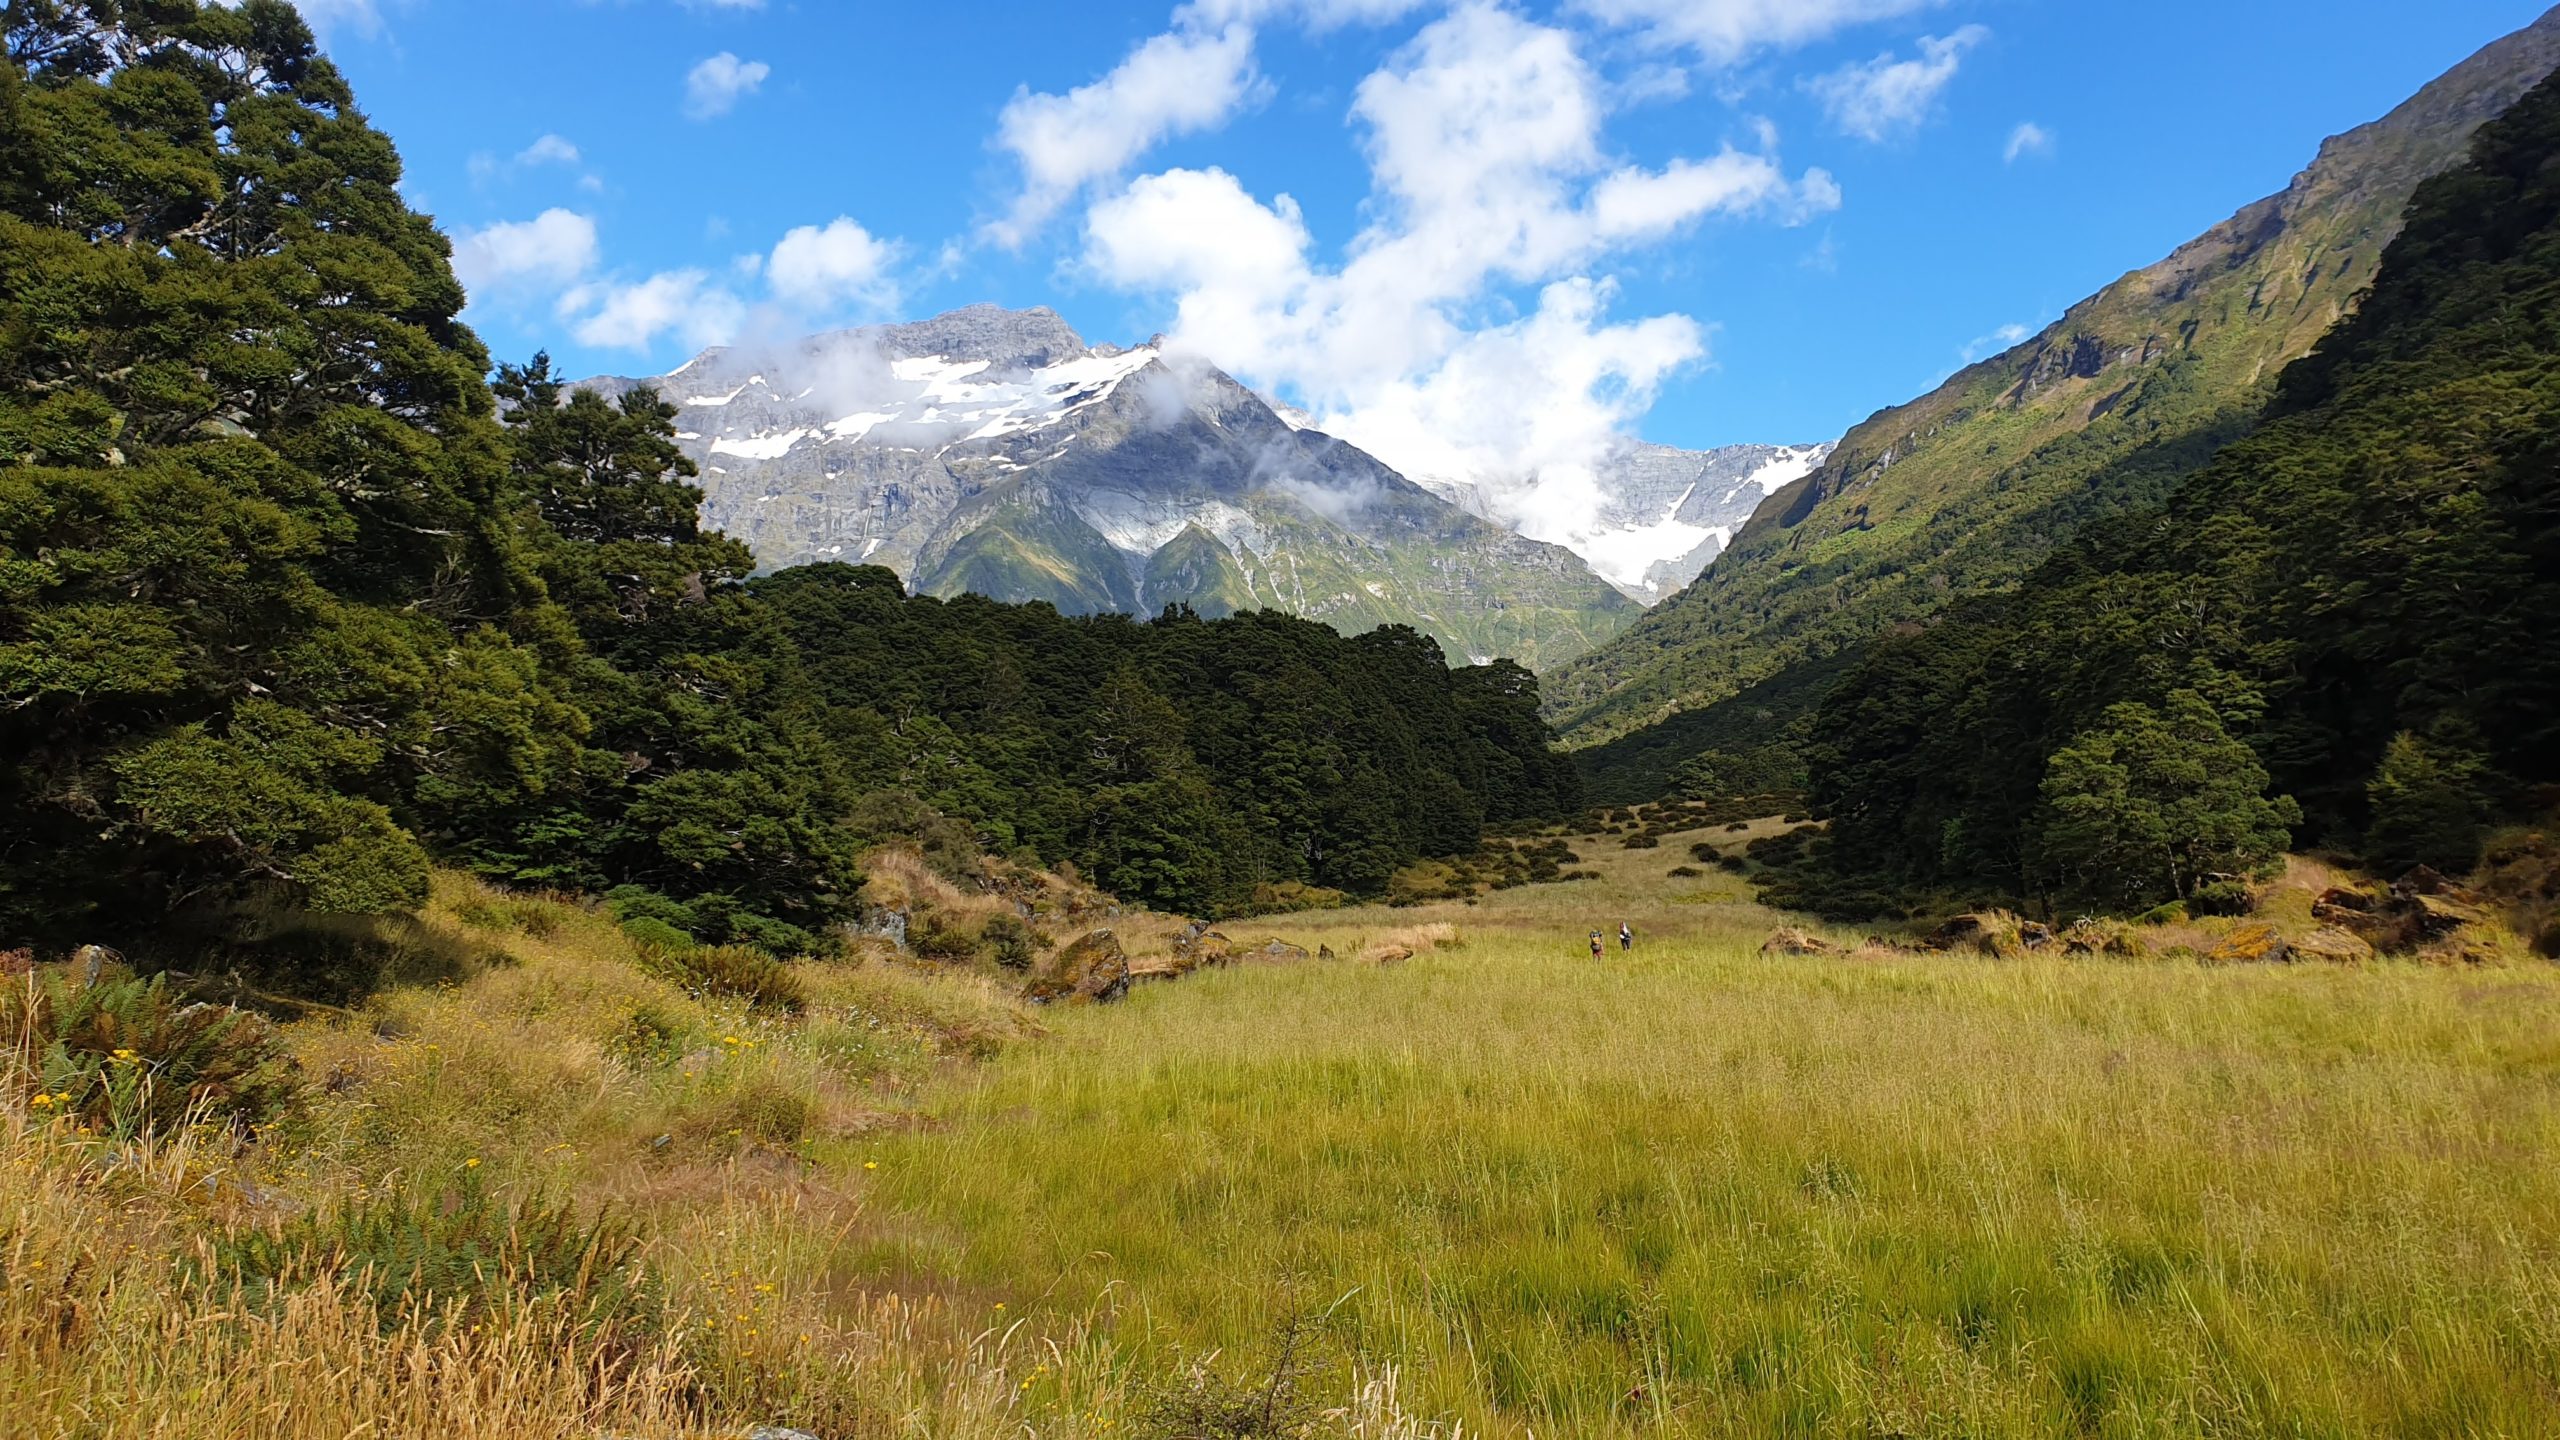
Top Forks Hut(s) is a great place to spend an extra day. A day spent in the Wilkin North branch is a great side trip, and well worth the effort.
It is a slow and steady grind up the South Branch Wilkin Track, above the Snow Bridge Gorge.
There is excellent camping in Waterfall Flat, but it’s probably better to ascend the Waterfall Face later in the day when any morning dew has evaporated.
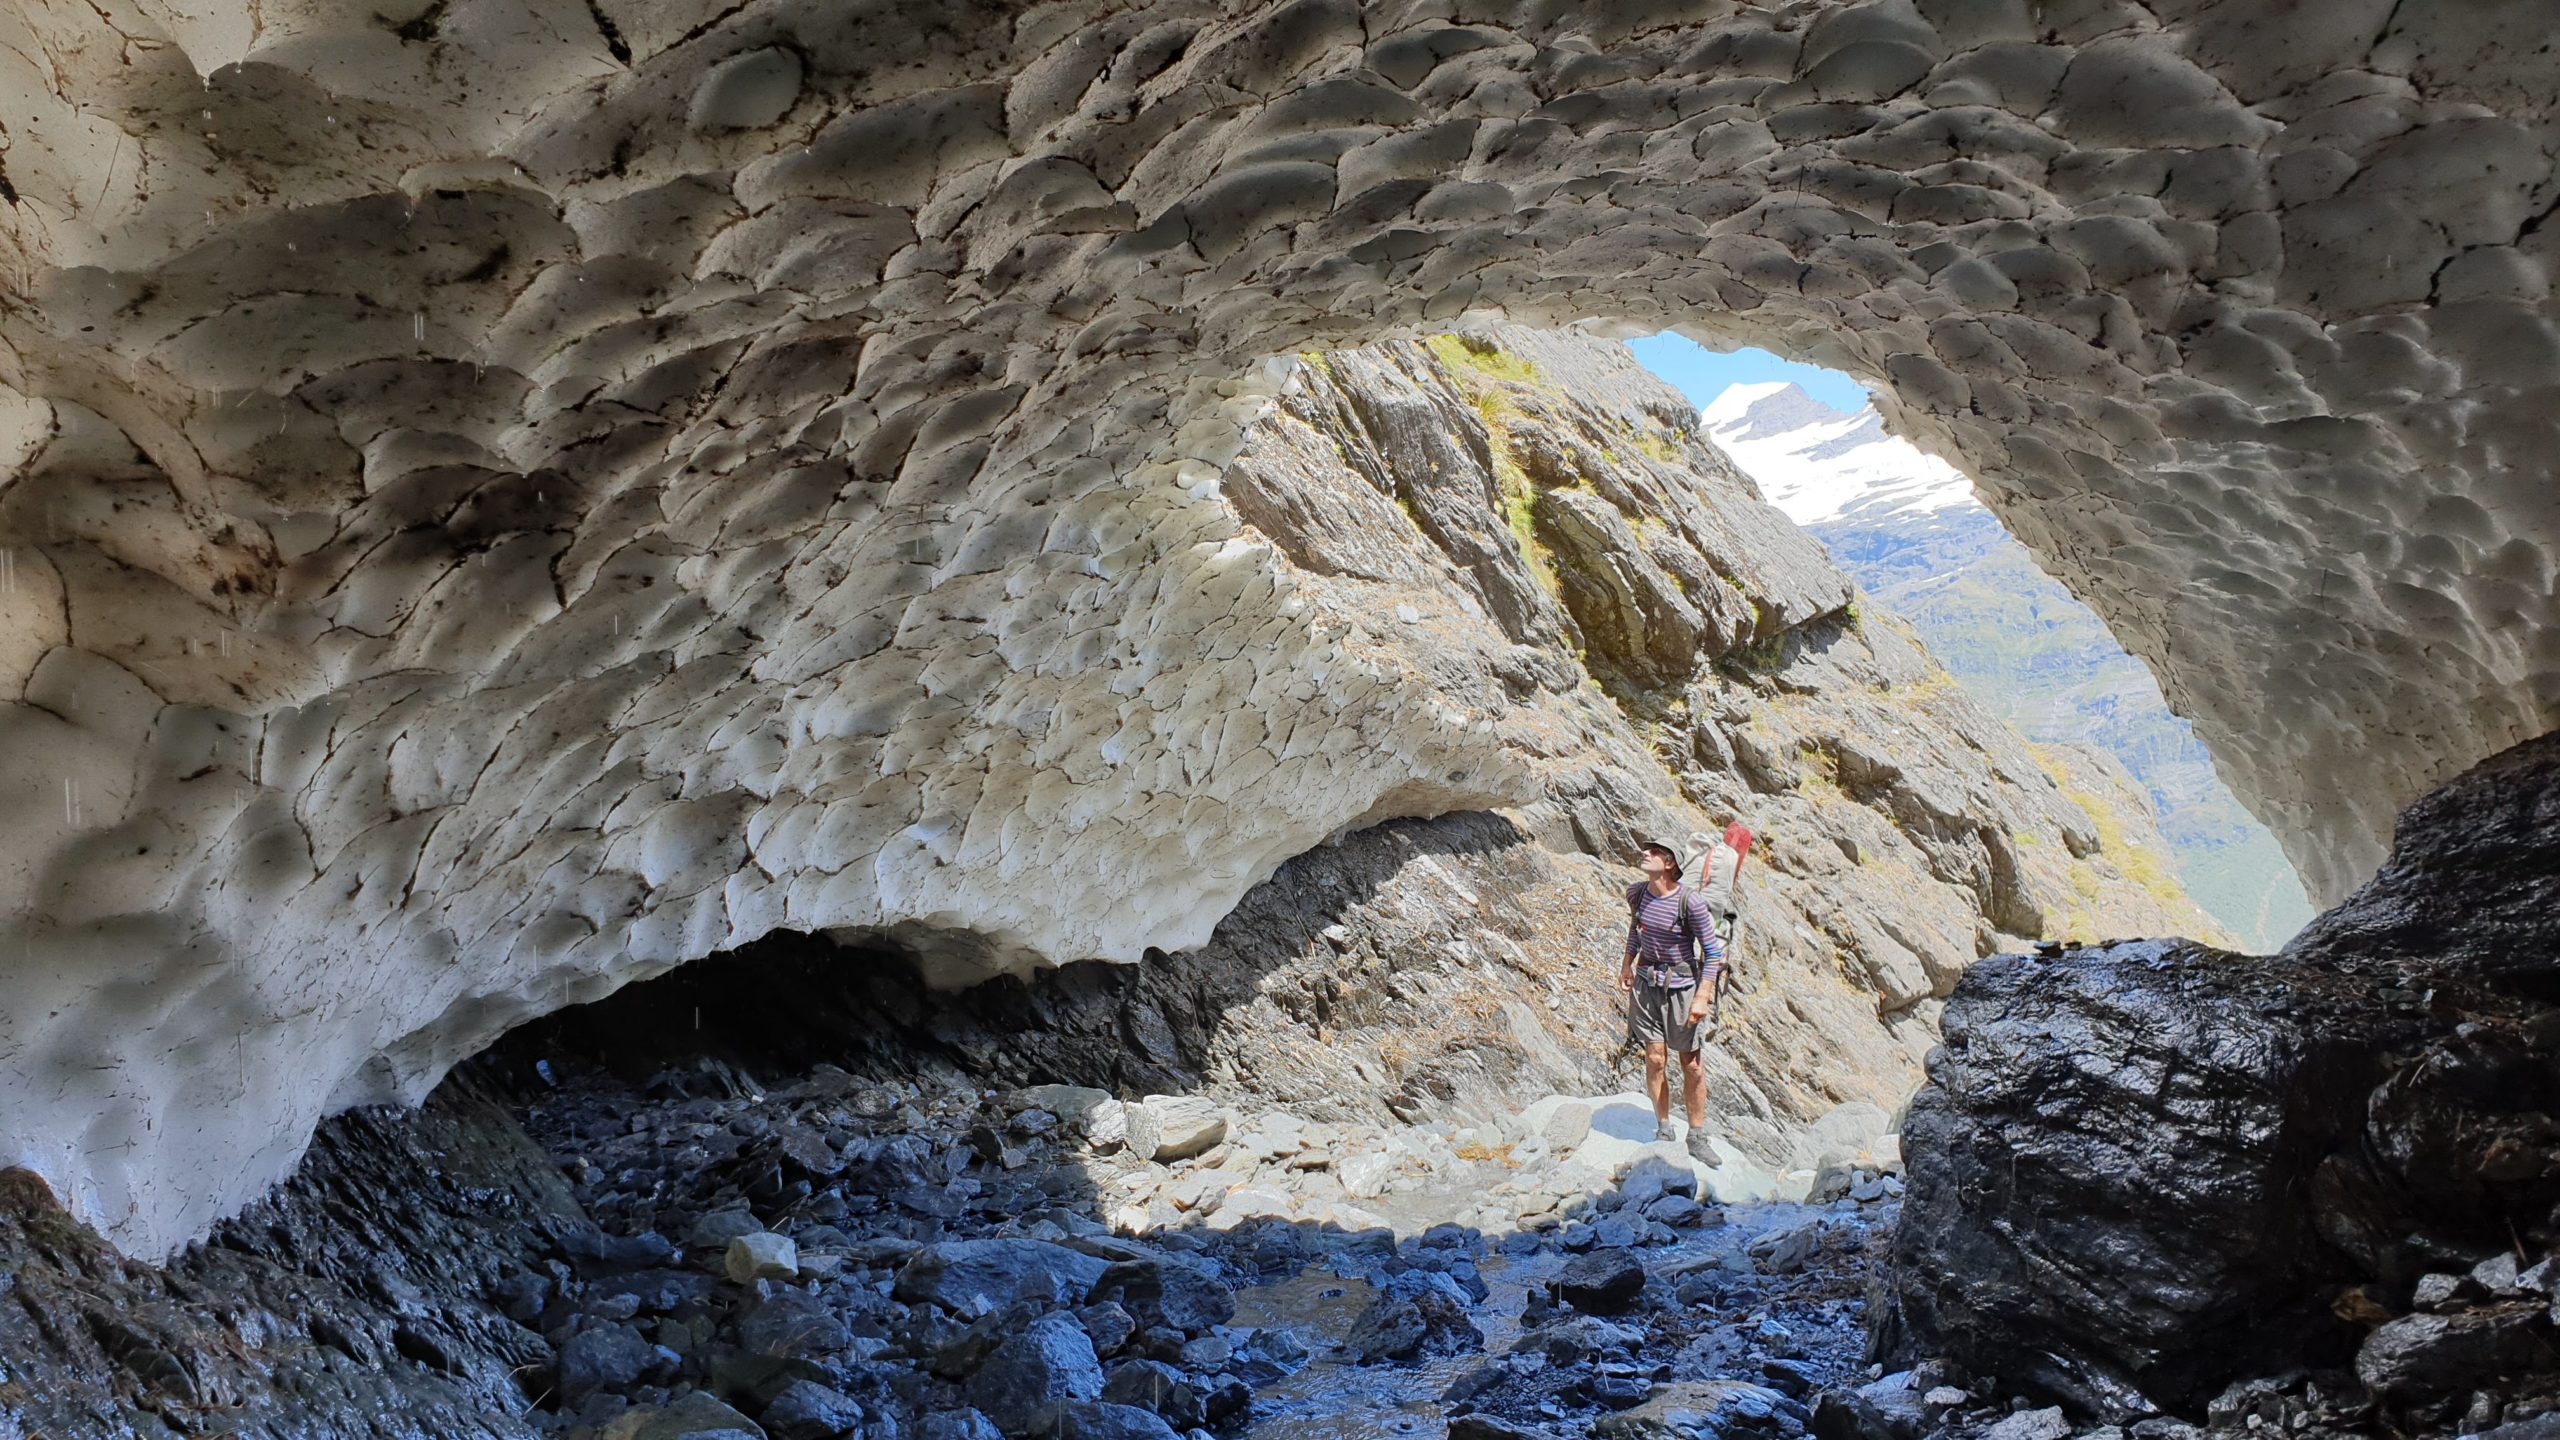
The Waterfall Face
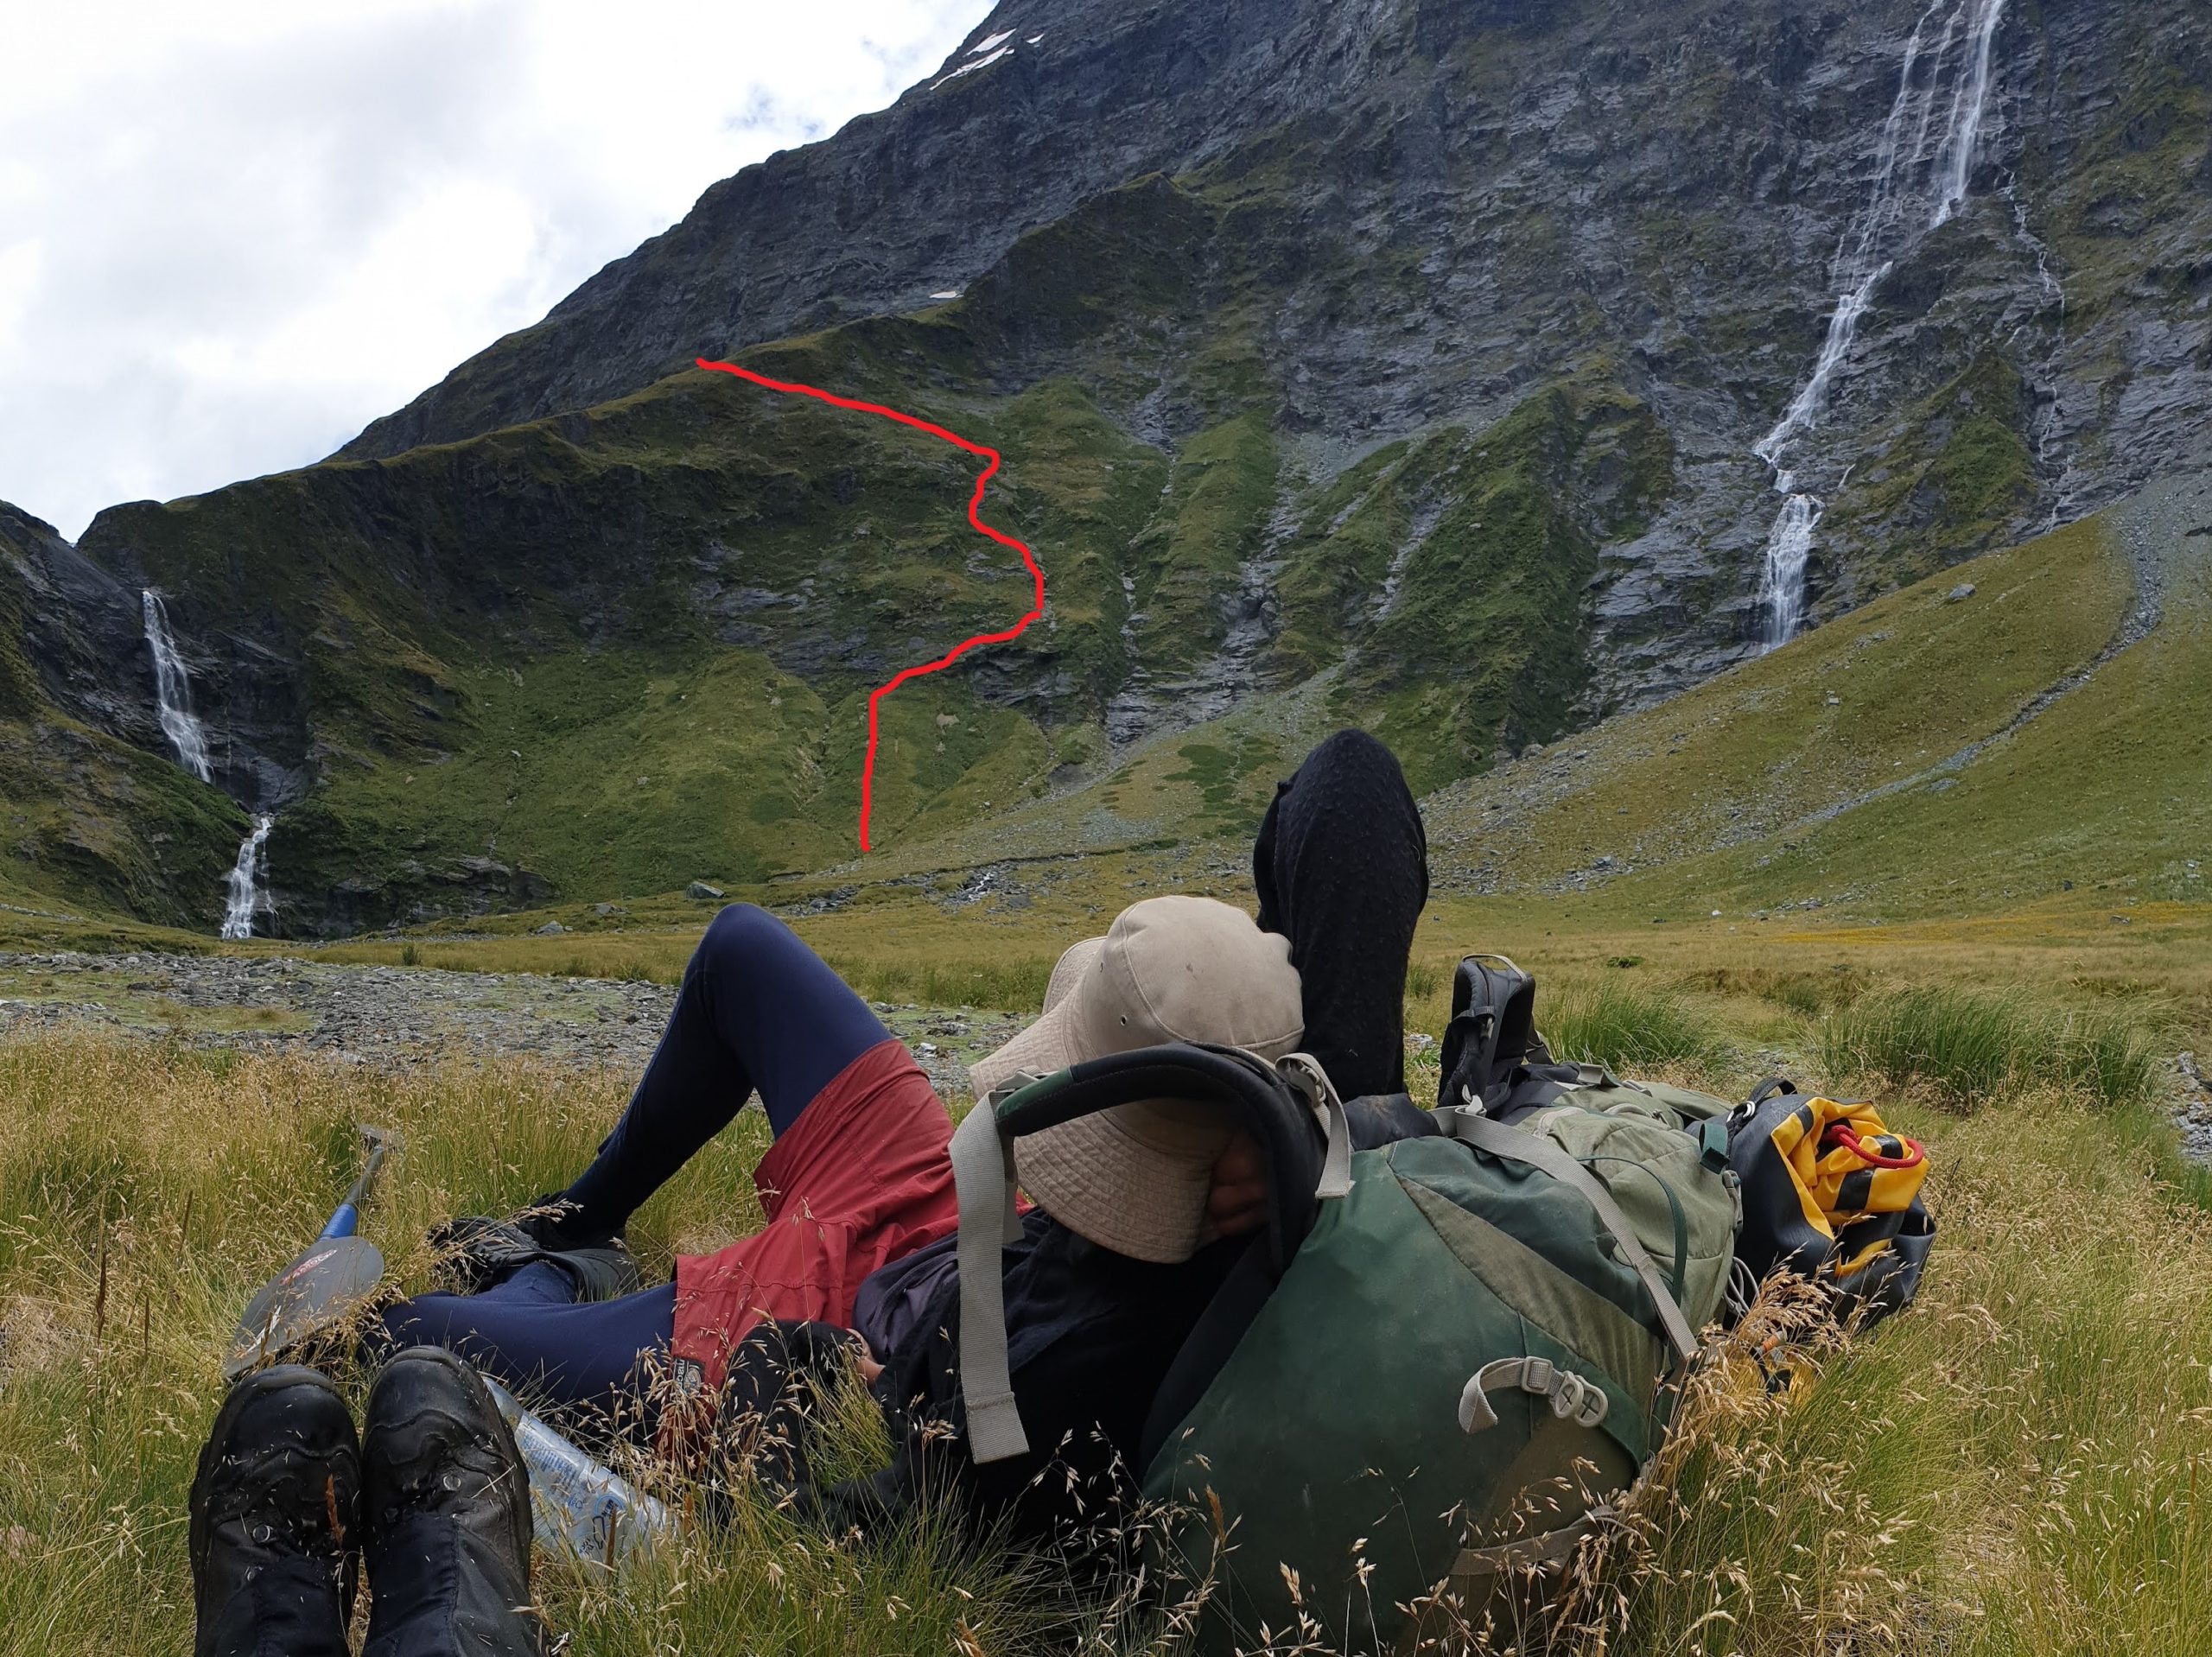
The Waterfall Face takes roughly 30-45mins to ascend.
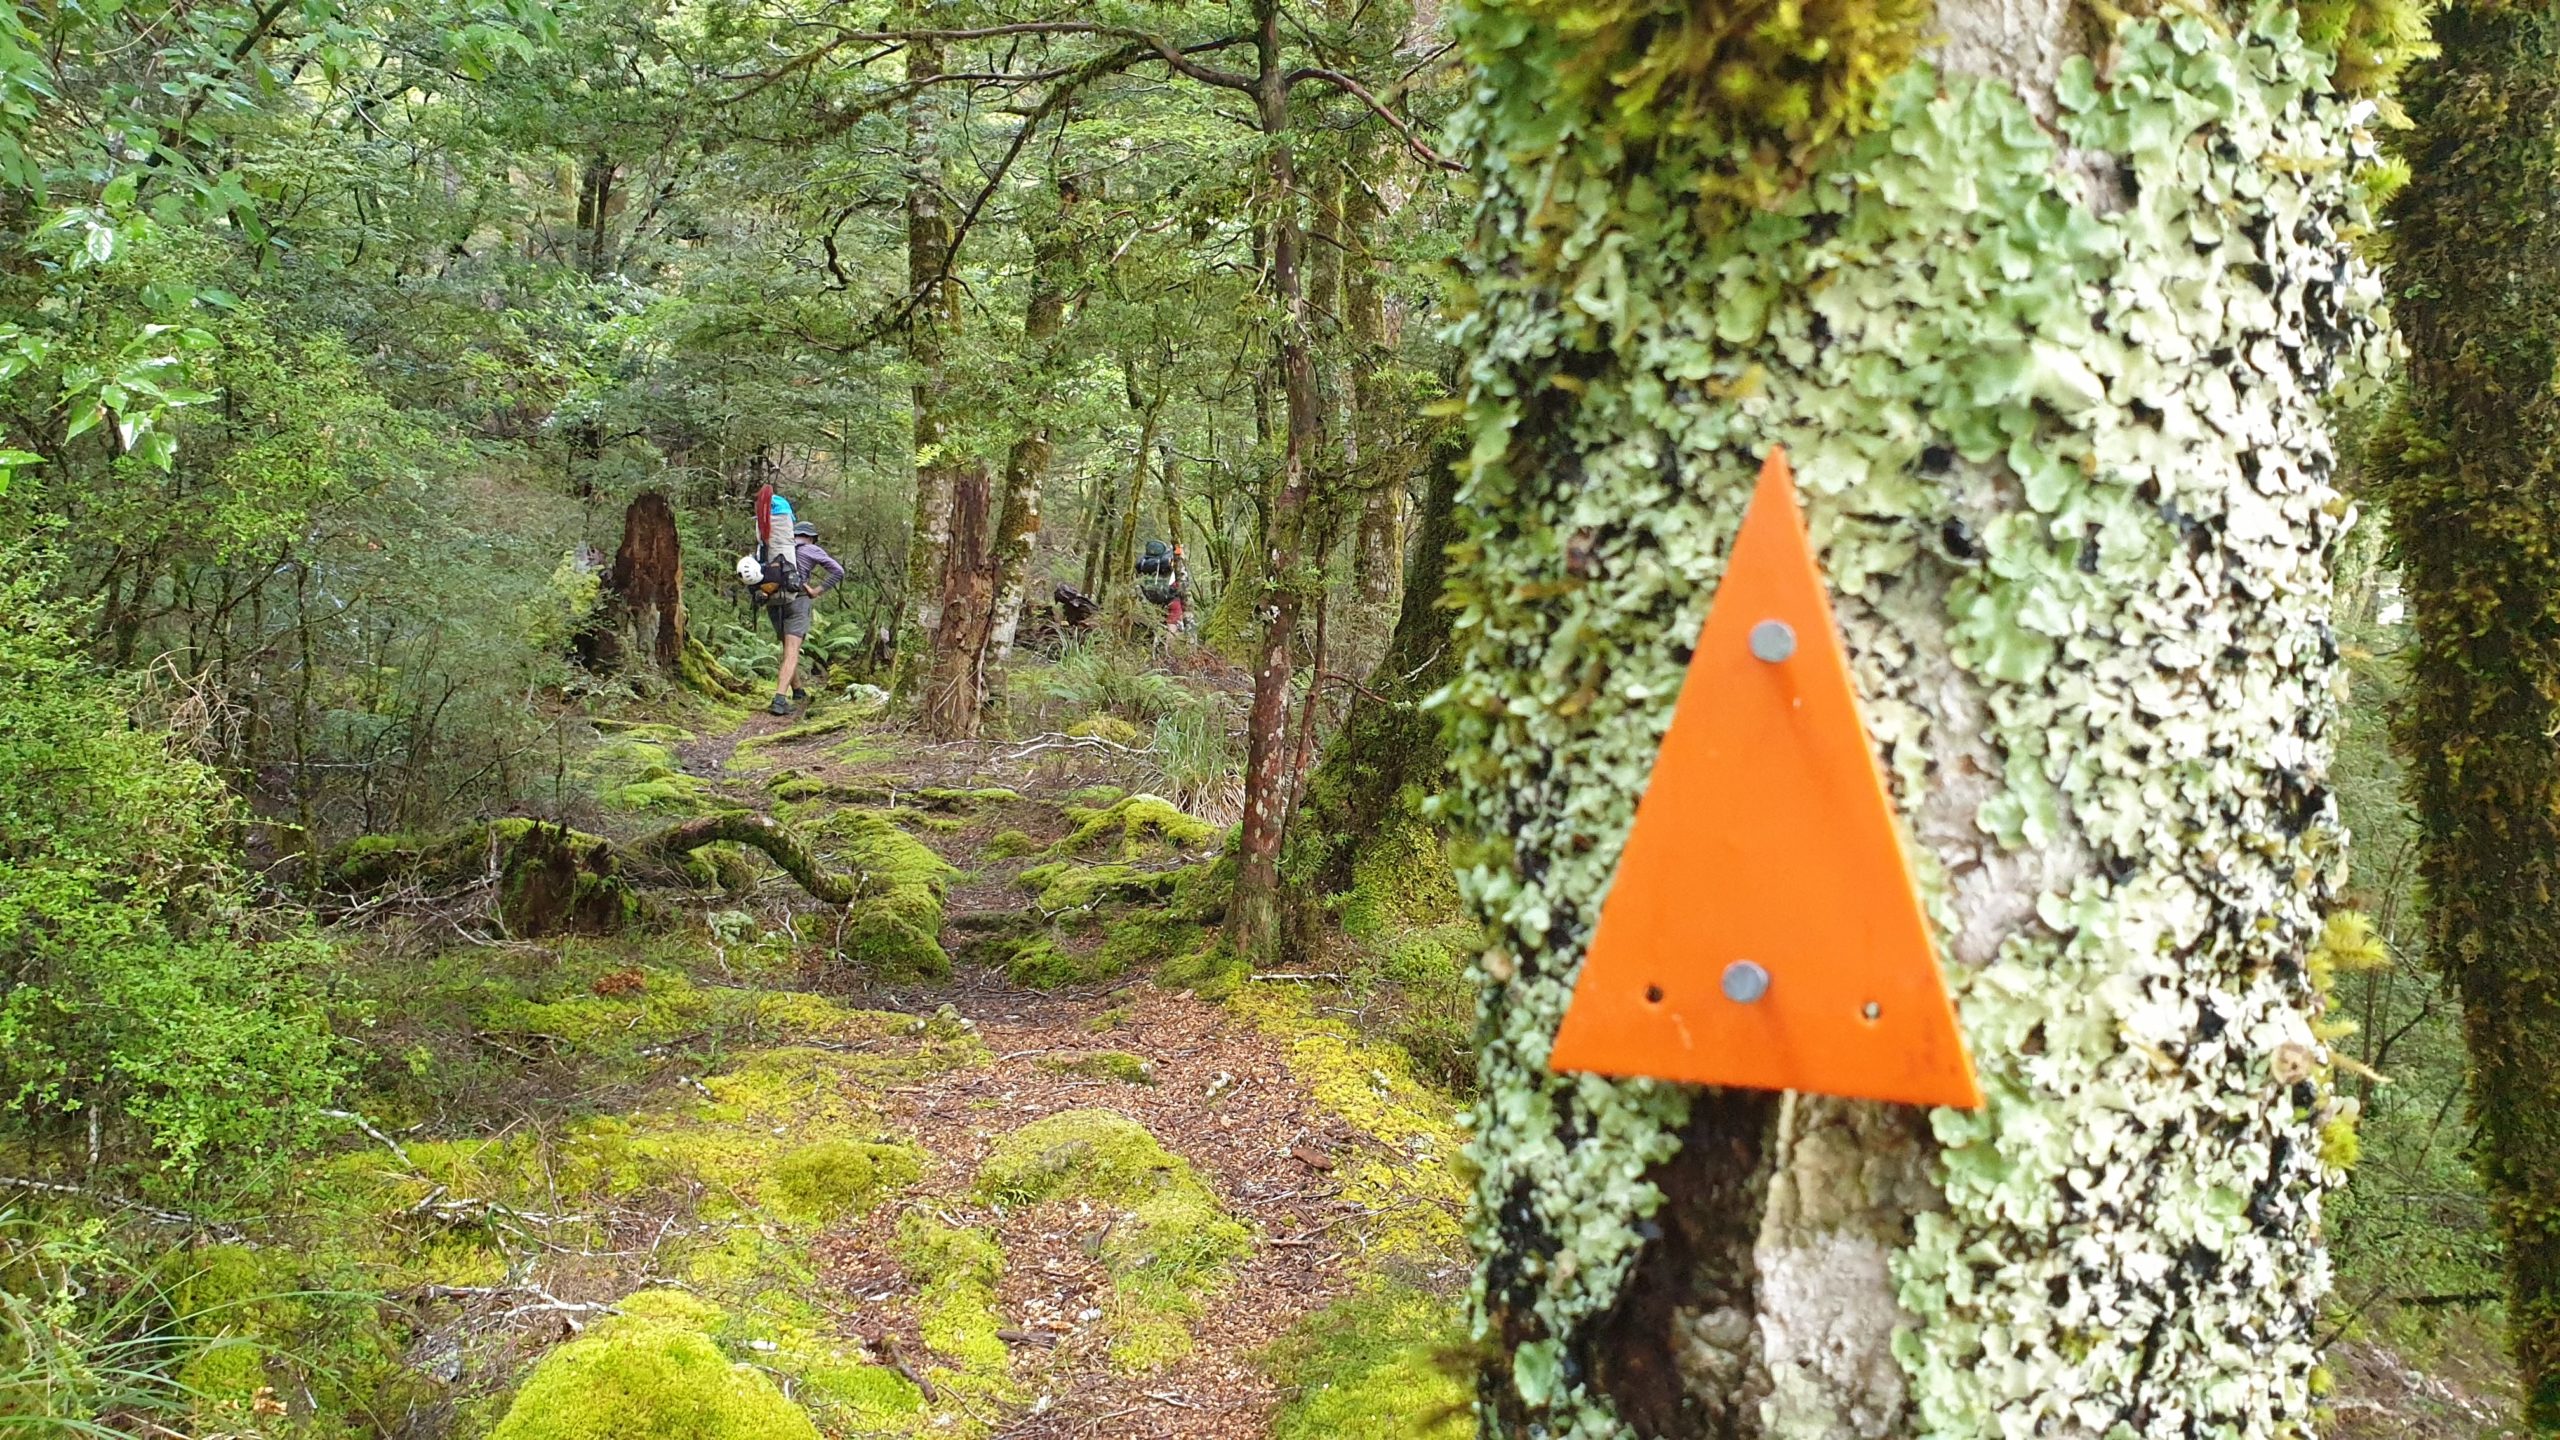
At the tussocky base of the face, make sure you find the ground trail, as the poles are effected by snow/avalanche and are not always standing up. In recent years, DOC has placed extra orange triangles, that are bolted into the rock to help with route finding. The route traverses exposed slabby rock ledges, ascends loose tussock spurs and slippery gullies then makes a final ascending traverse across gravelly tussock. The exposure increases to its maximum along that traverse. The pole you’ll (hopefully) see on the skyline marks the end of the ascent.
There have been multiple fatalities on this route, partly because of the exposure, but also because it is part of a renowned tramping route which continues over Rabbit Pass and into the East Matukituki. The face does ooze moisture in many places, but you really want the best chance of as much of it being dry as possible.
Once you’re above the Waterfall face you are somewhat committed. Any route down from this position is exposed and dangerous in wet & windy weather. The easiest escape would probably be via Rabbit Pass, which involves steep and loose rock scrambling and 2 days walk.
Above the Waterfall face, there are plenty of options for camping, but all are exposed to the wind.
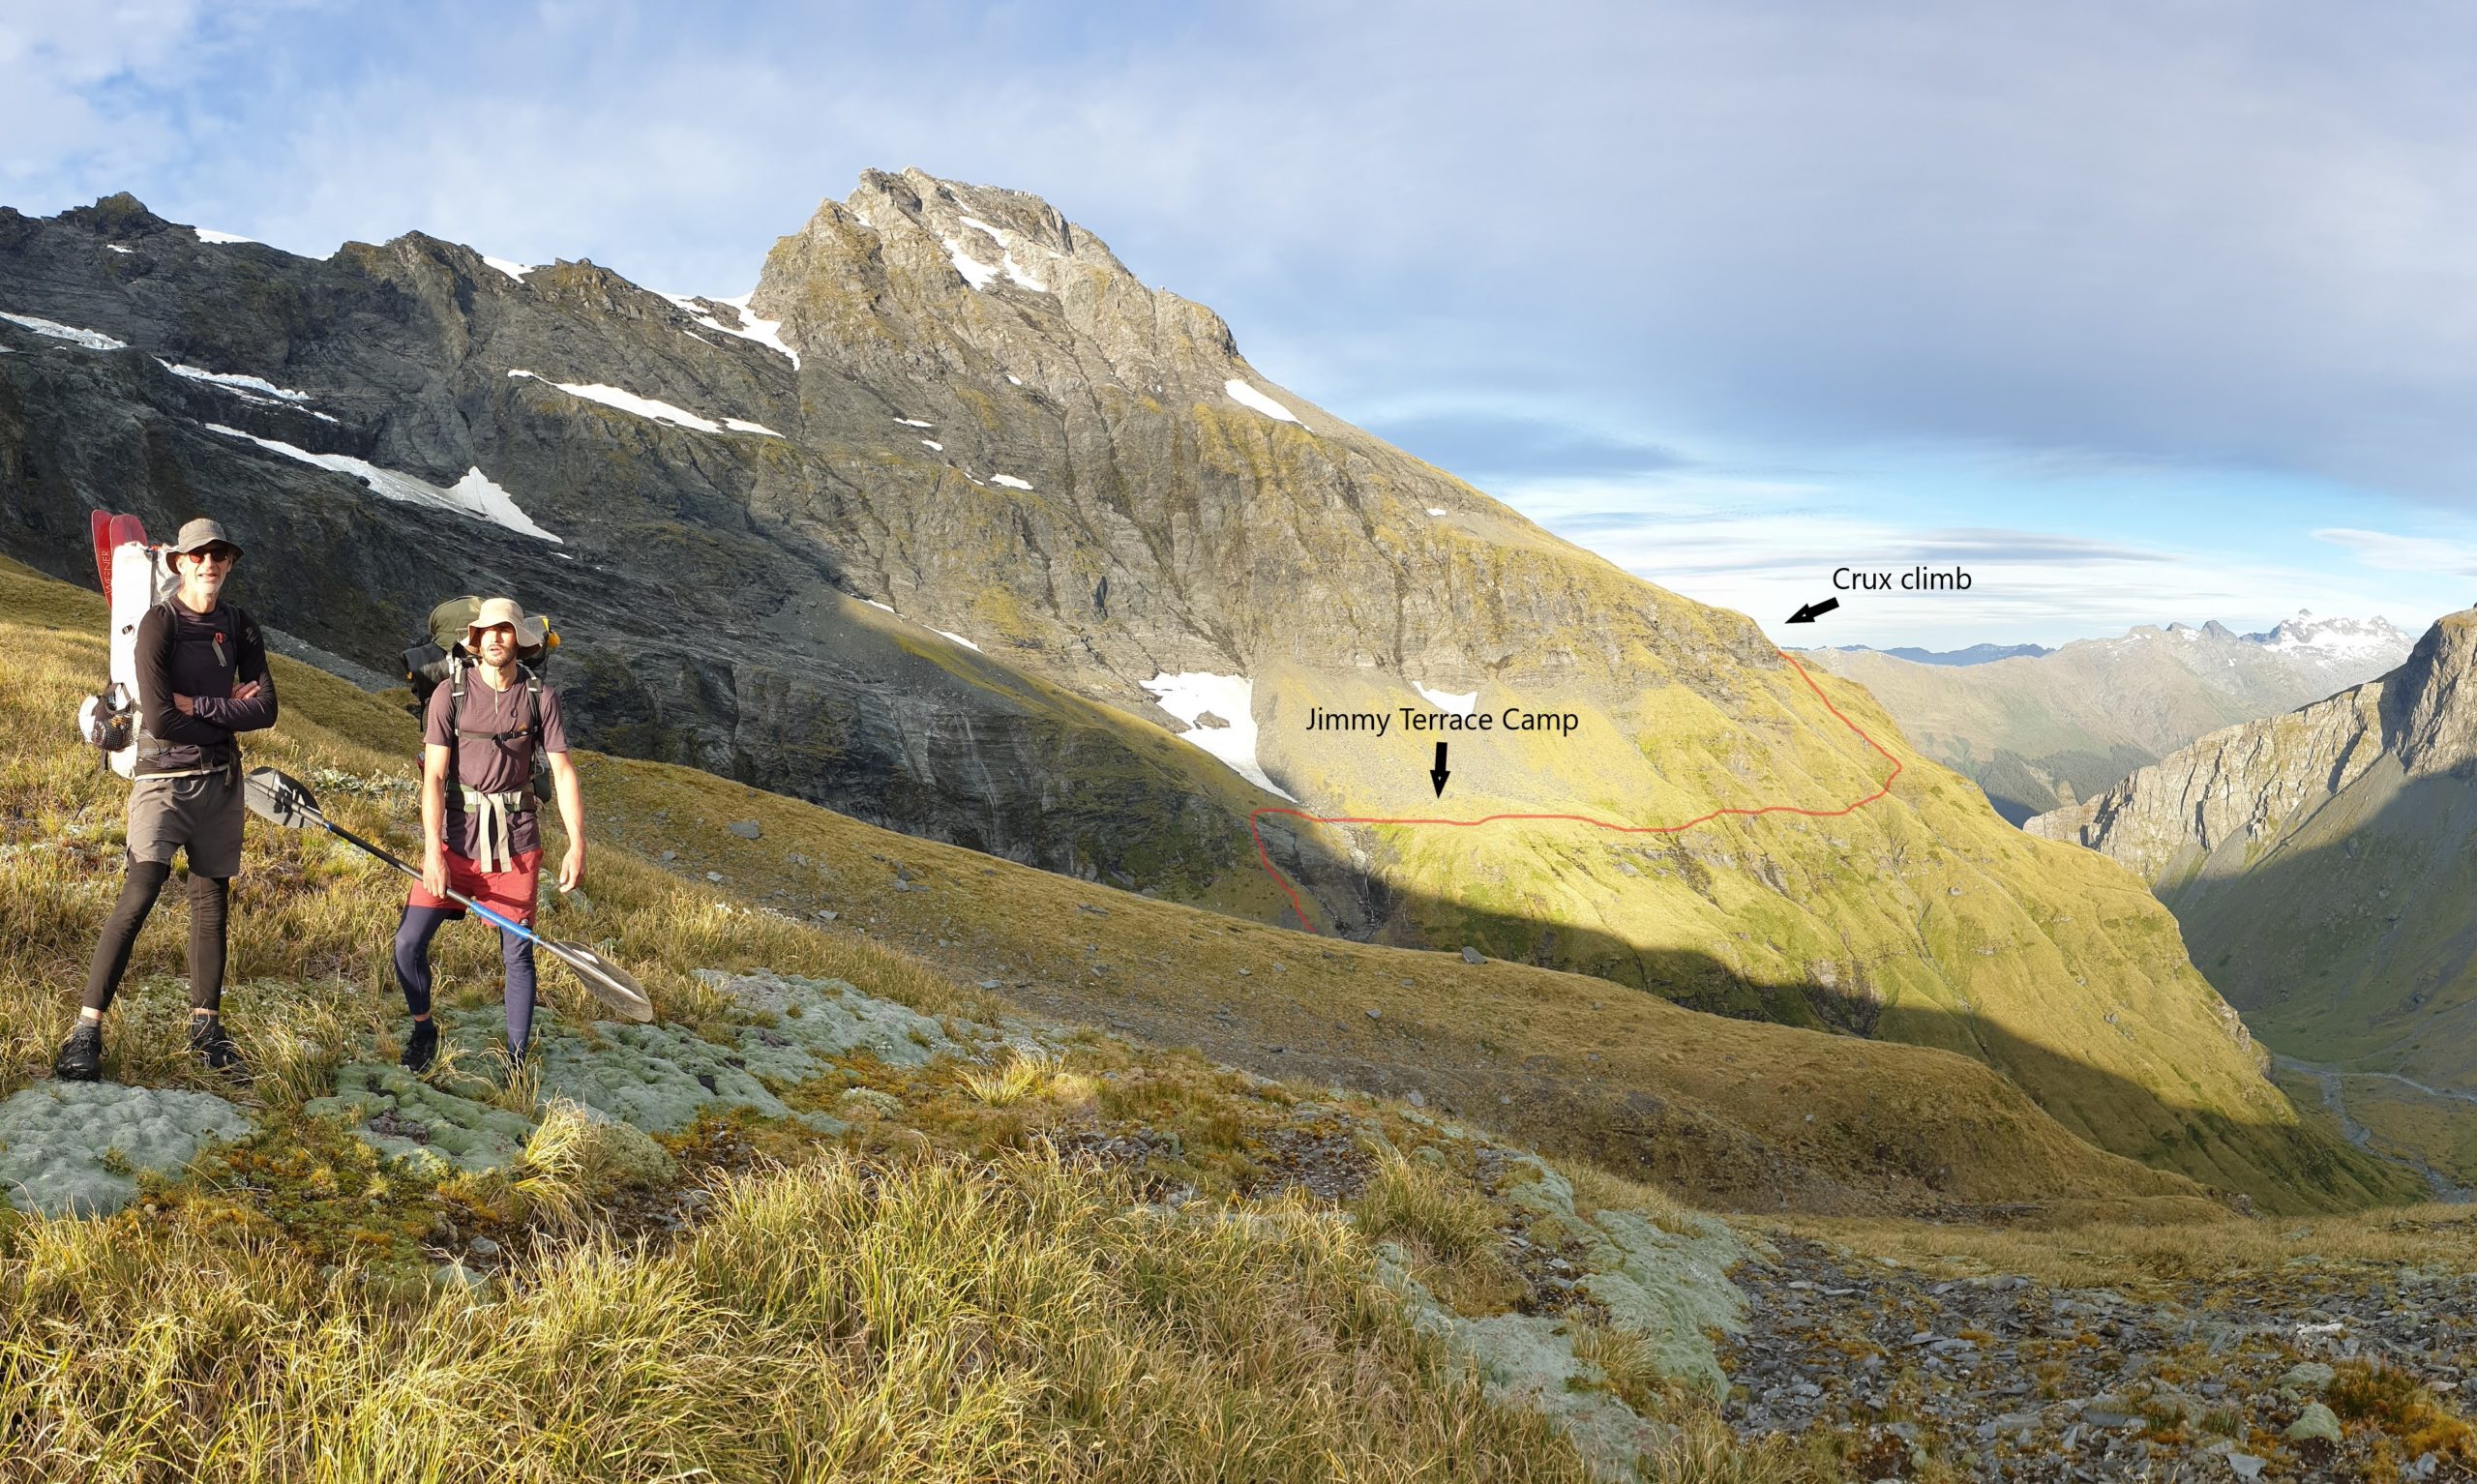
There are tarns and limited camping options on Pearson Saddle itself. If you have enough time and want to push on, there’s a good camping option (“Jimmy Terrace Camp”) on the terrace above and west of Jimmy Creek.. But pushing on means you might miss the mid-Bettnie camp, which is a trip highlight..
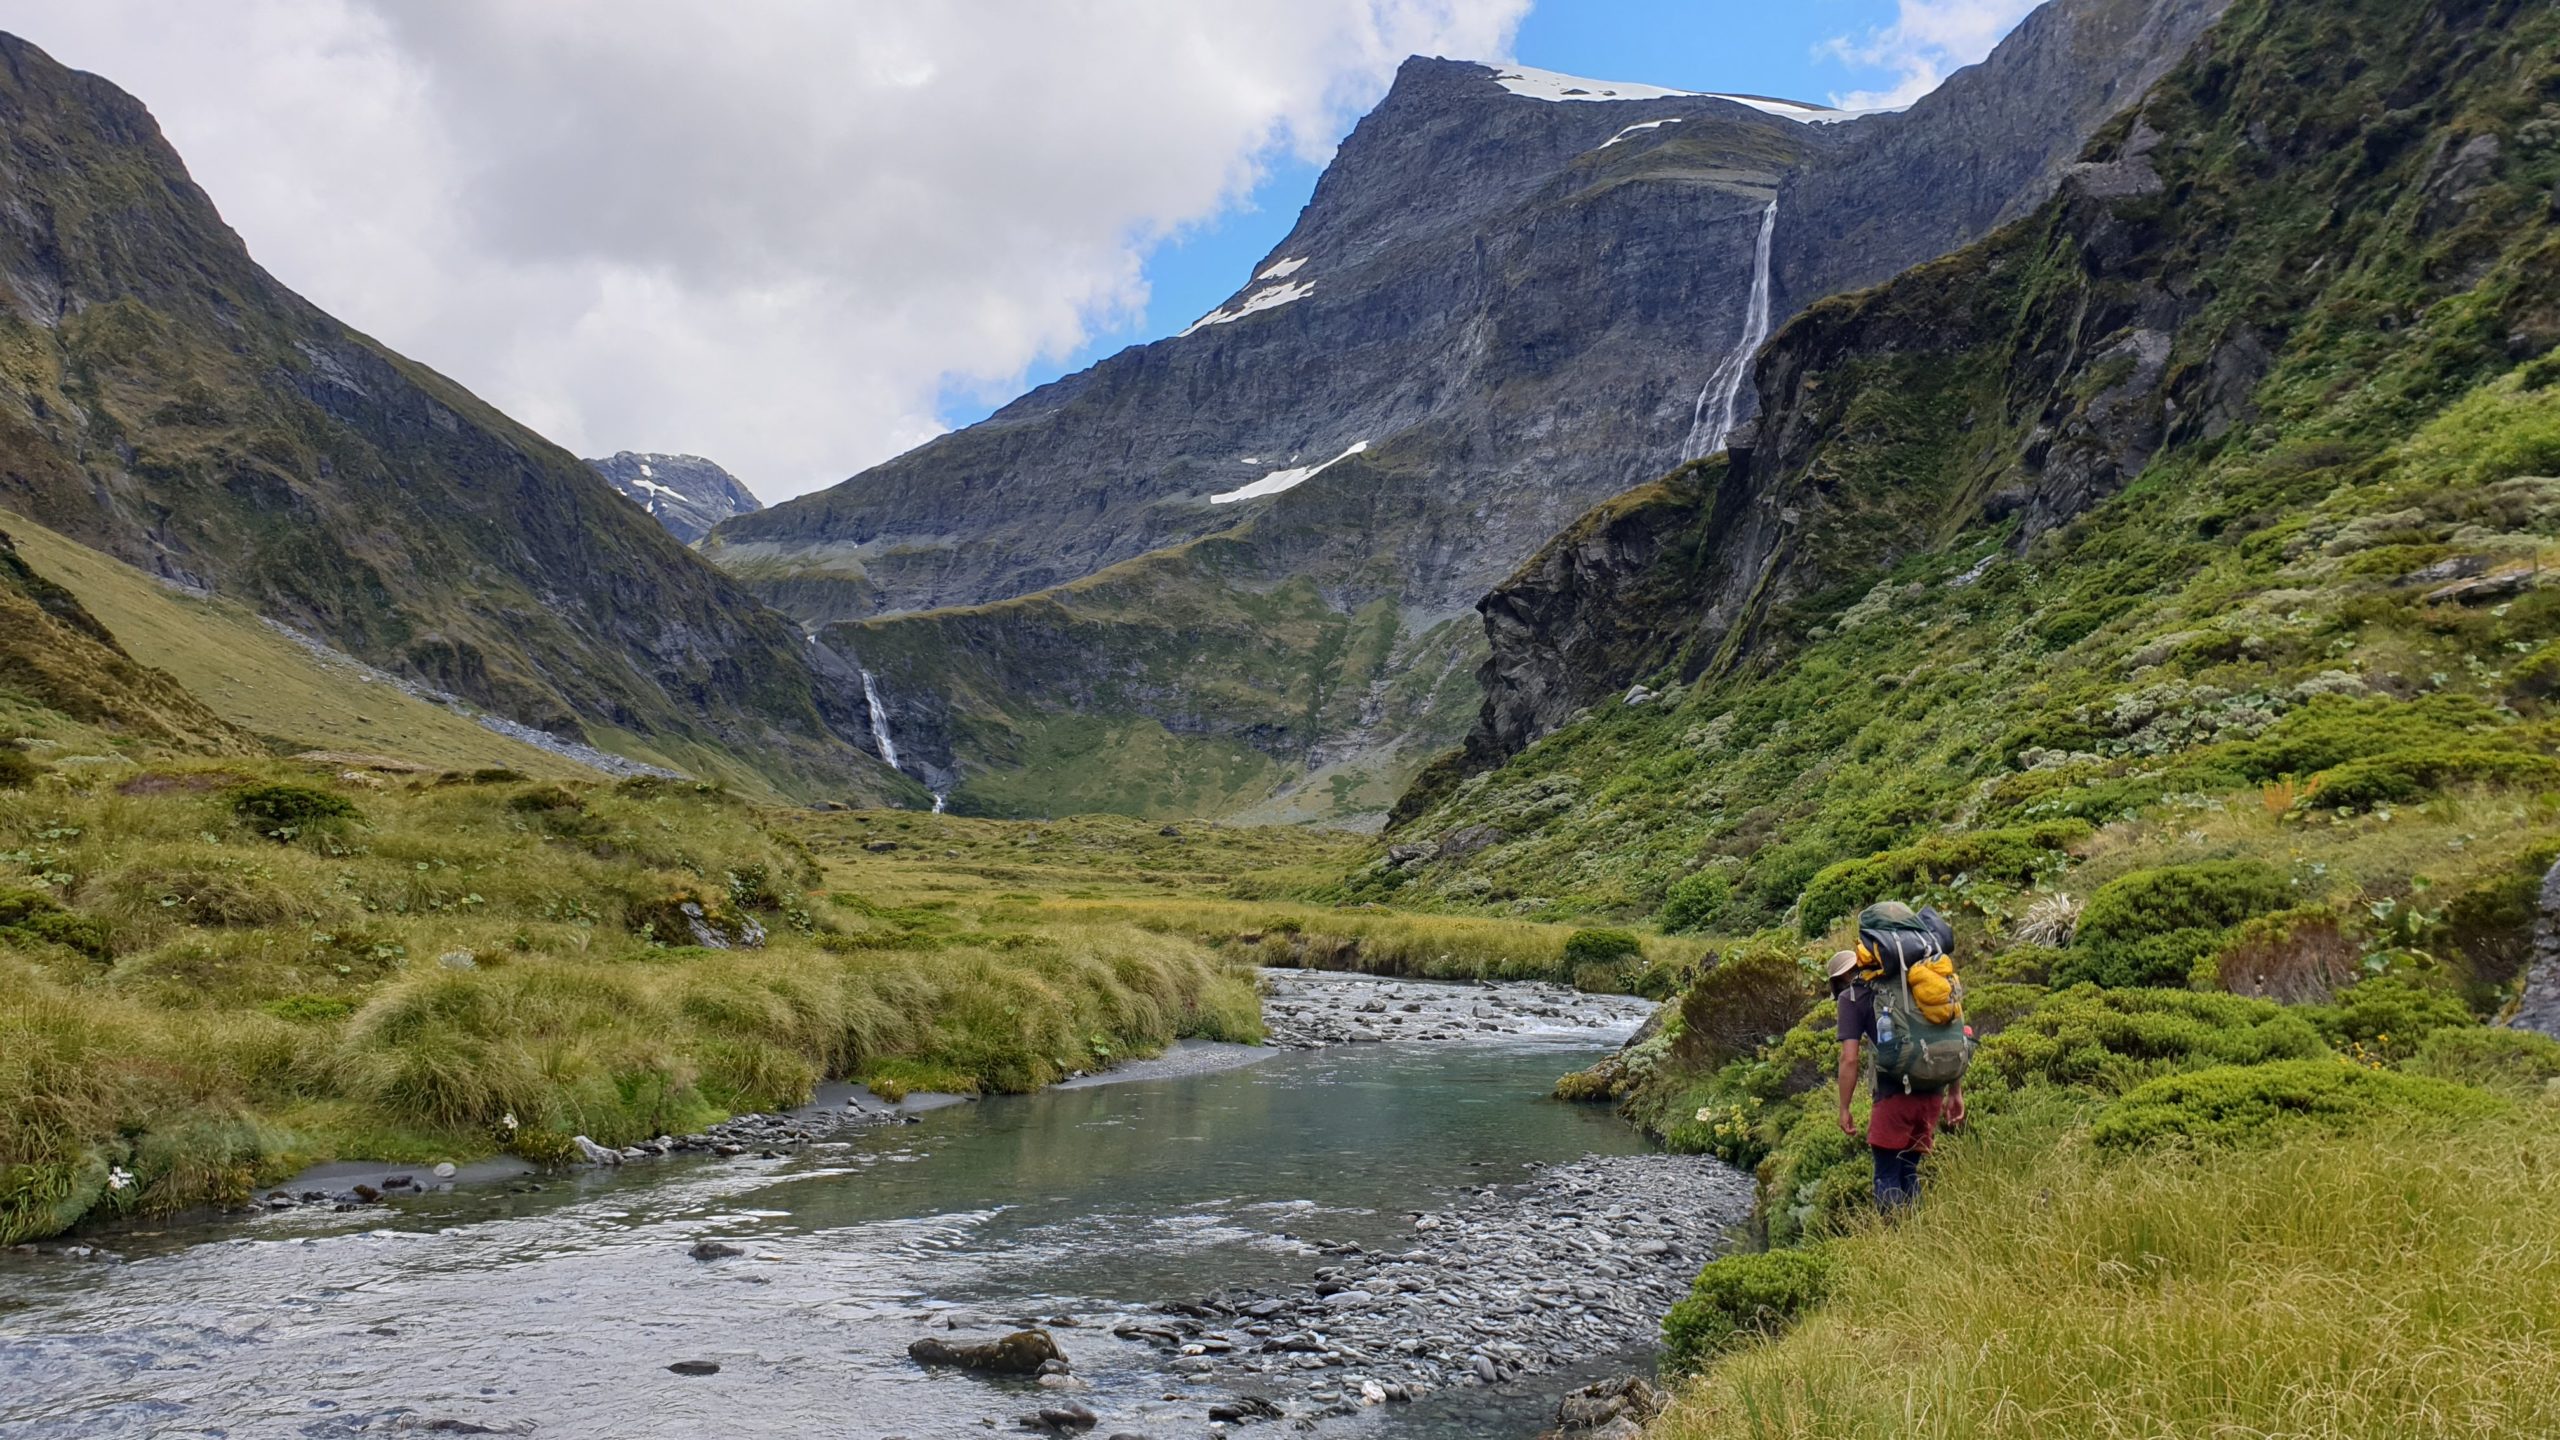
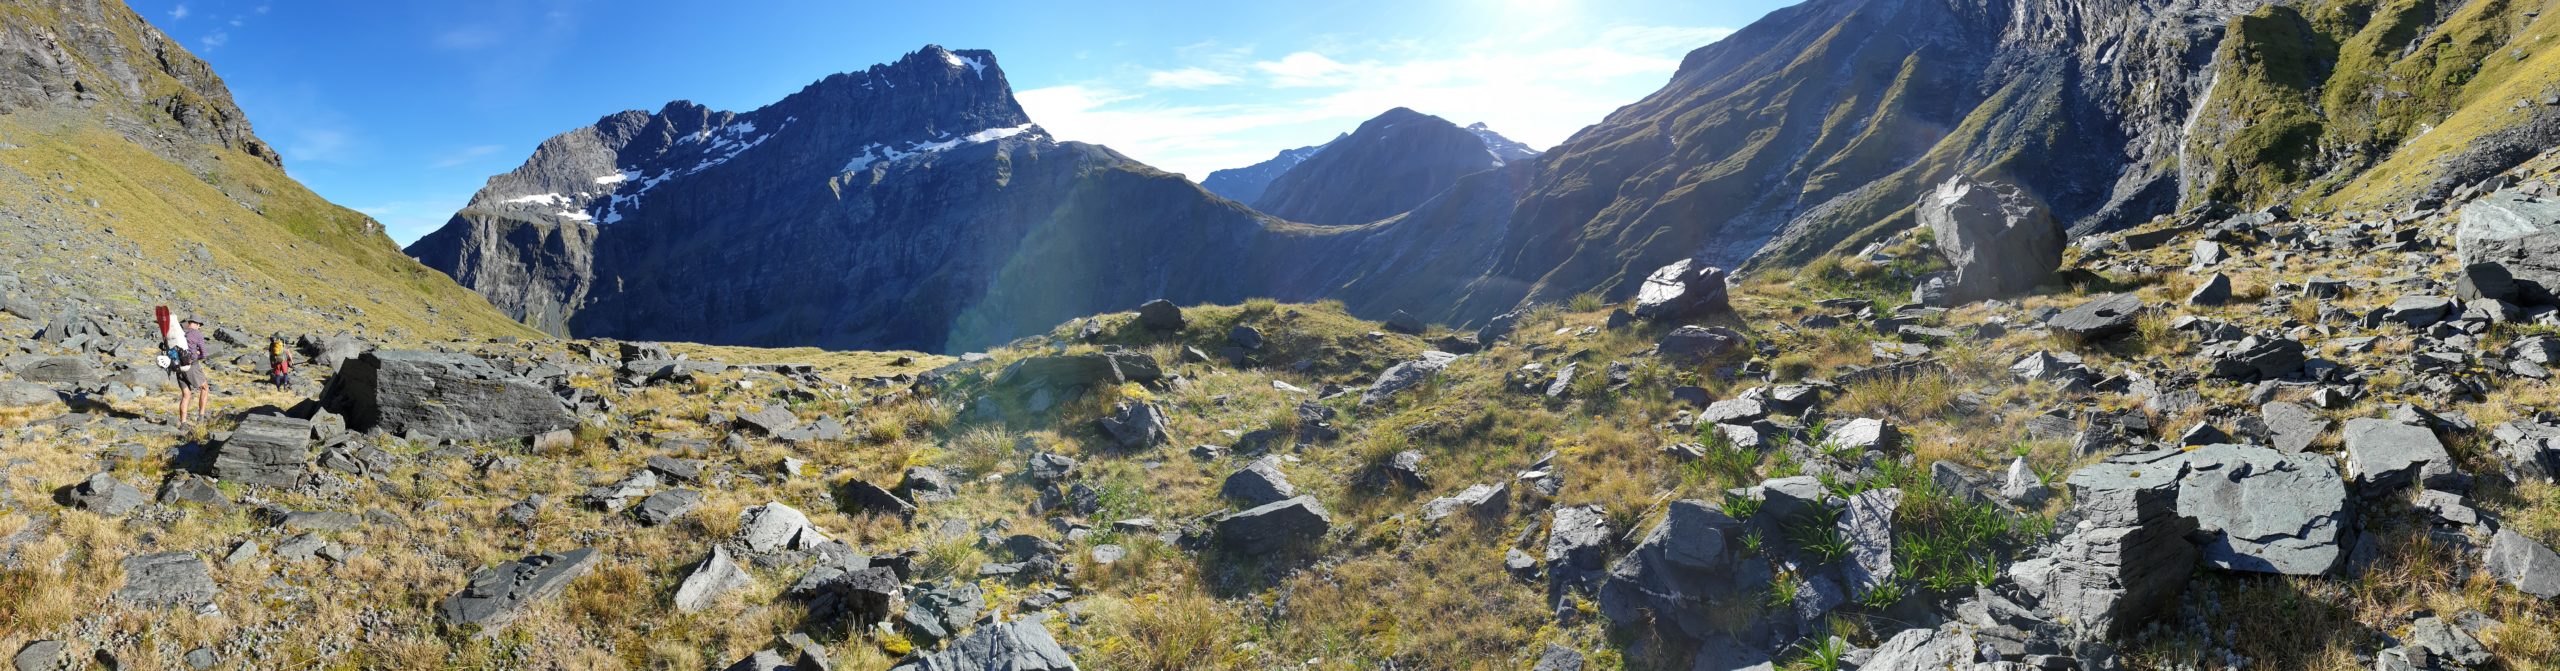
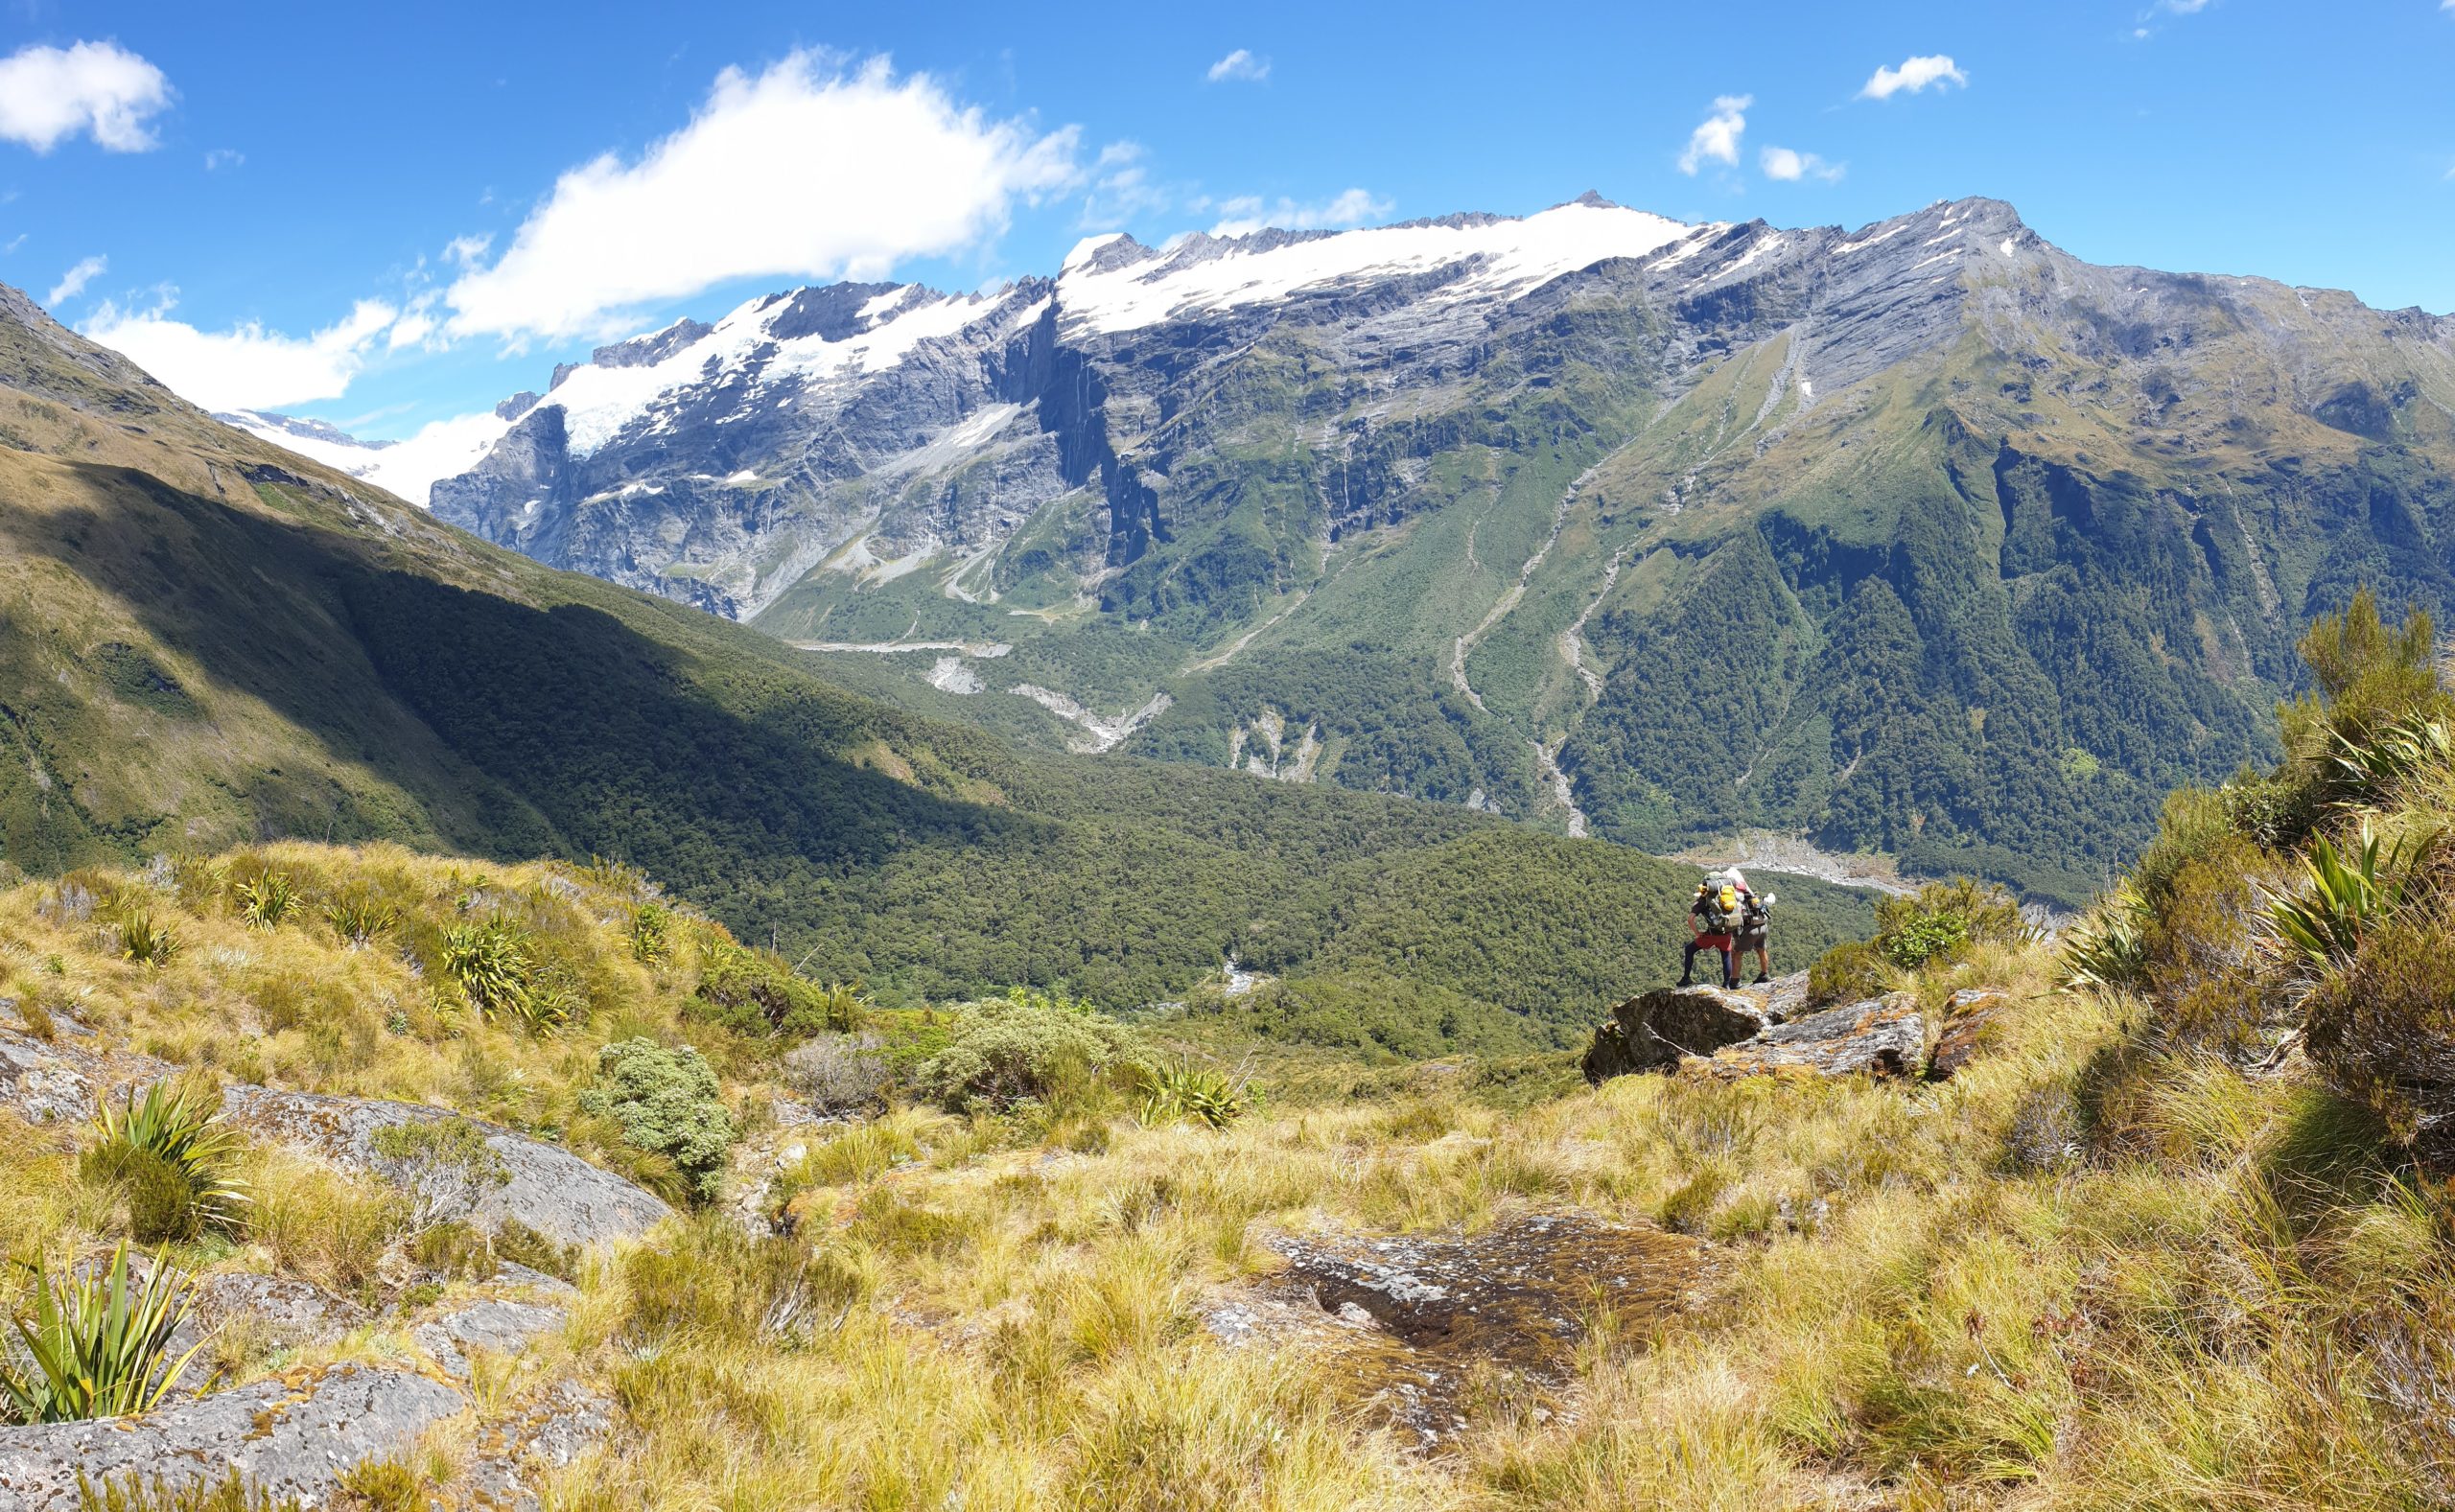
Pearson Saddle to mid-Bettnie Camp: 6hrs
- 1.5hrs Pearson saddle to Jimmy Terrace Camp
- 45min to the ‘crux climb’
- 30mins to the Waiatoto view point
- 3hrs to Mid-Bettnie Camp
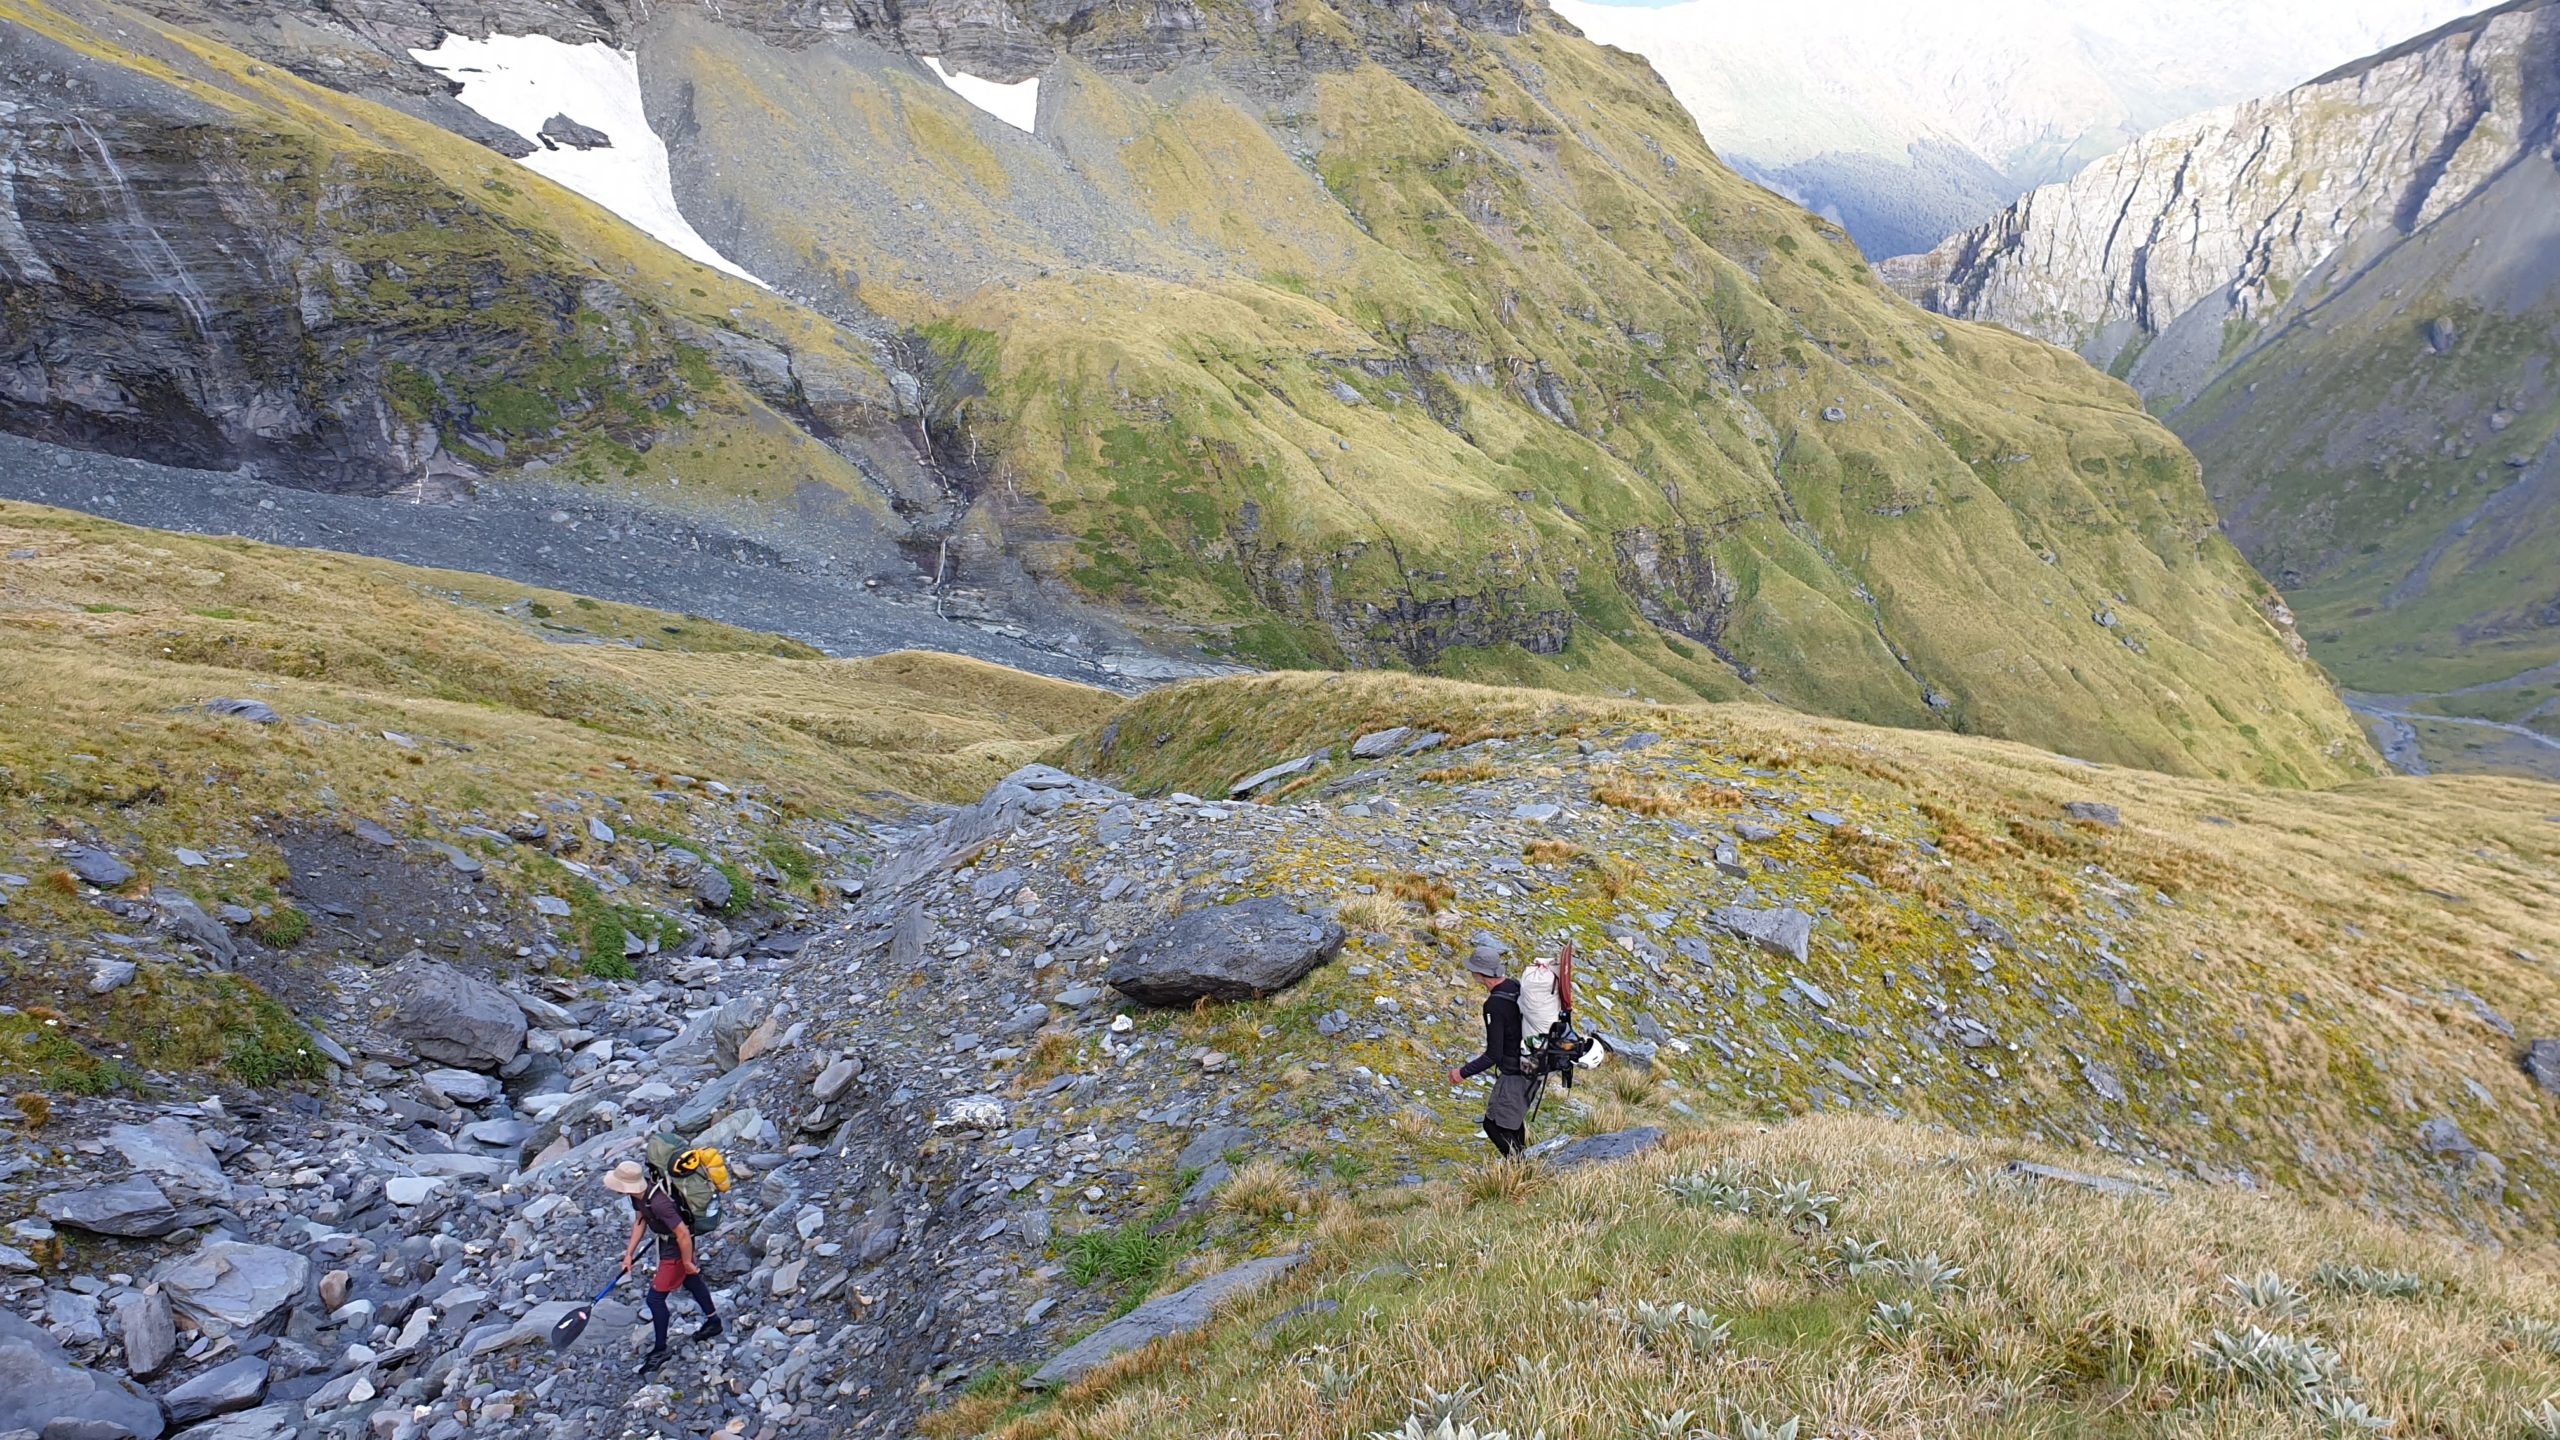
This section heads into the Olivine Wilderness Area, a specially protected zone where no tracks, no huts and no helicopter landings are allowed.
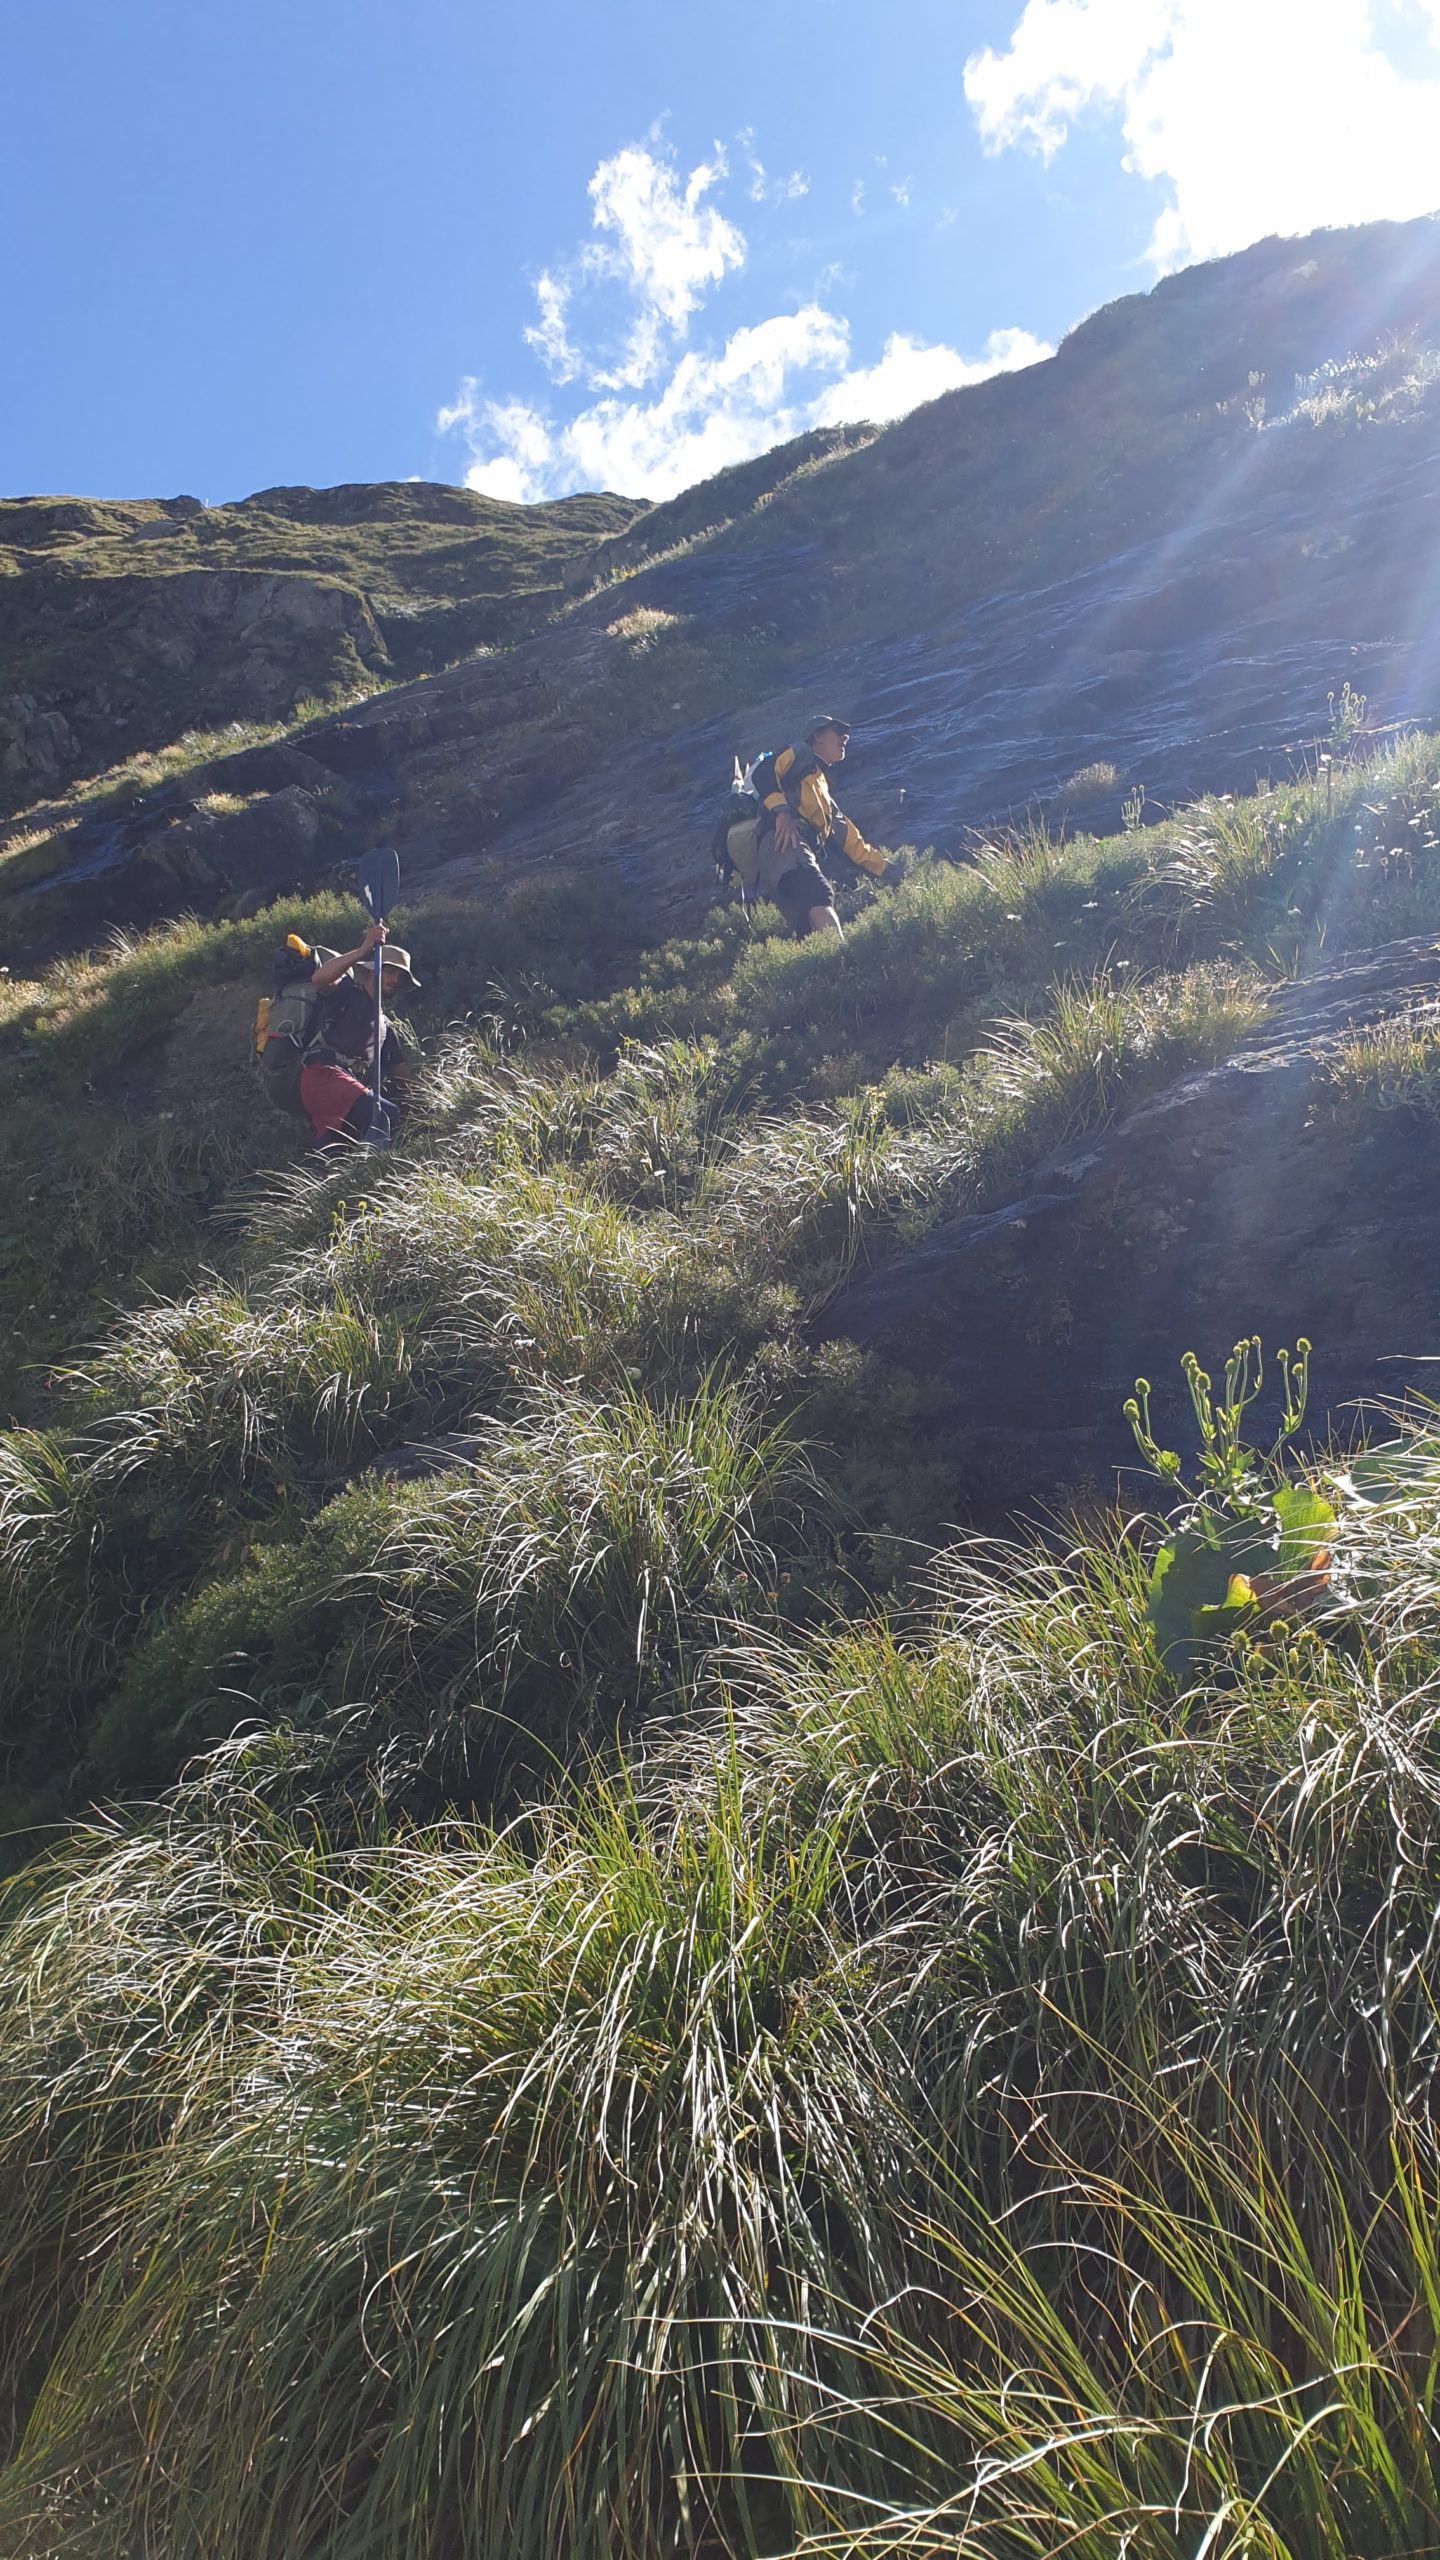
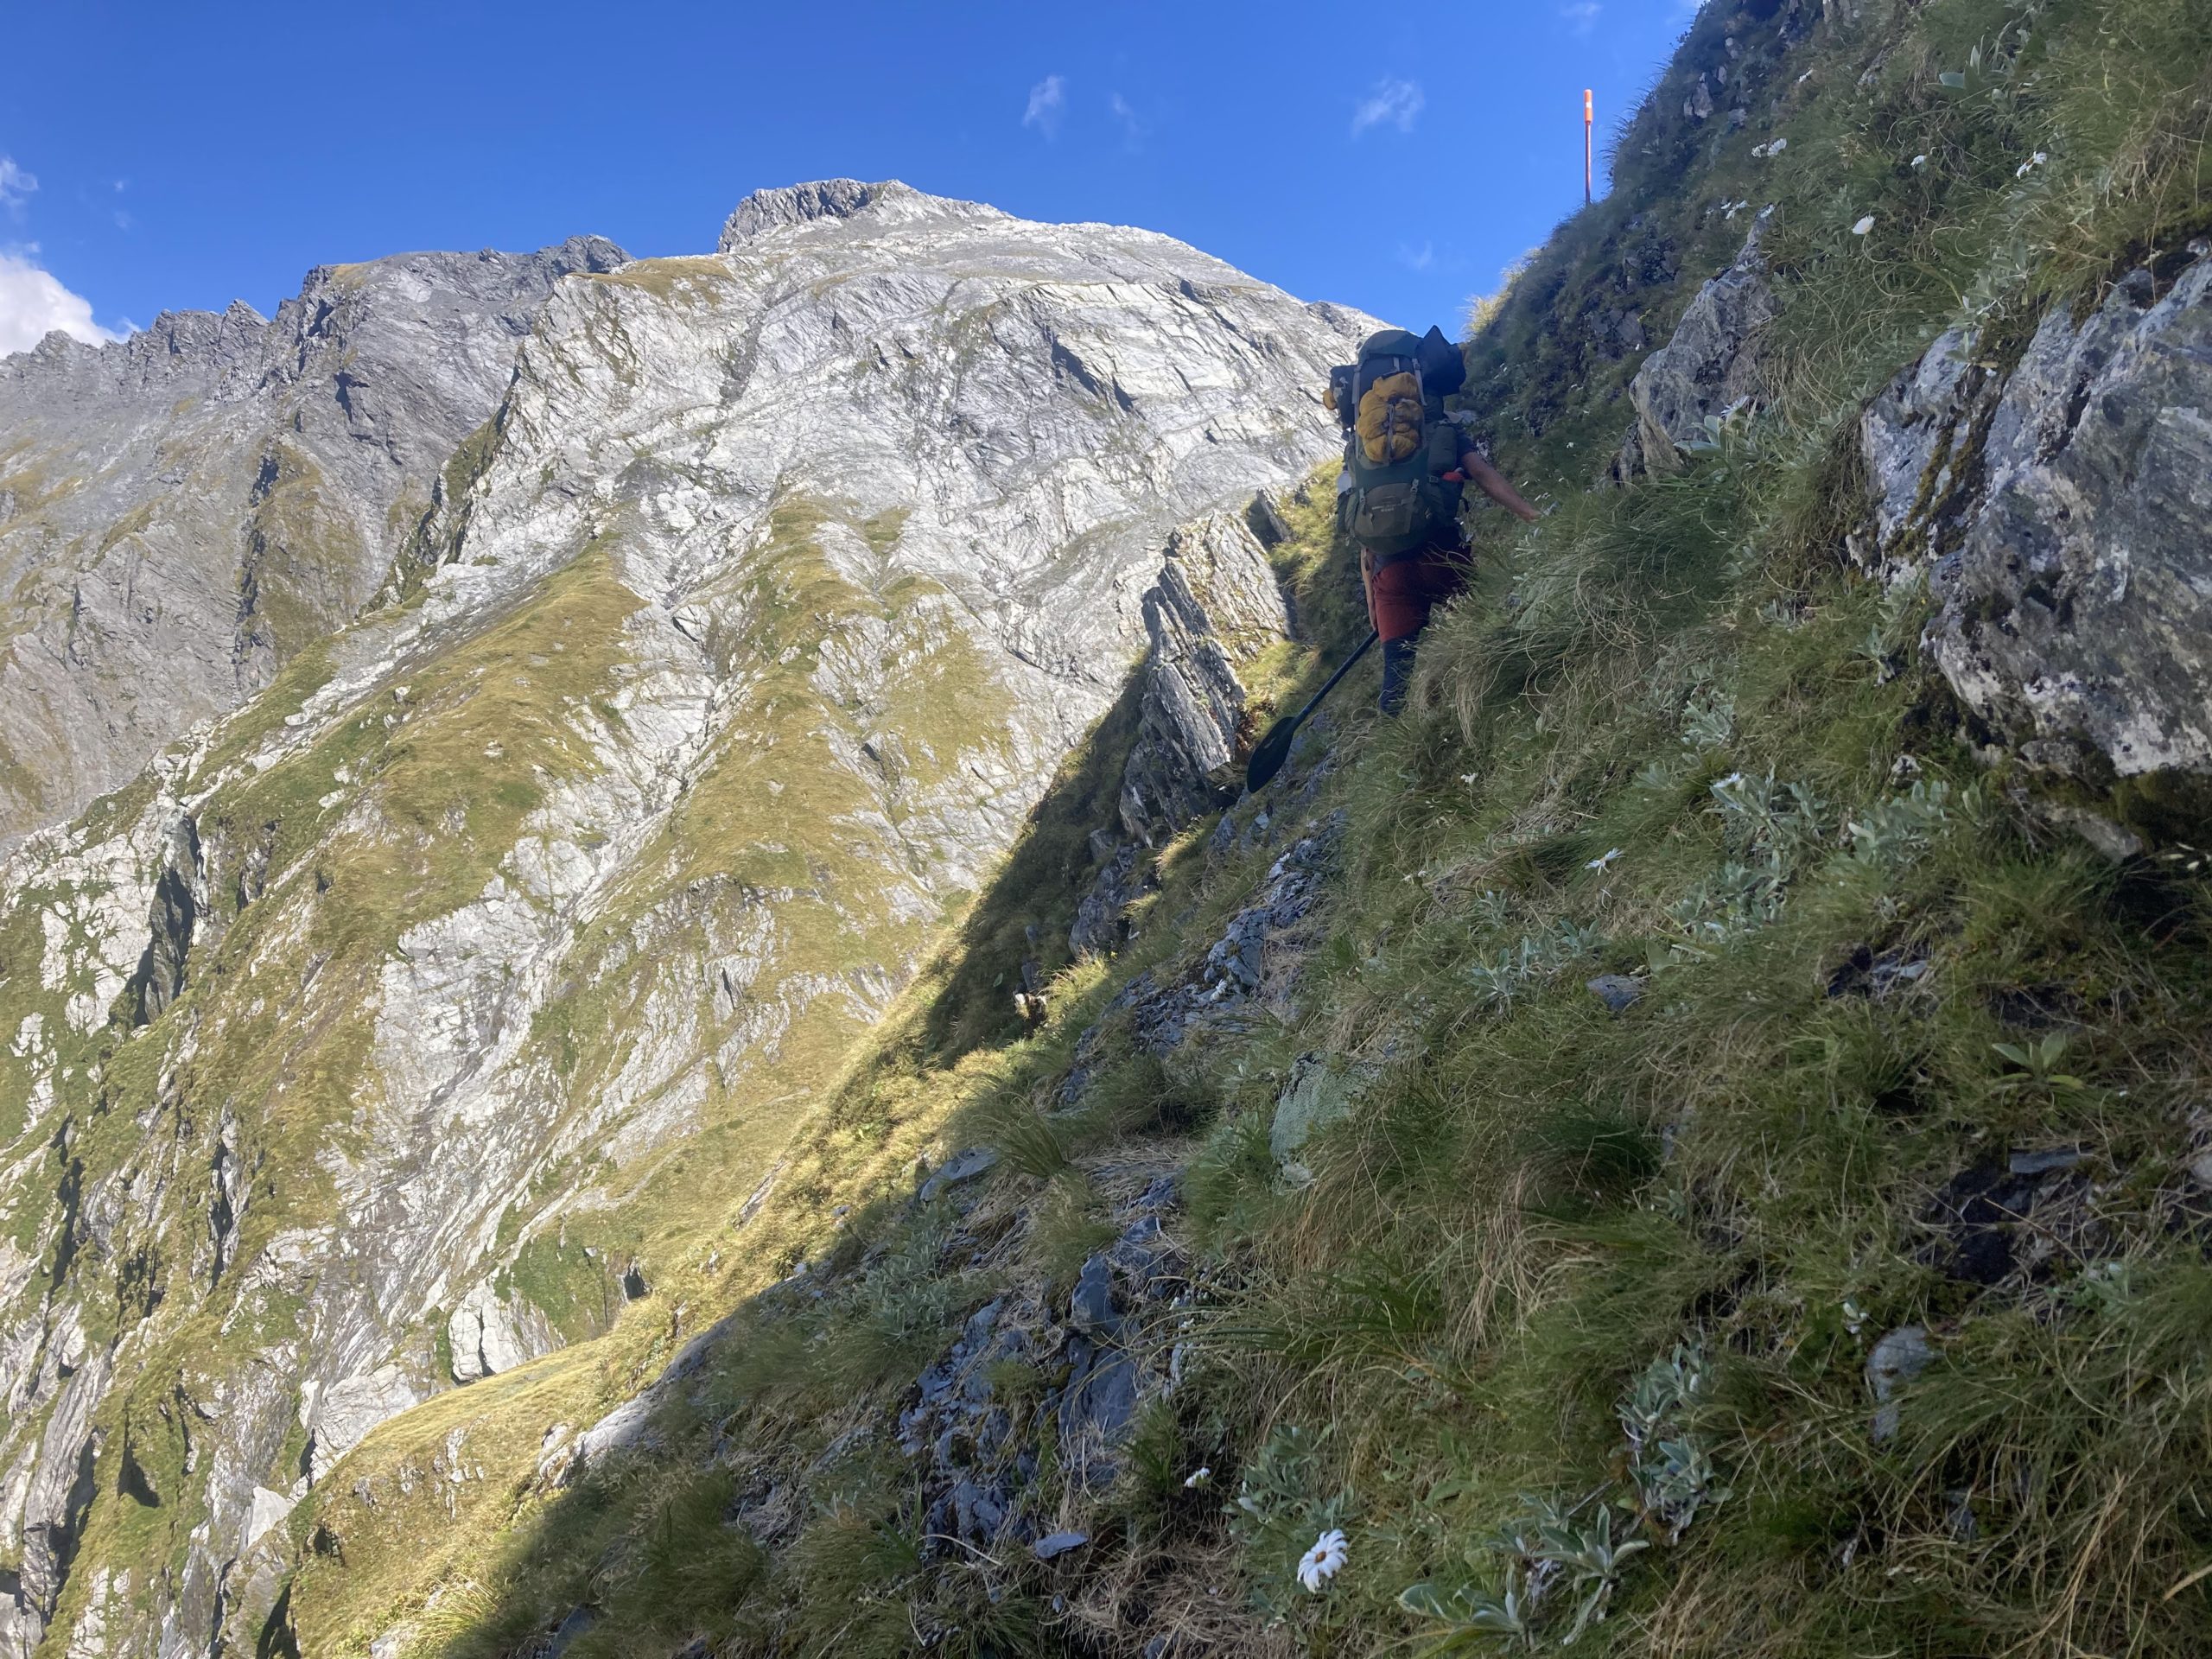
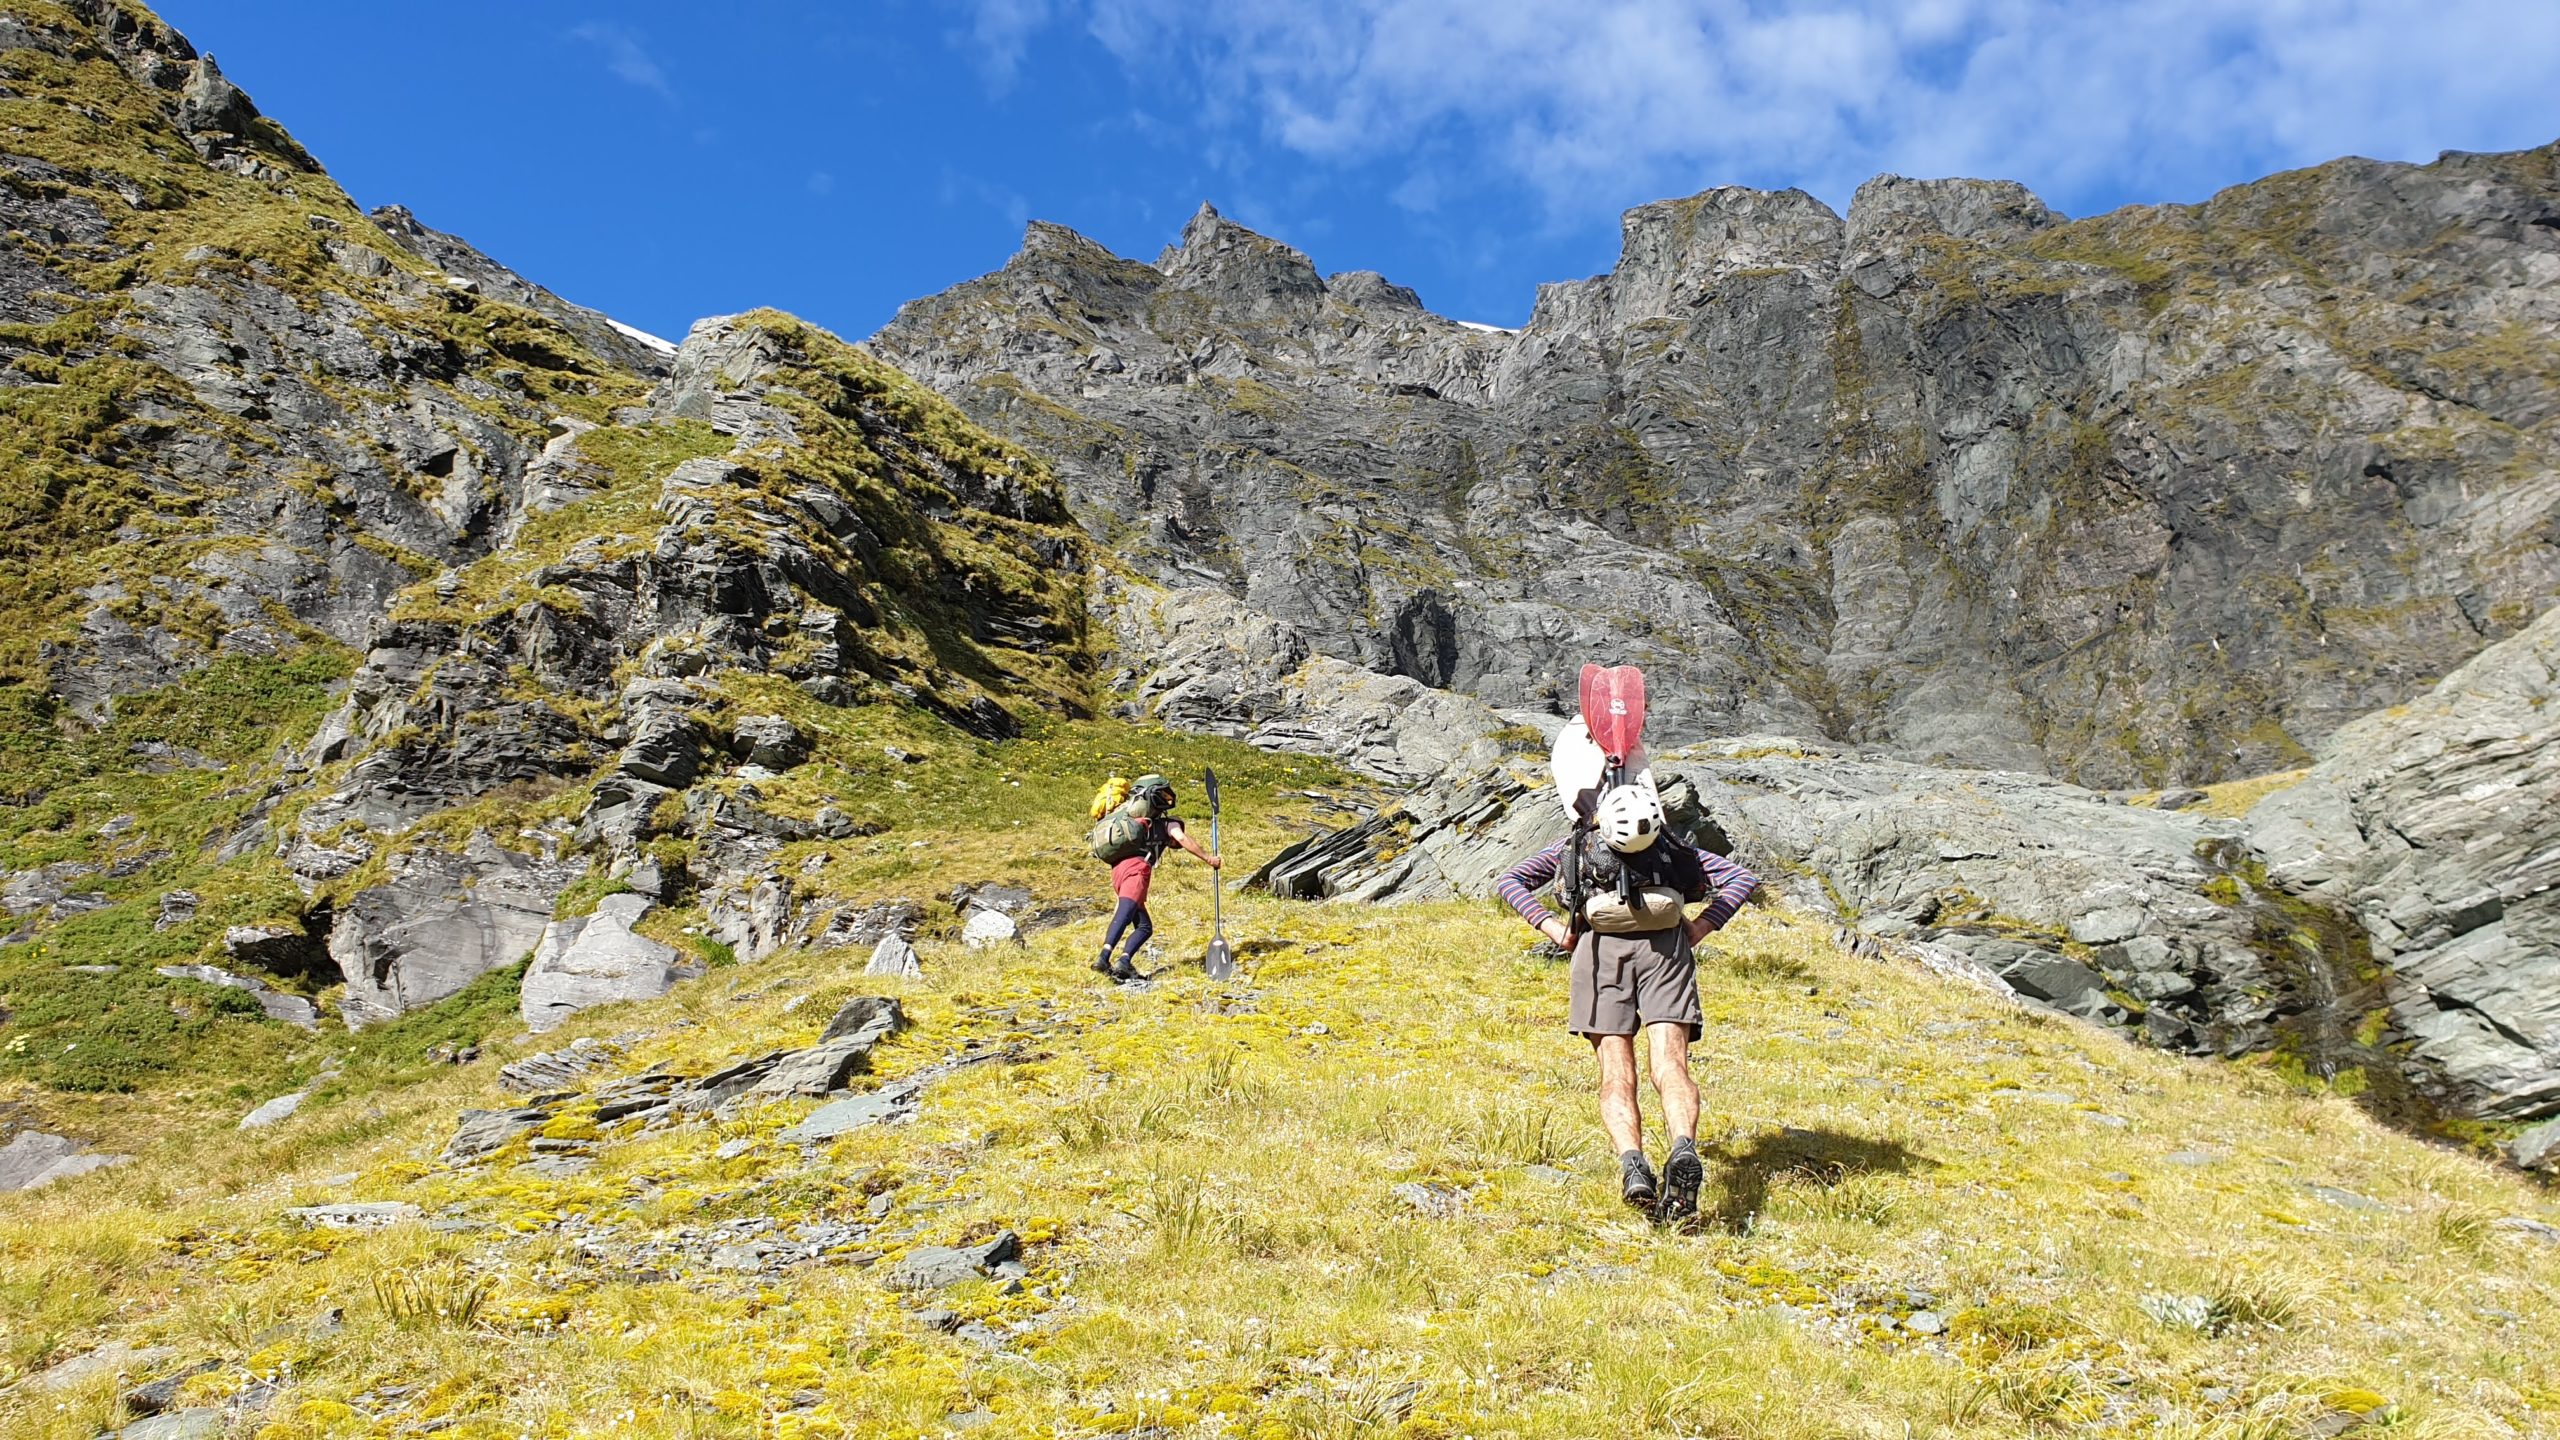
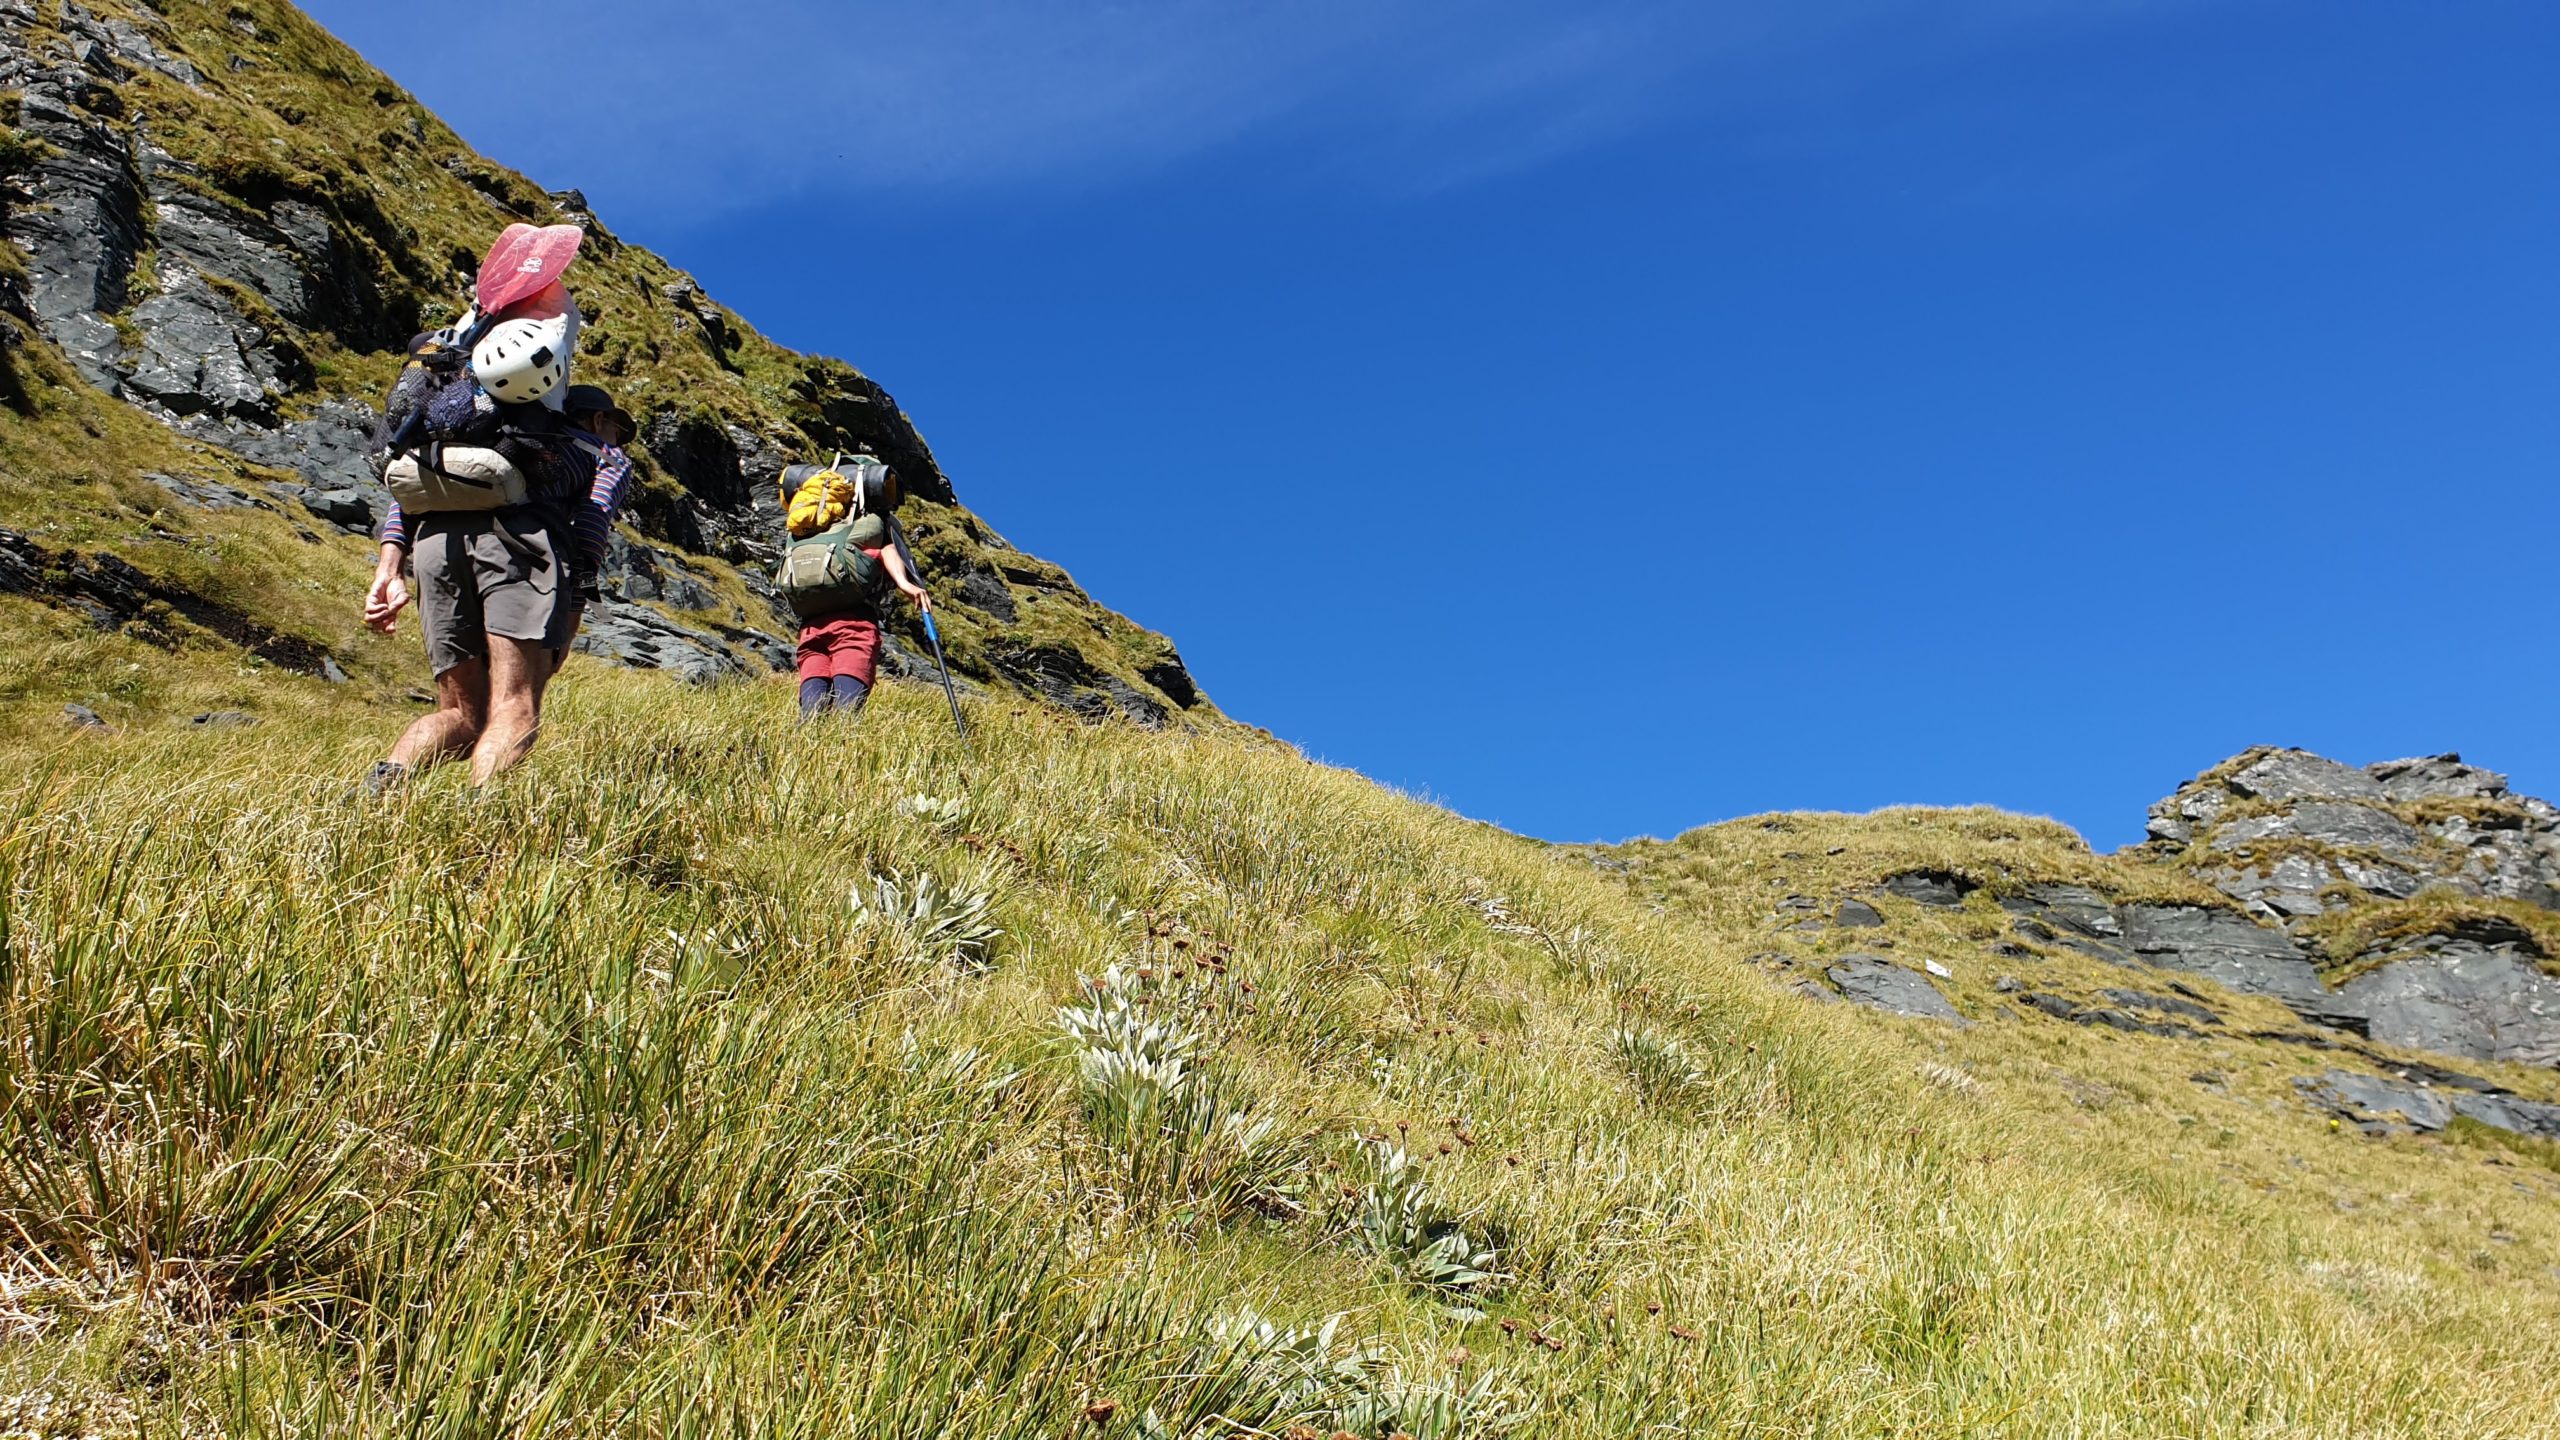
This part is the route-finding crux of the trip, which means you really need good weather and visibility. There are plenty of spots to get water in the tussock parts of this section.
At Pearson Saddle, spend some time identifying the landmarks on the route on the far side of the valley.
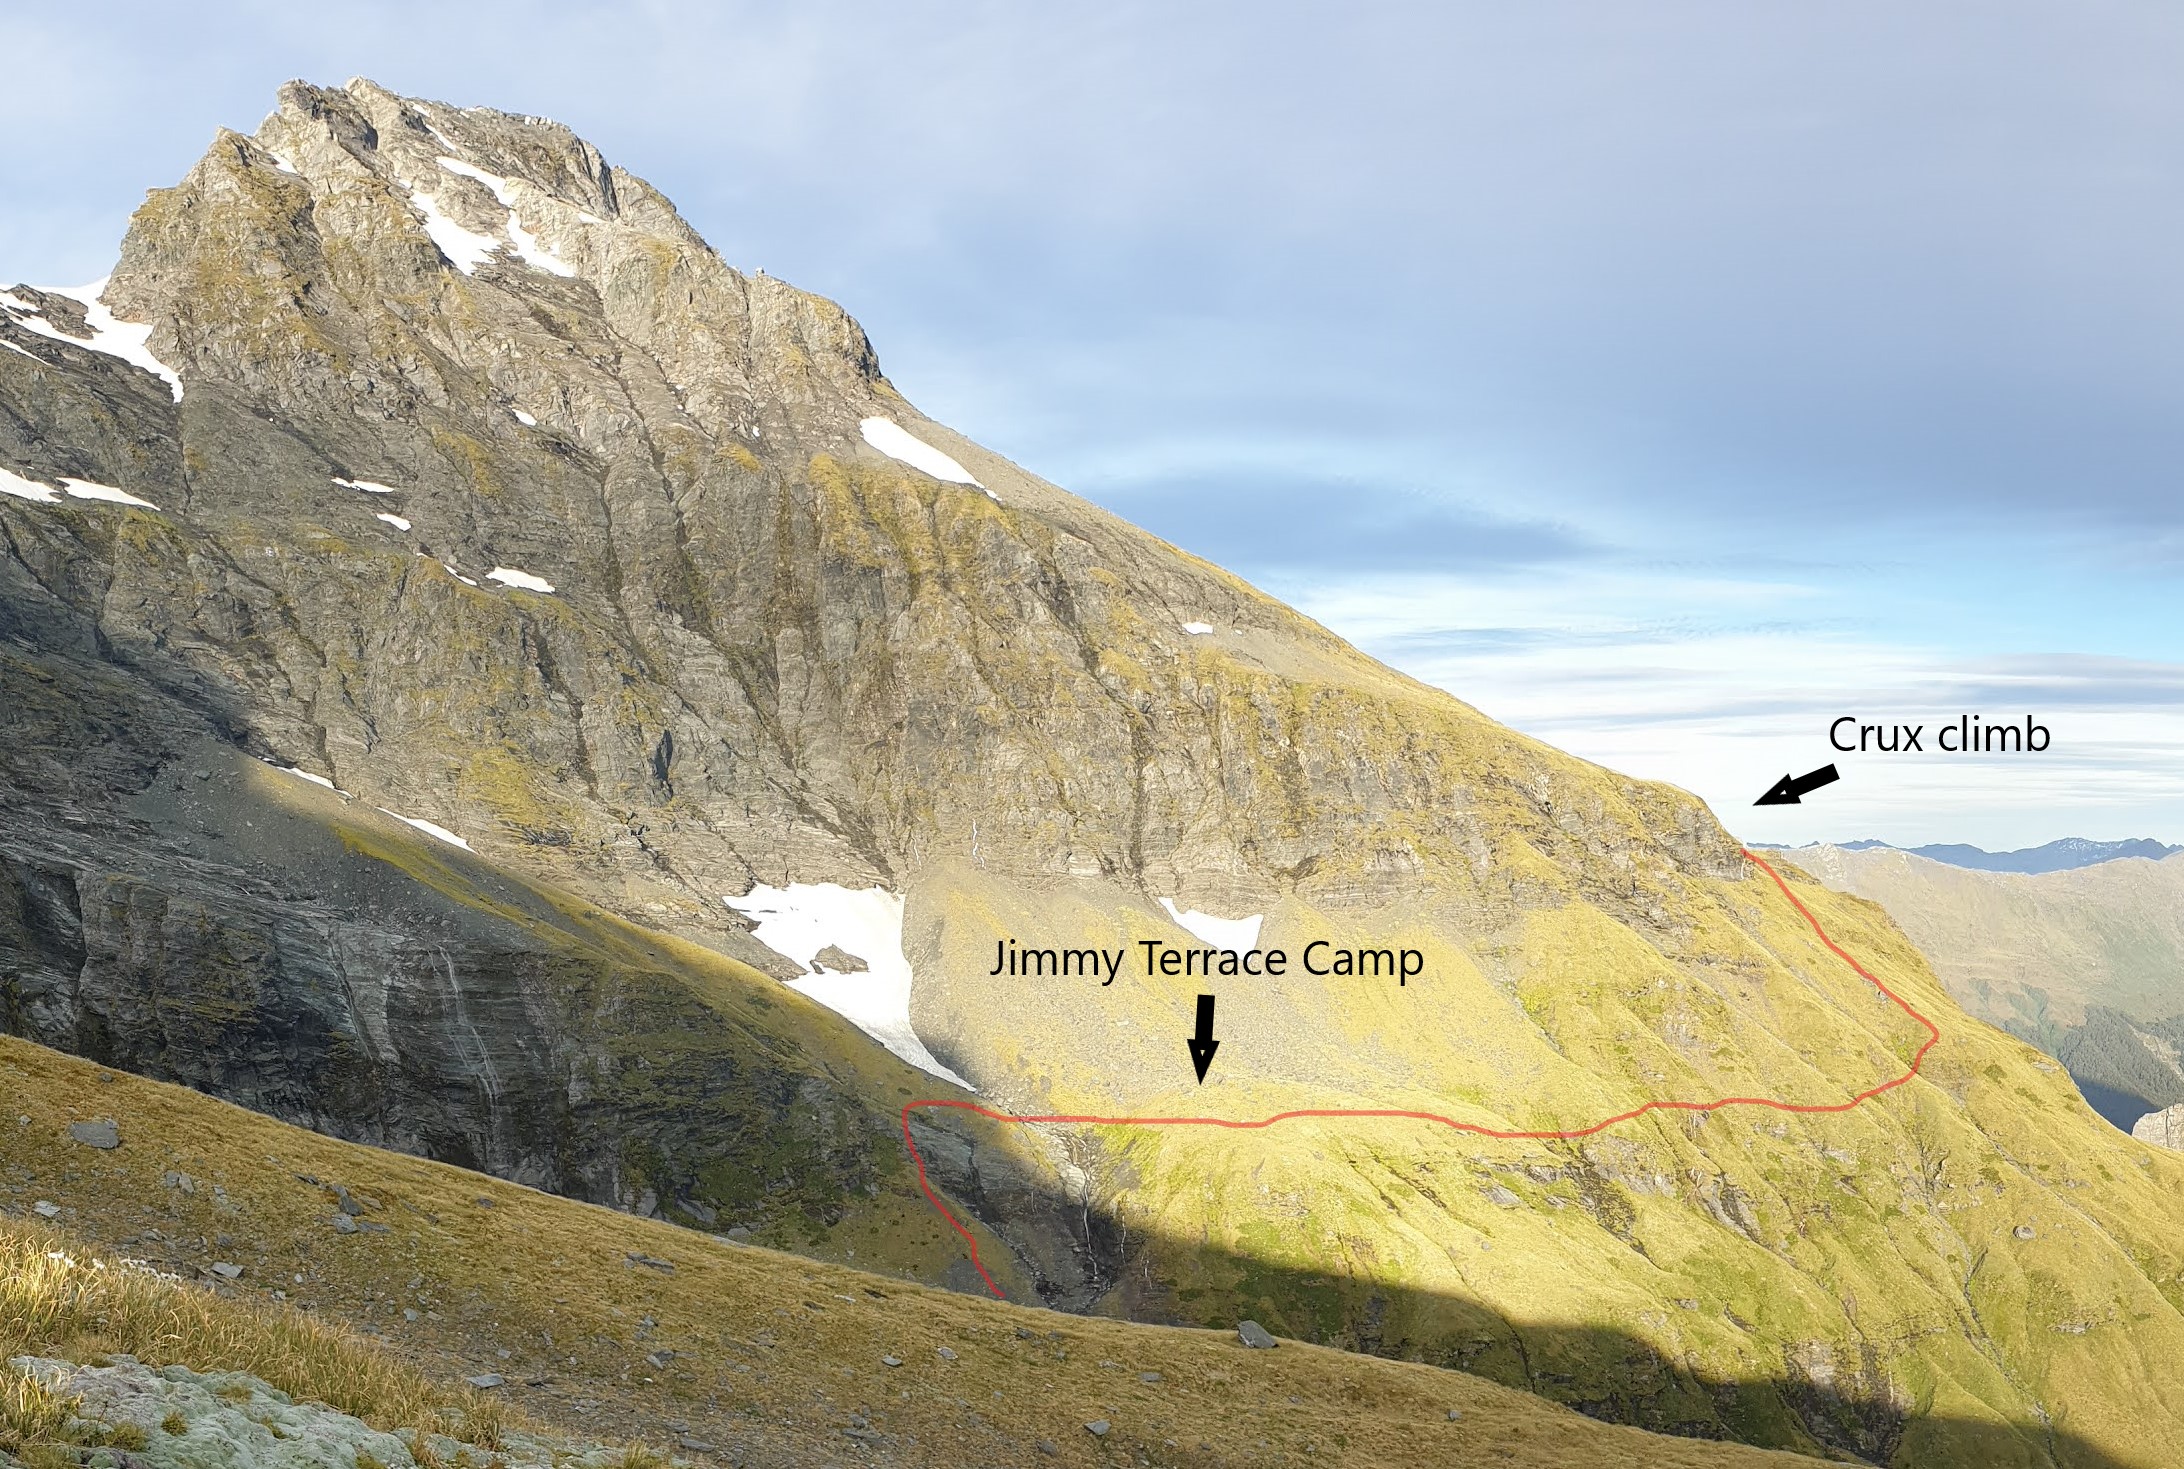
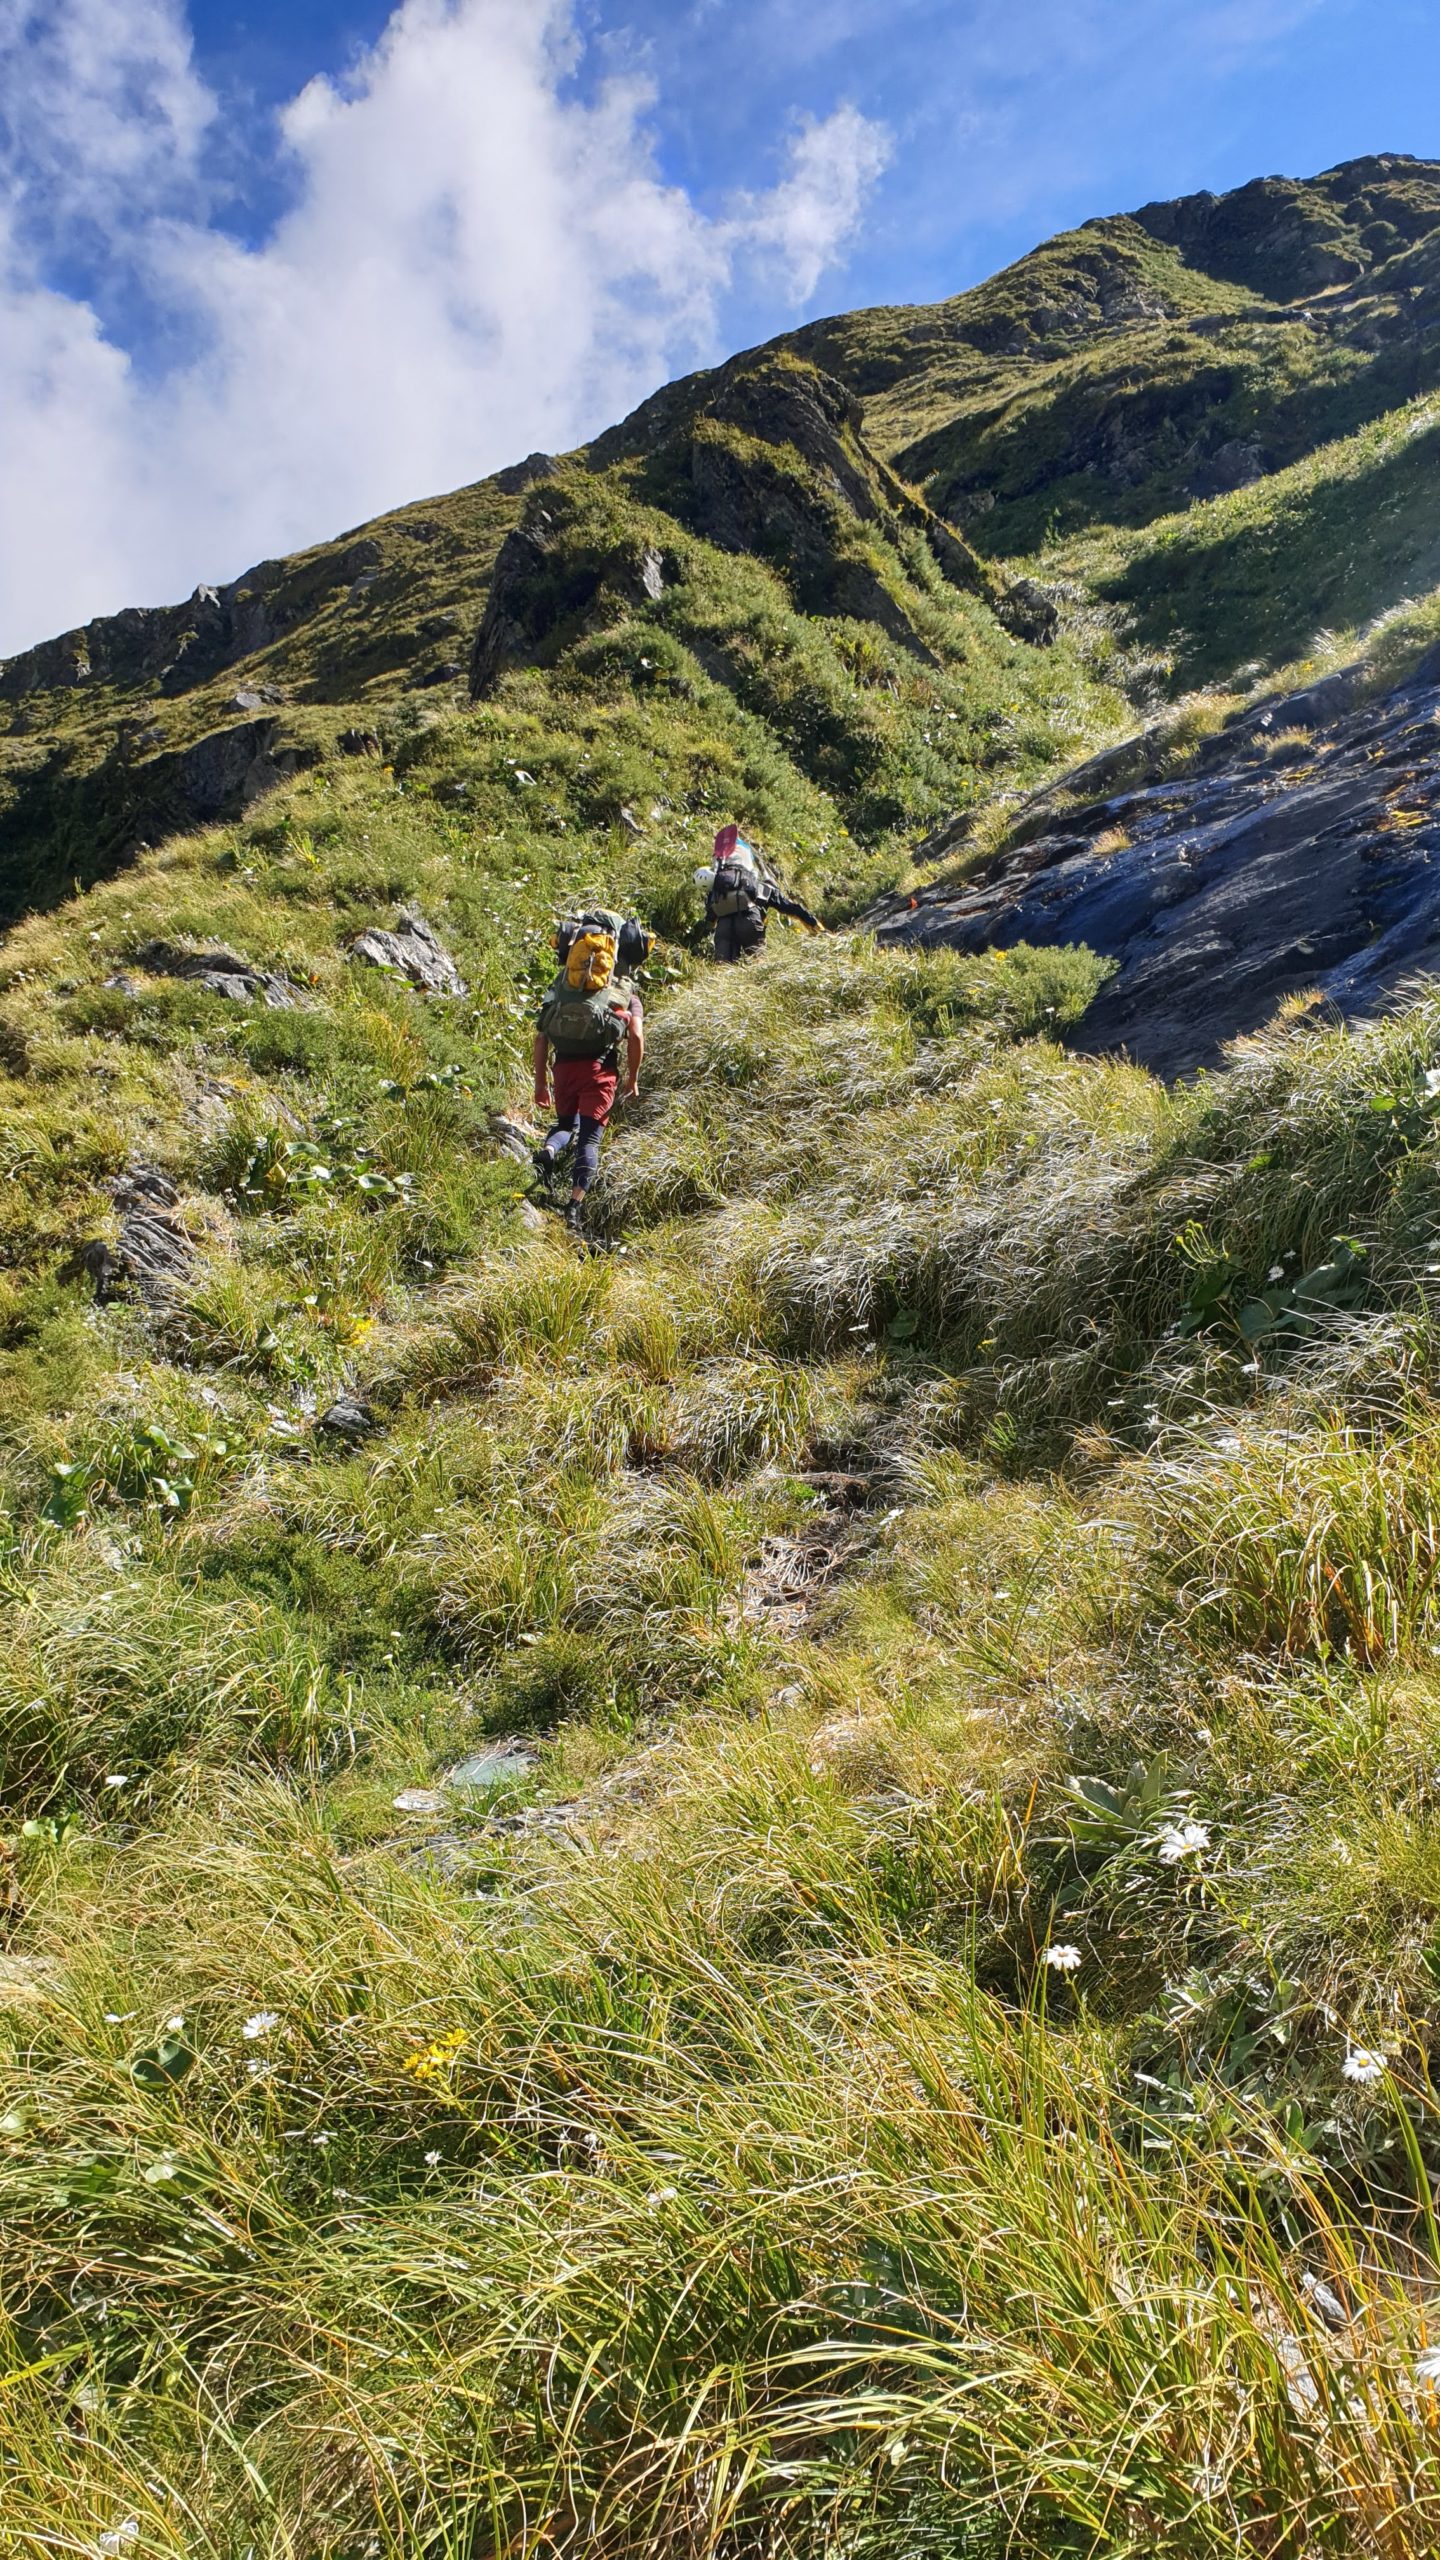
From Pearson Saddle, the line on the map describes it best, but you begin ascending tussock spurs, traverse west when you can, then descend tussock spurs and bedrock gullies to Jimmy Creek.
Ascend onto the upper terrace via a spur on the true right of the small waterfall.
“Jimmy Terrace Camp” is among boulders, but there are a few tent sized spots.
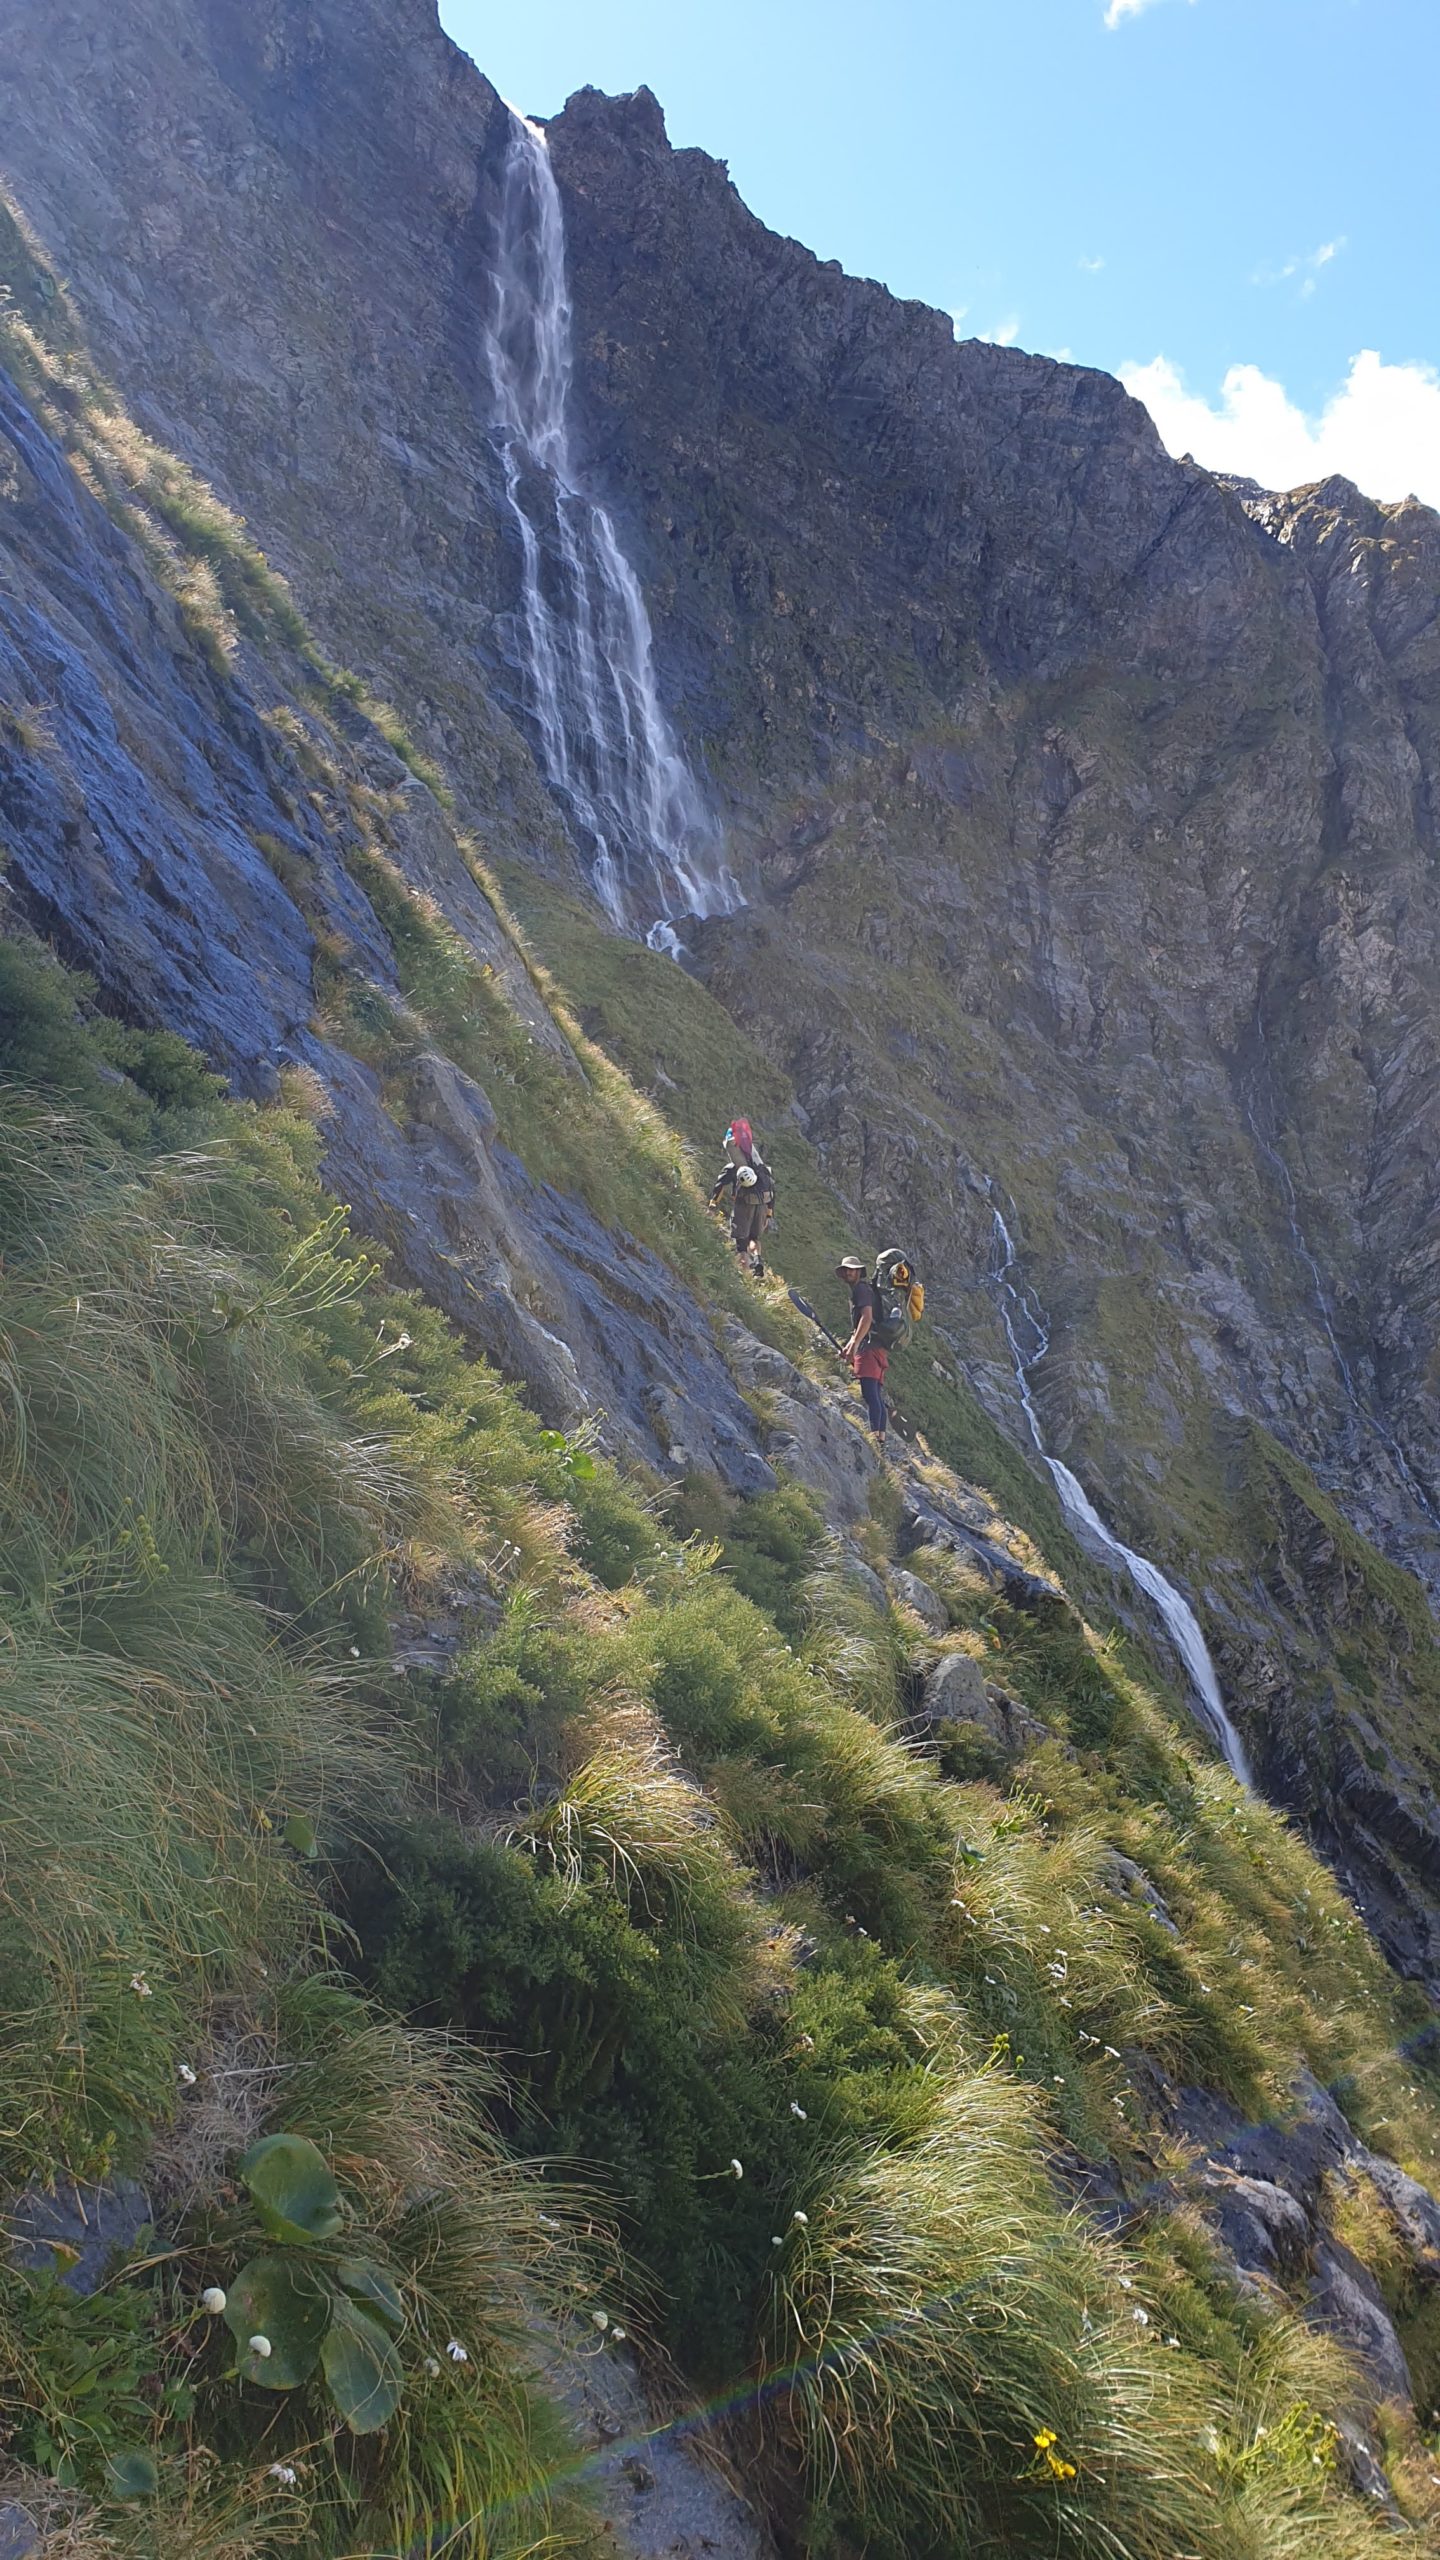
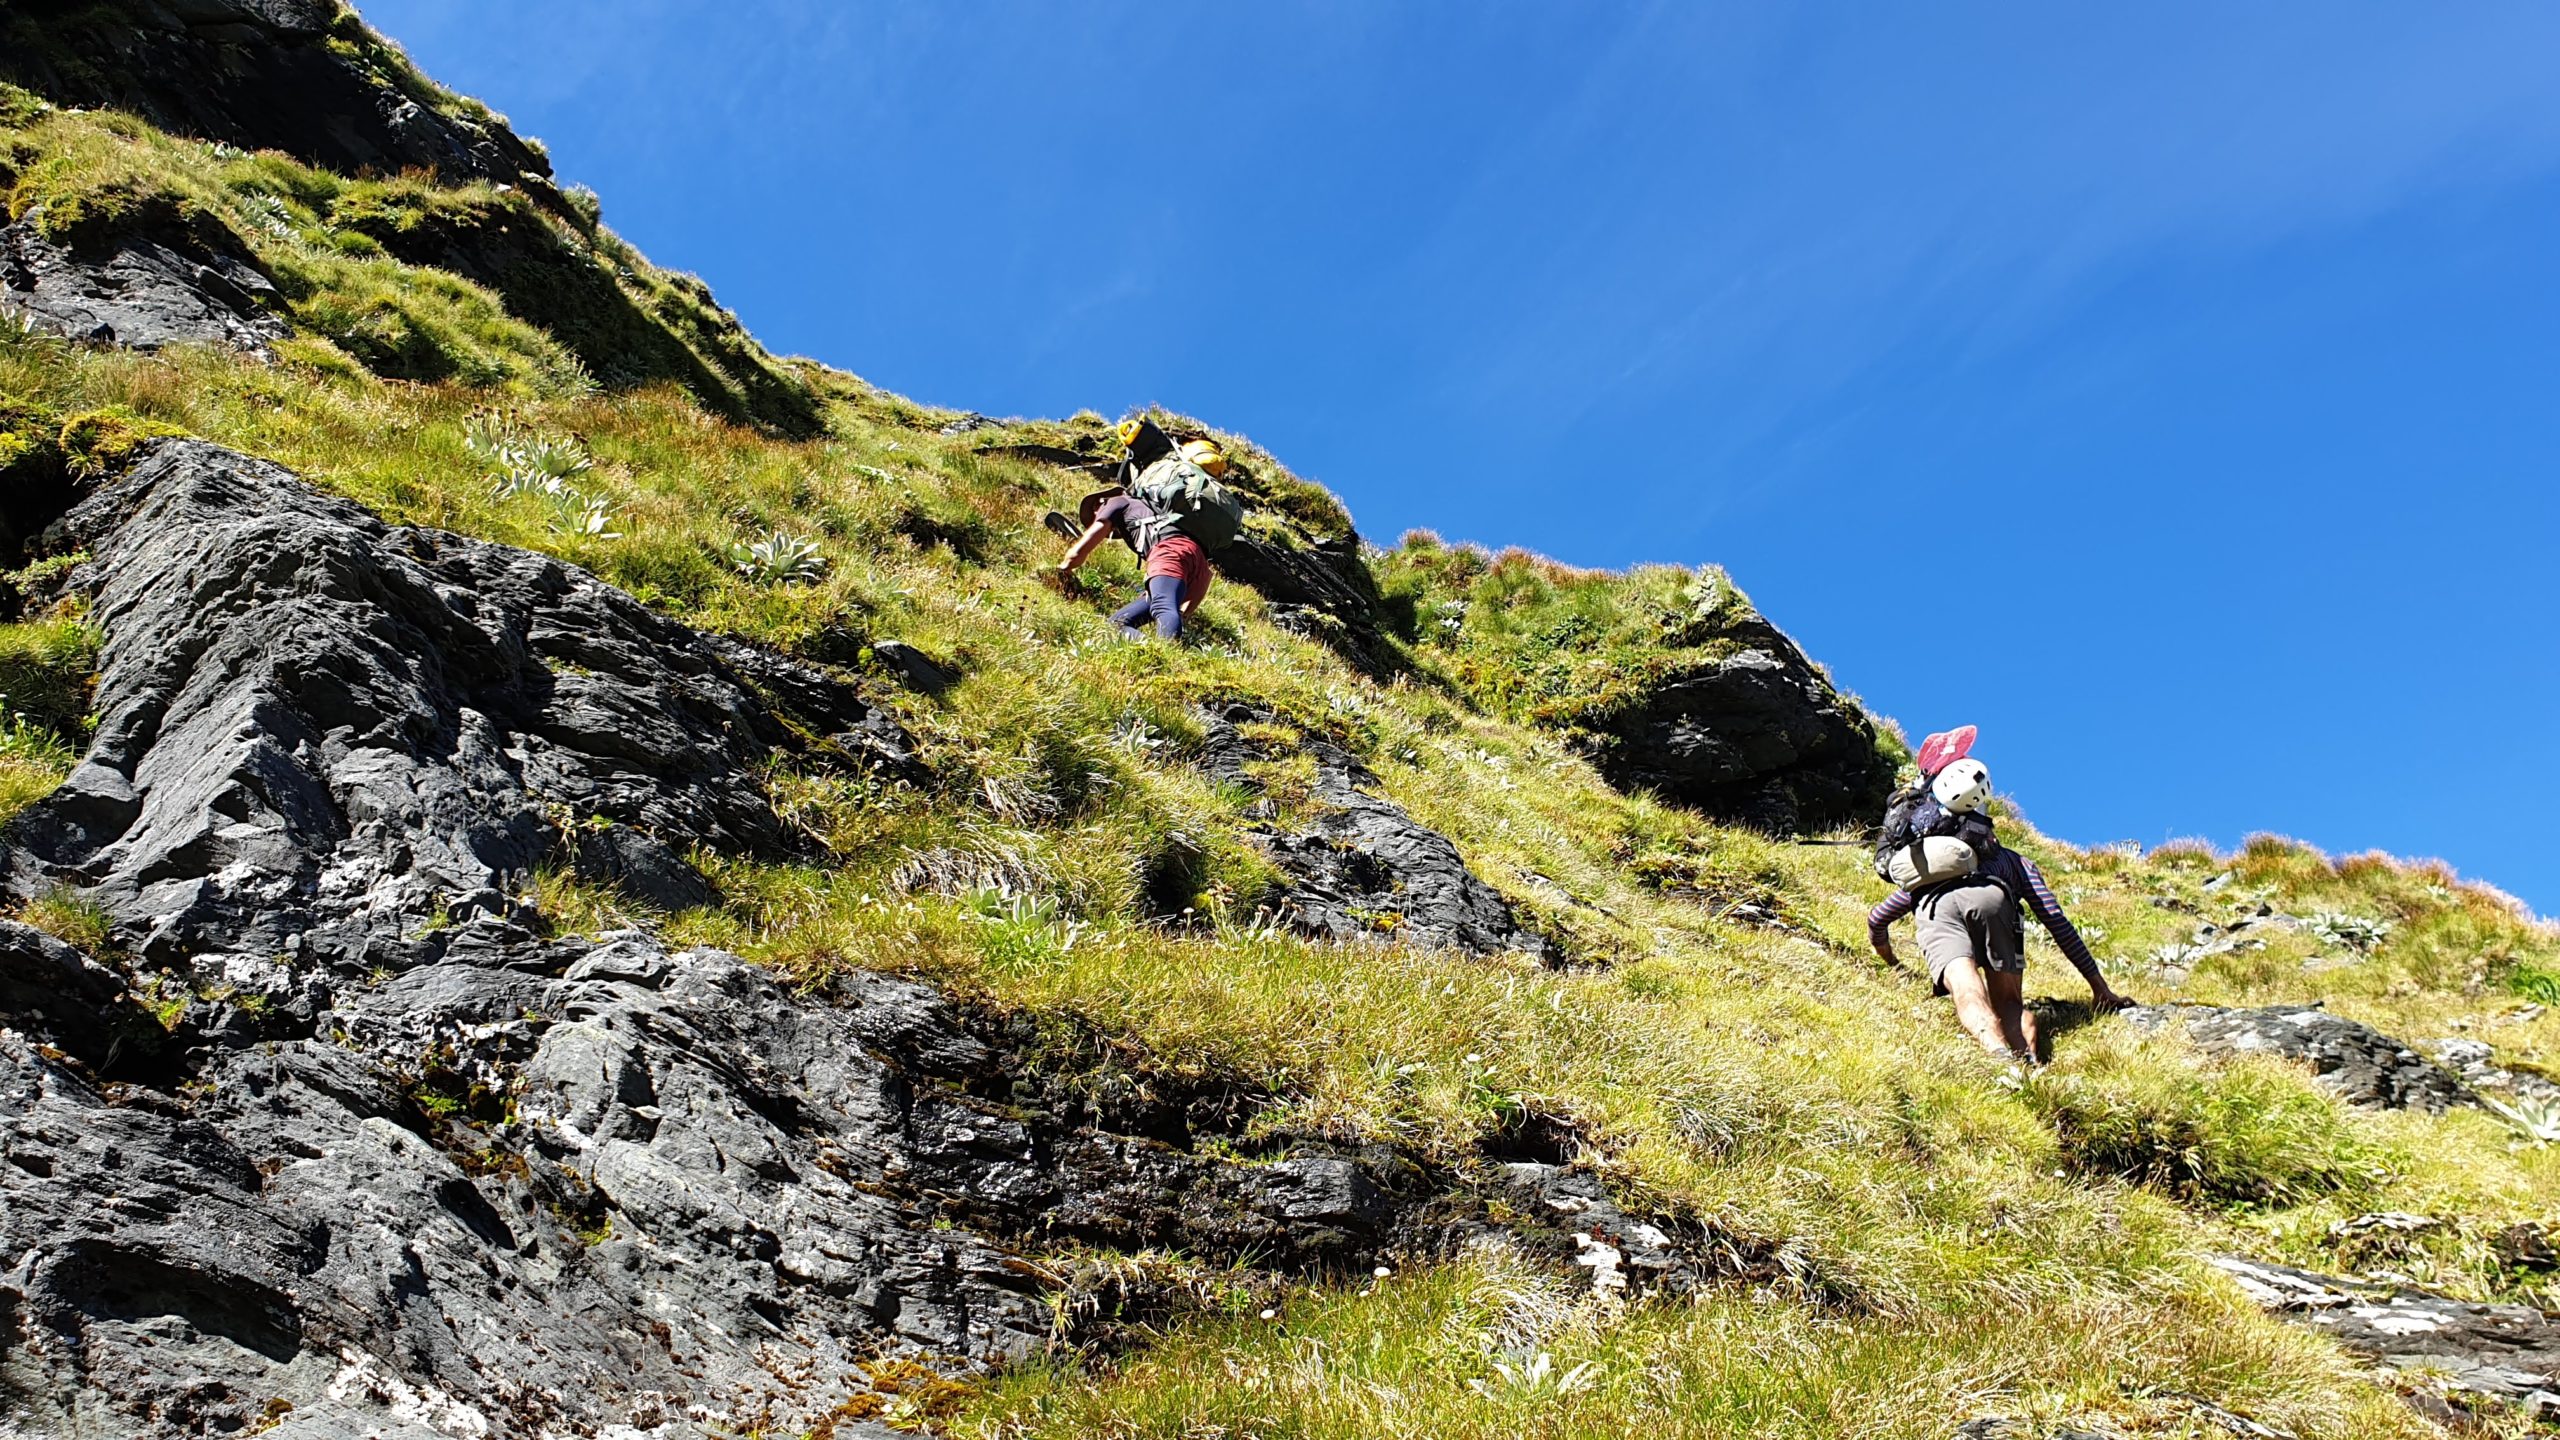
From here sidle across steep and sometimes exposed tussock spurs until you reach the broader main spur. Ascend the spur, which becomes exposed to huge bluffs near to the top. Here, there is a short steep tussock pitch to climb, which requires both hands to ascend. It’s possible to climb so that you’re only exposed to the Jimmy Creek bluffs rather than the Pearson Bluffs, but either way it is no-falls terrain. The climbing pitch is probably only 10m or so: but we used our throw bags for a little psychological support for one particular move.
Above the pitch is another great flat campsite where you can regain your composure.
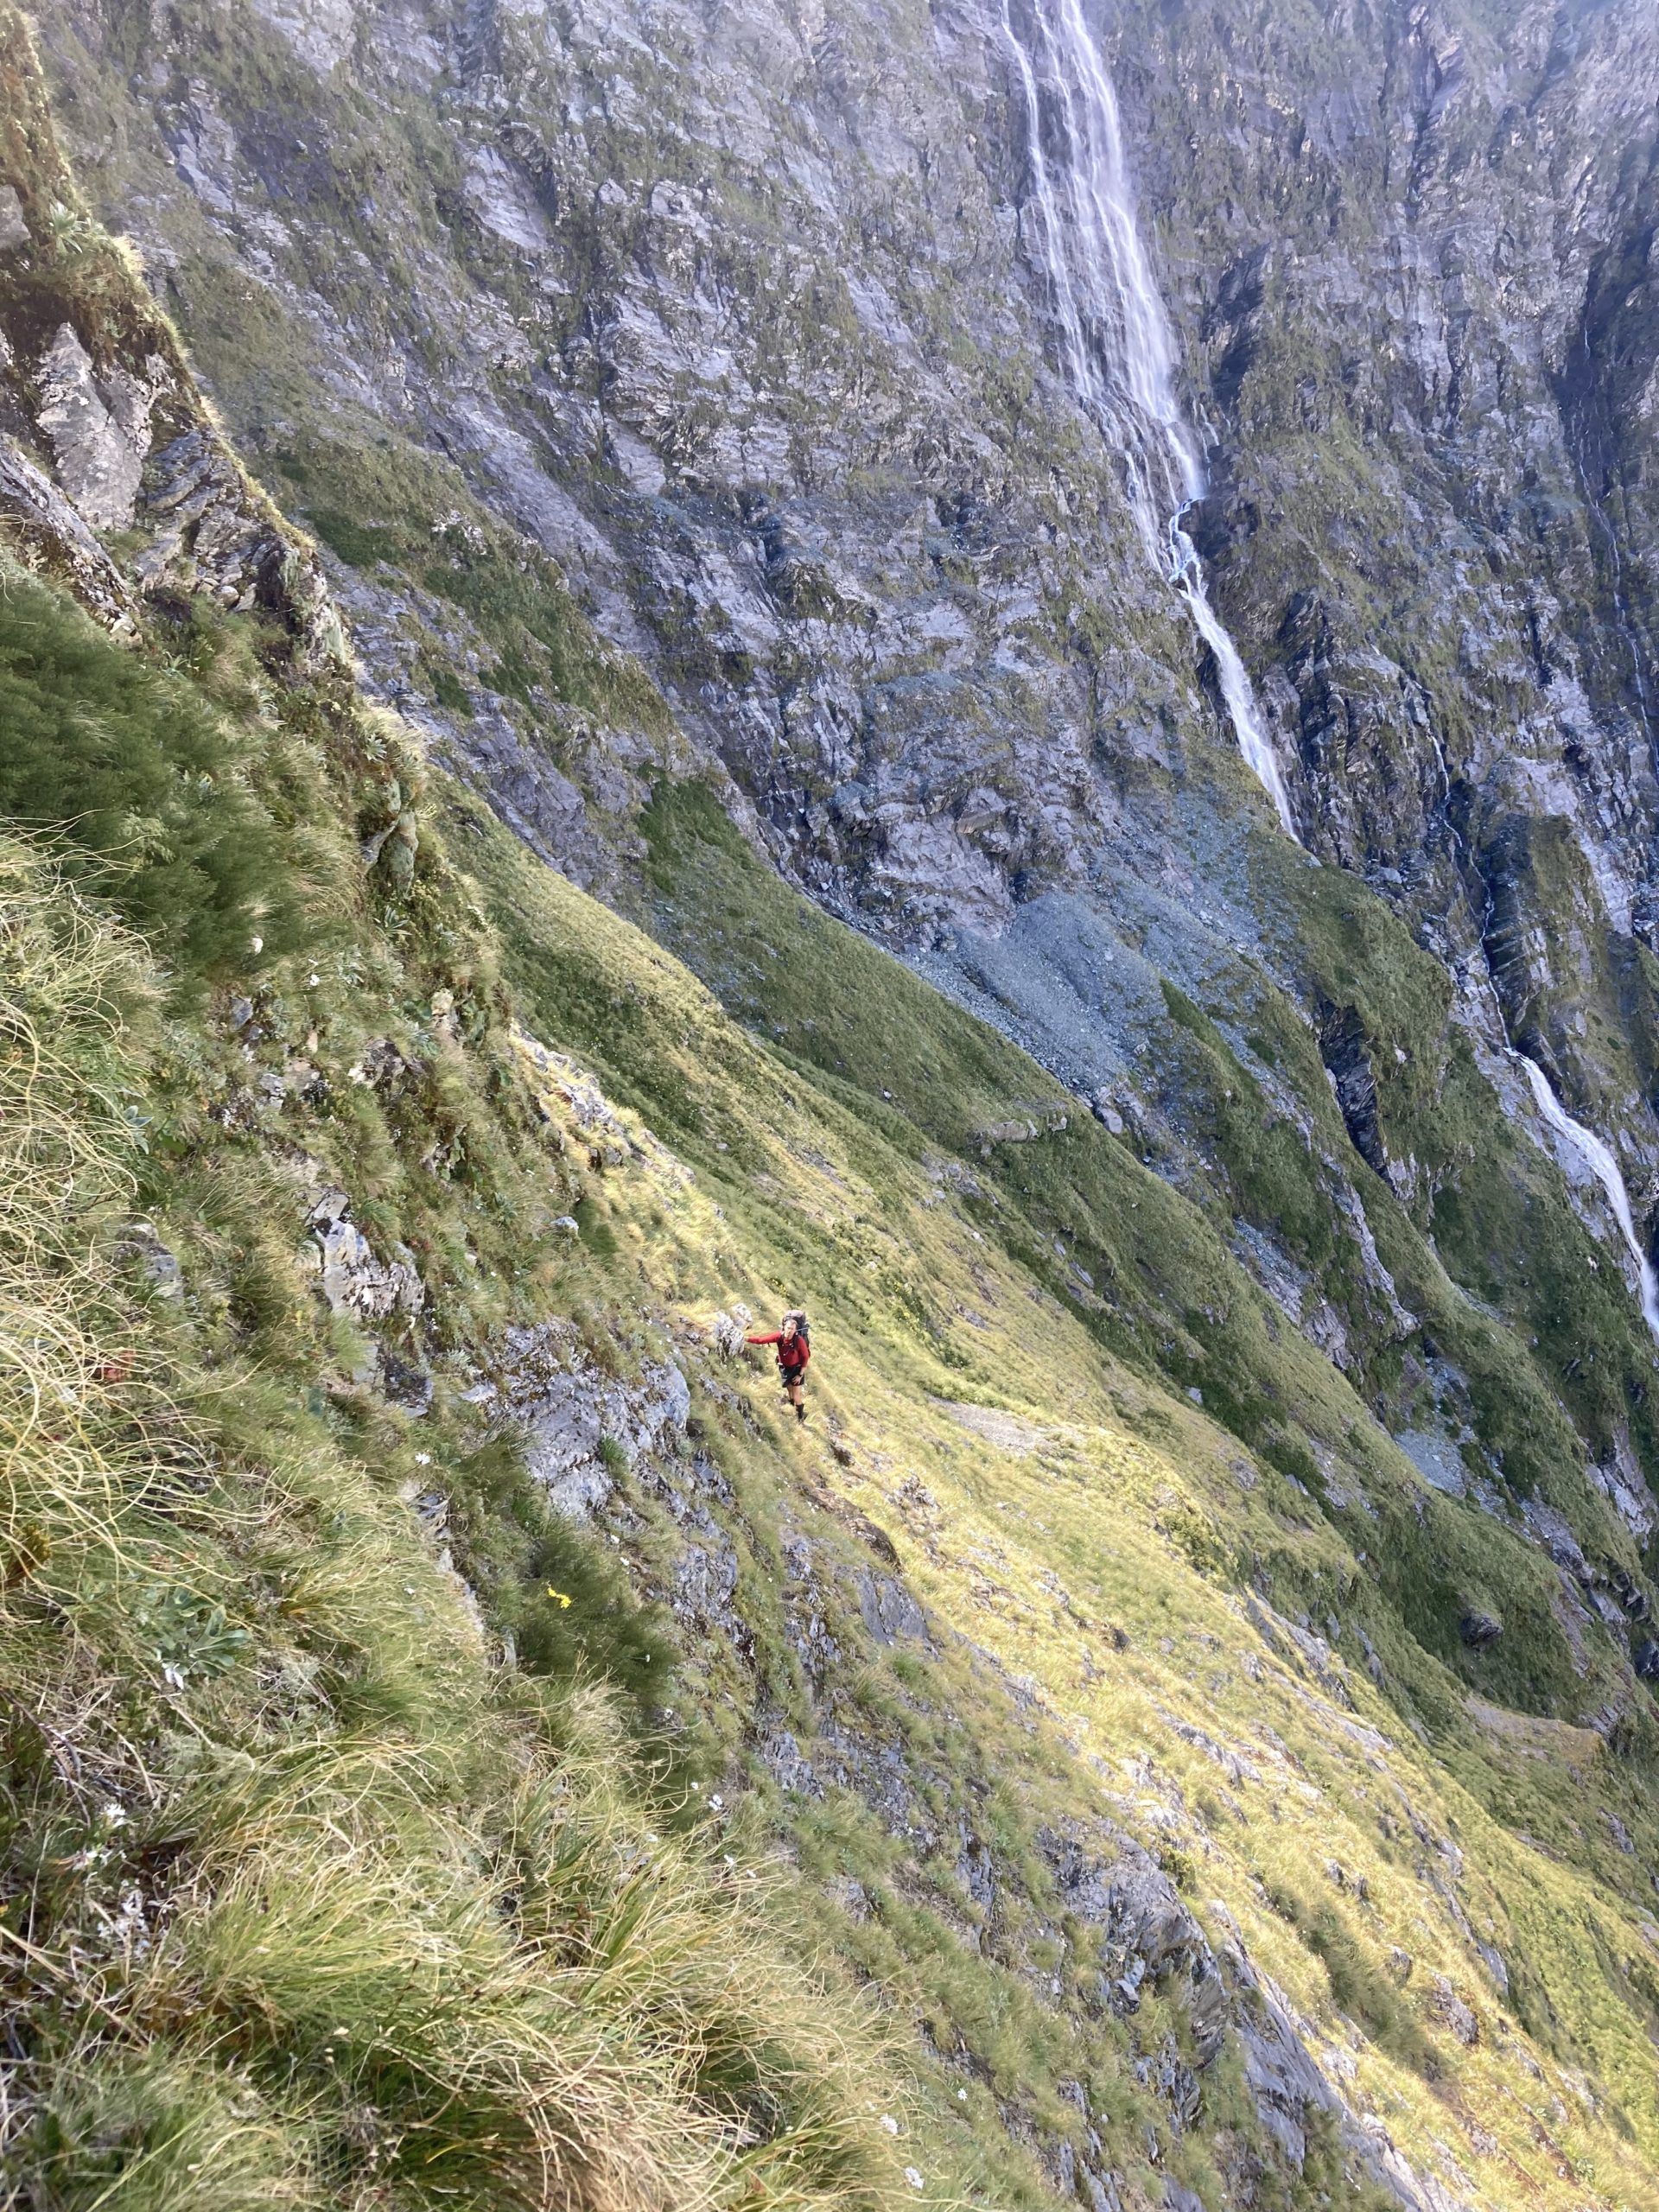
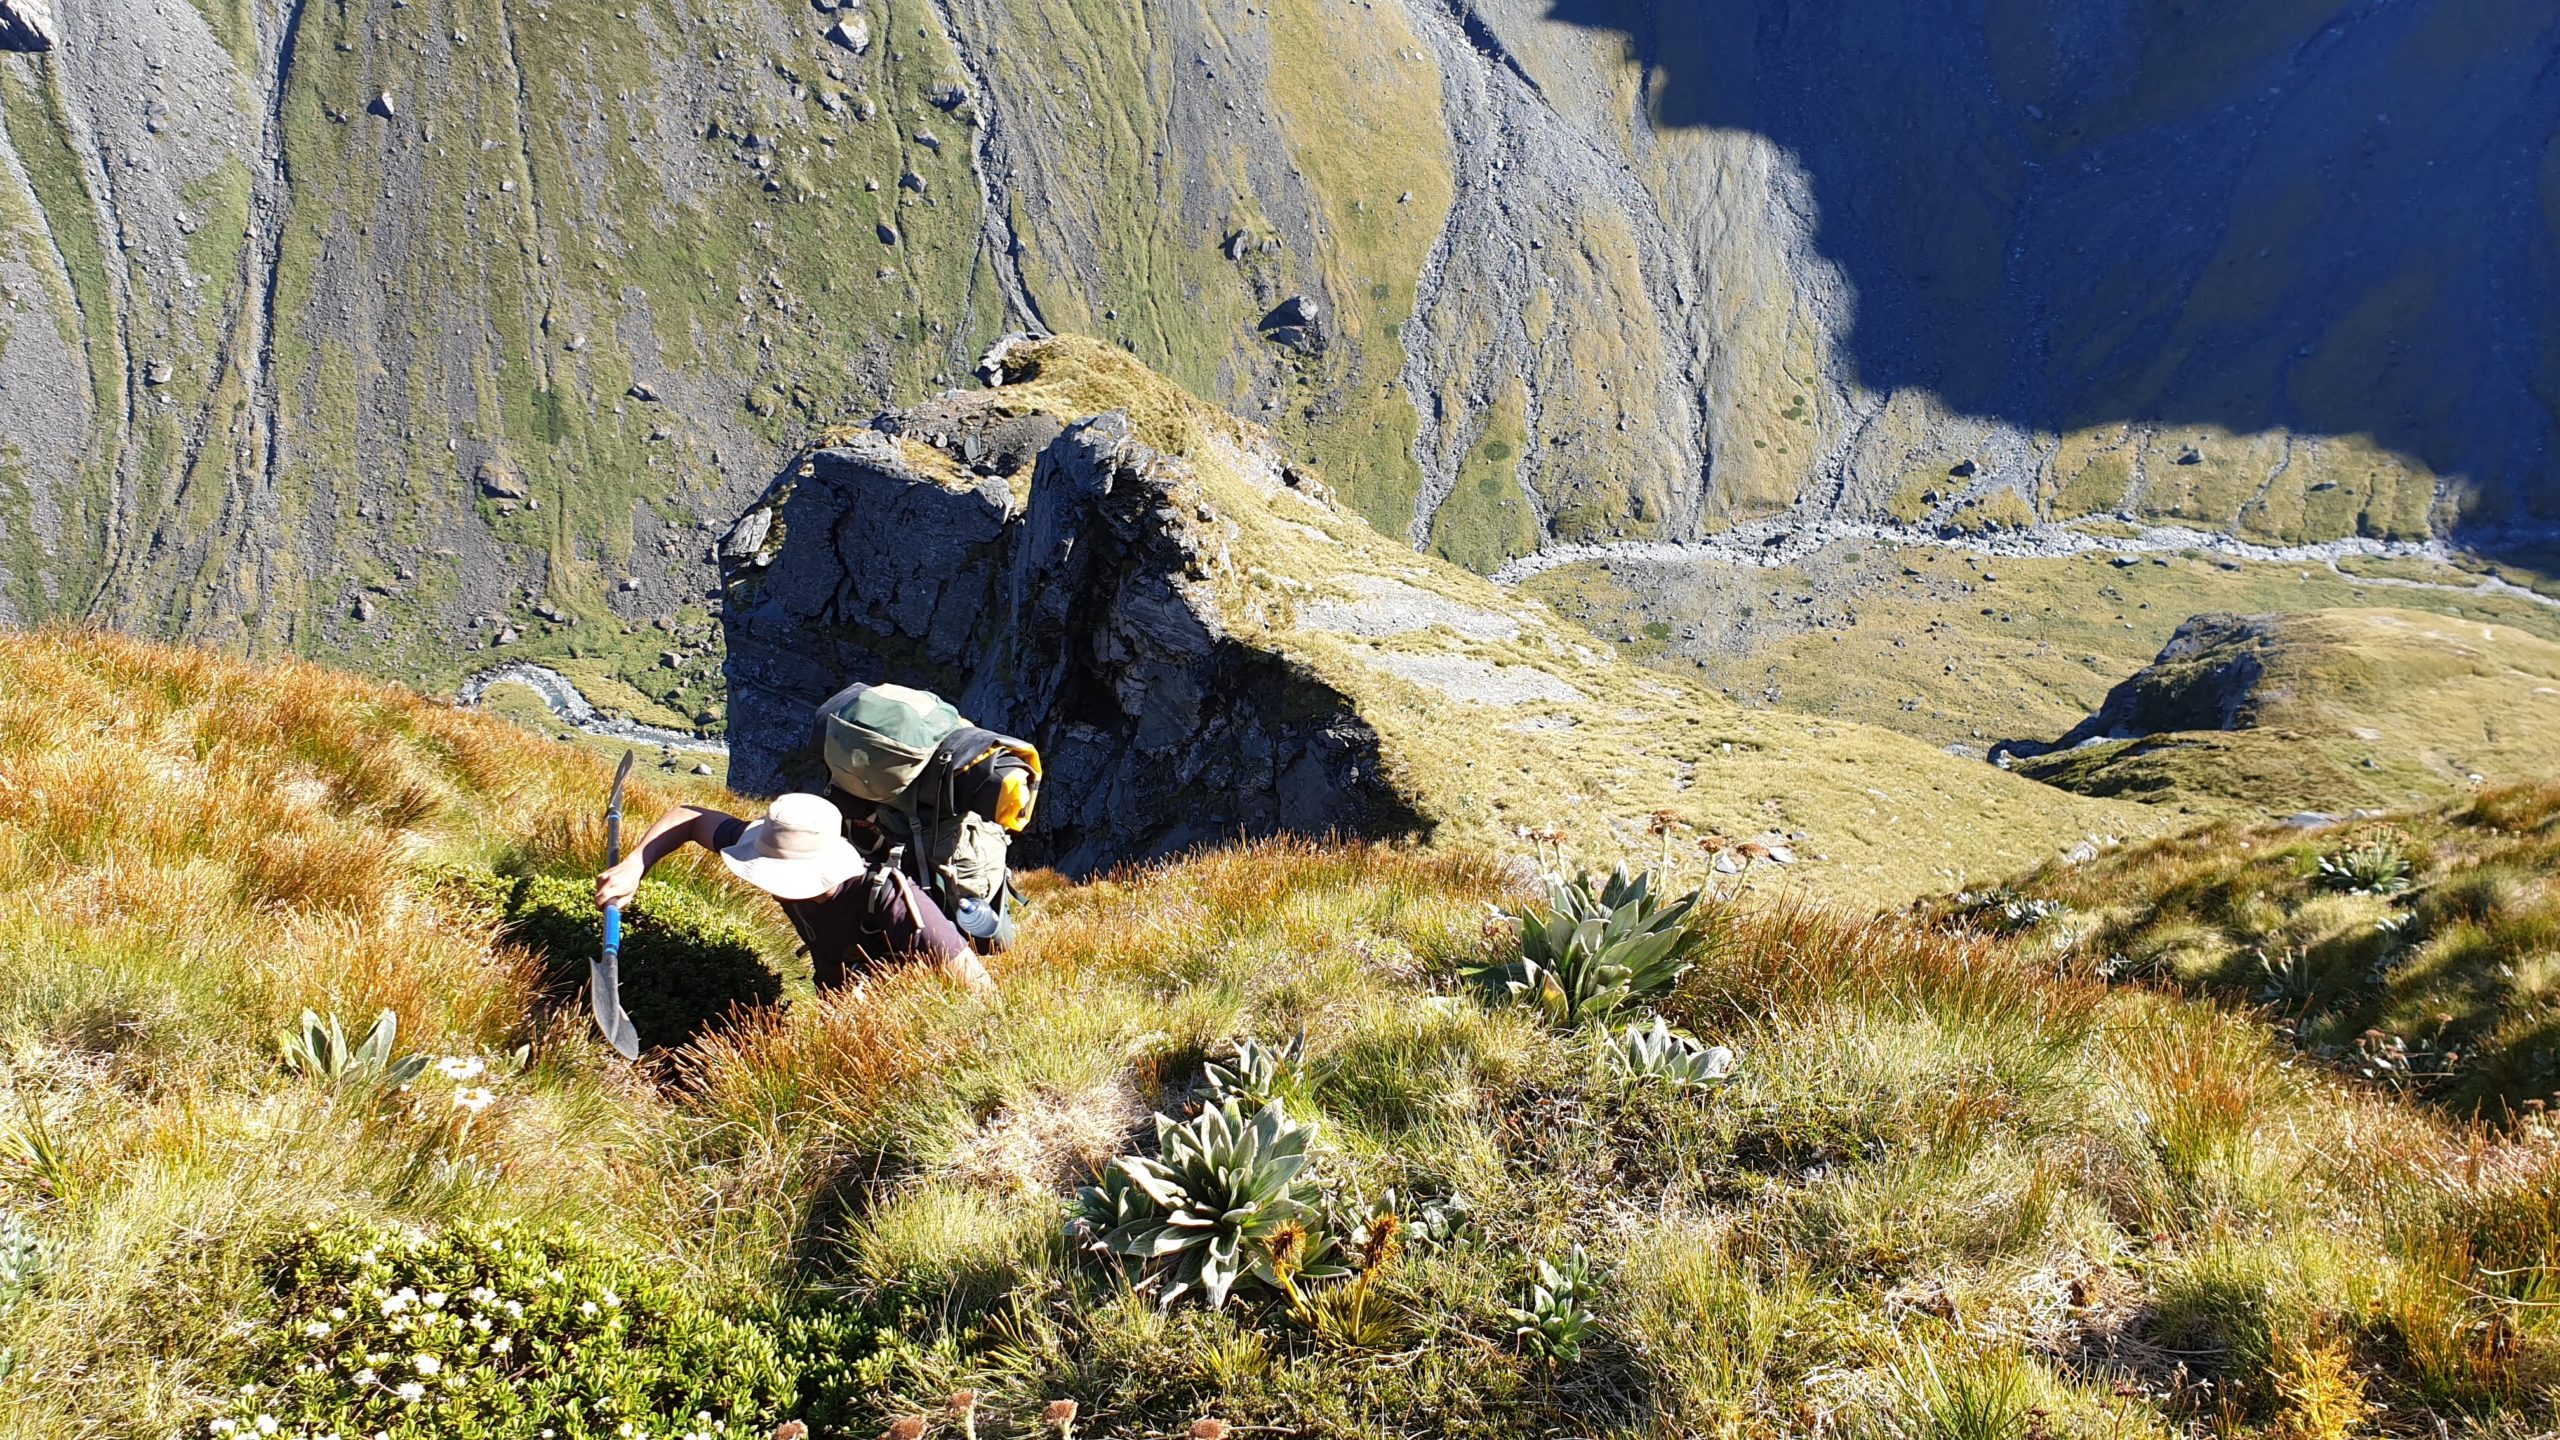
Sidle west on easy ground past a few stream until you get your first views of the Waiatoto: from the north face of Tititea/Mt Aspiring to the Therma Glacier to the Haast ridge, it is one to savour. (Plus there’s yet another nice campsite here).
The next crux is descending the 200m of elevation to the ramp. It is steep snow grass, with waterfalls and small bluffs. Start by descending up valley and routefind your way carefully down.
At the 1400m contour you’ve passed the exposed section: from here on it is much easier.
Follow the ramp down, and you’ll soon be able to see the oasis which is the mid-Bettnie camp.
At the scrub-line wade into the rough scrub bashing! There are some reasonable deer trails up here, so if you find one, do your best to stay on it.
At the bush line, the deer trails on the spur are as good as some DOC tracks.. At the 700m contour, it gets a bit steeper and we lost the deer trail. Reasonably straightforward to bush bash to the saddle, and then down to the mid-Bettnie camp.
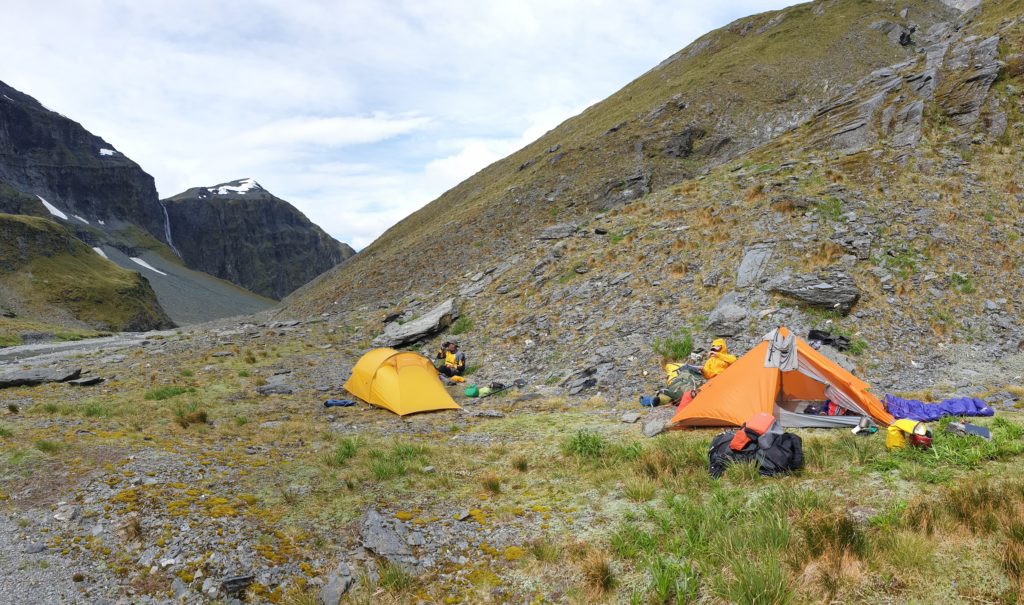
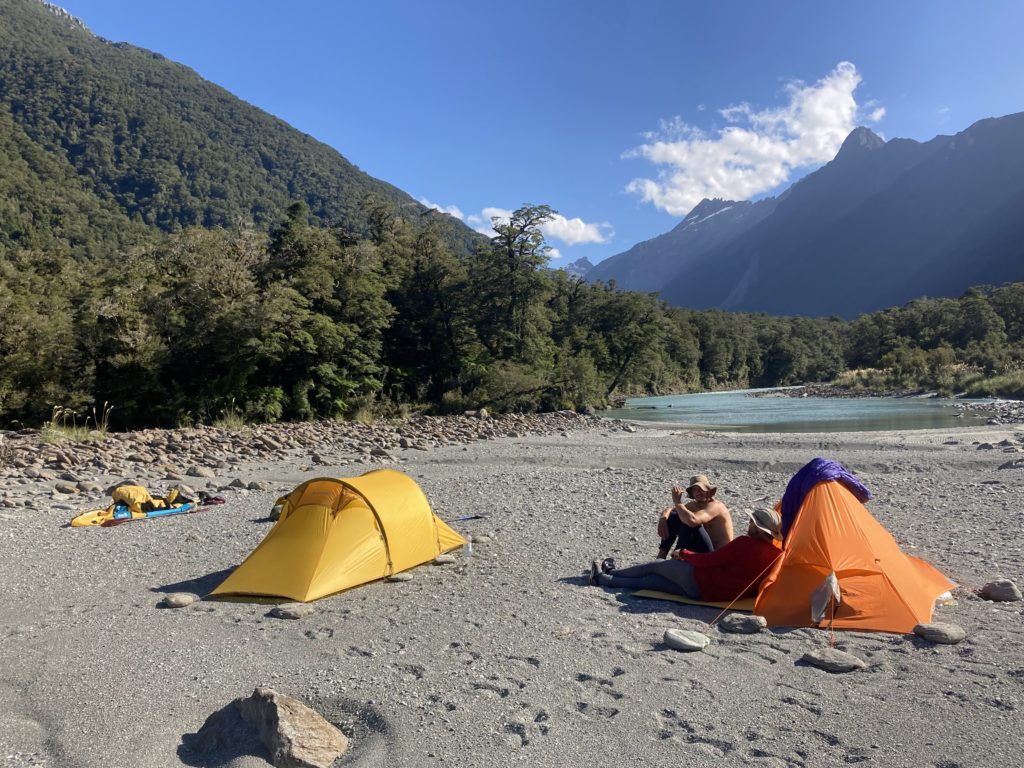
Mid-Bettnie camp is glorious: flat grassy campsites on a small terrace above a swimming spot in the river, sheltered from winds in any direction, views of the Bettnie river chasm & waterfall in one direction, and glaciers of the Haast Range in the other. Plus, very few sandflies!
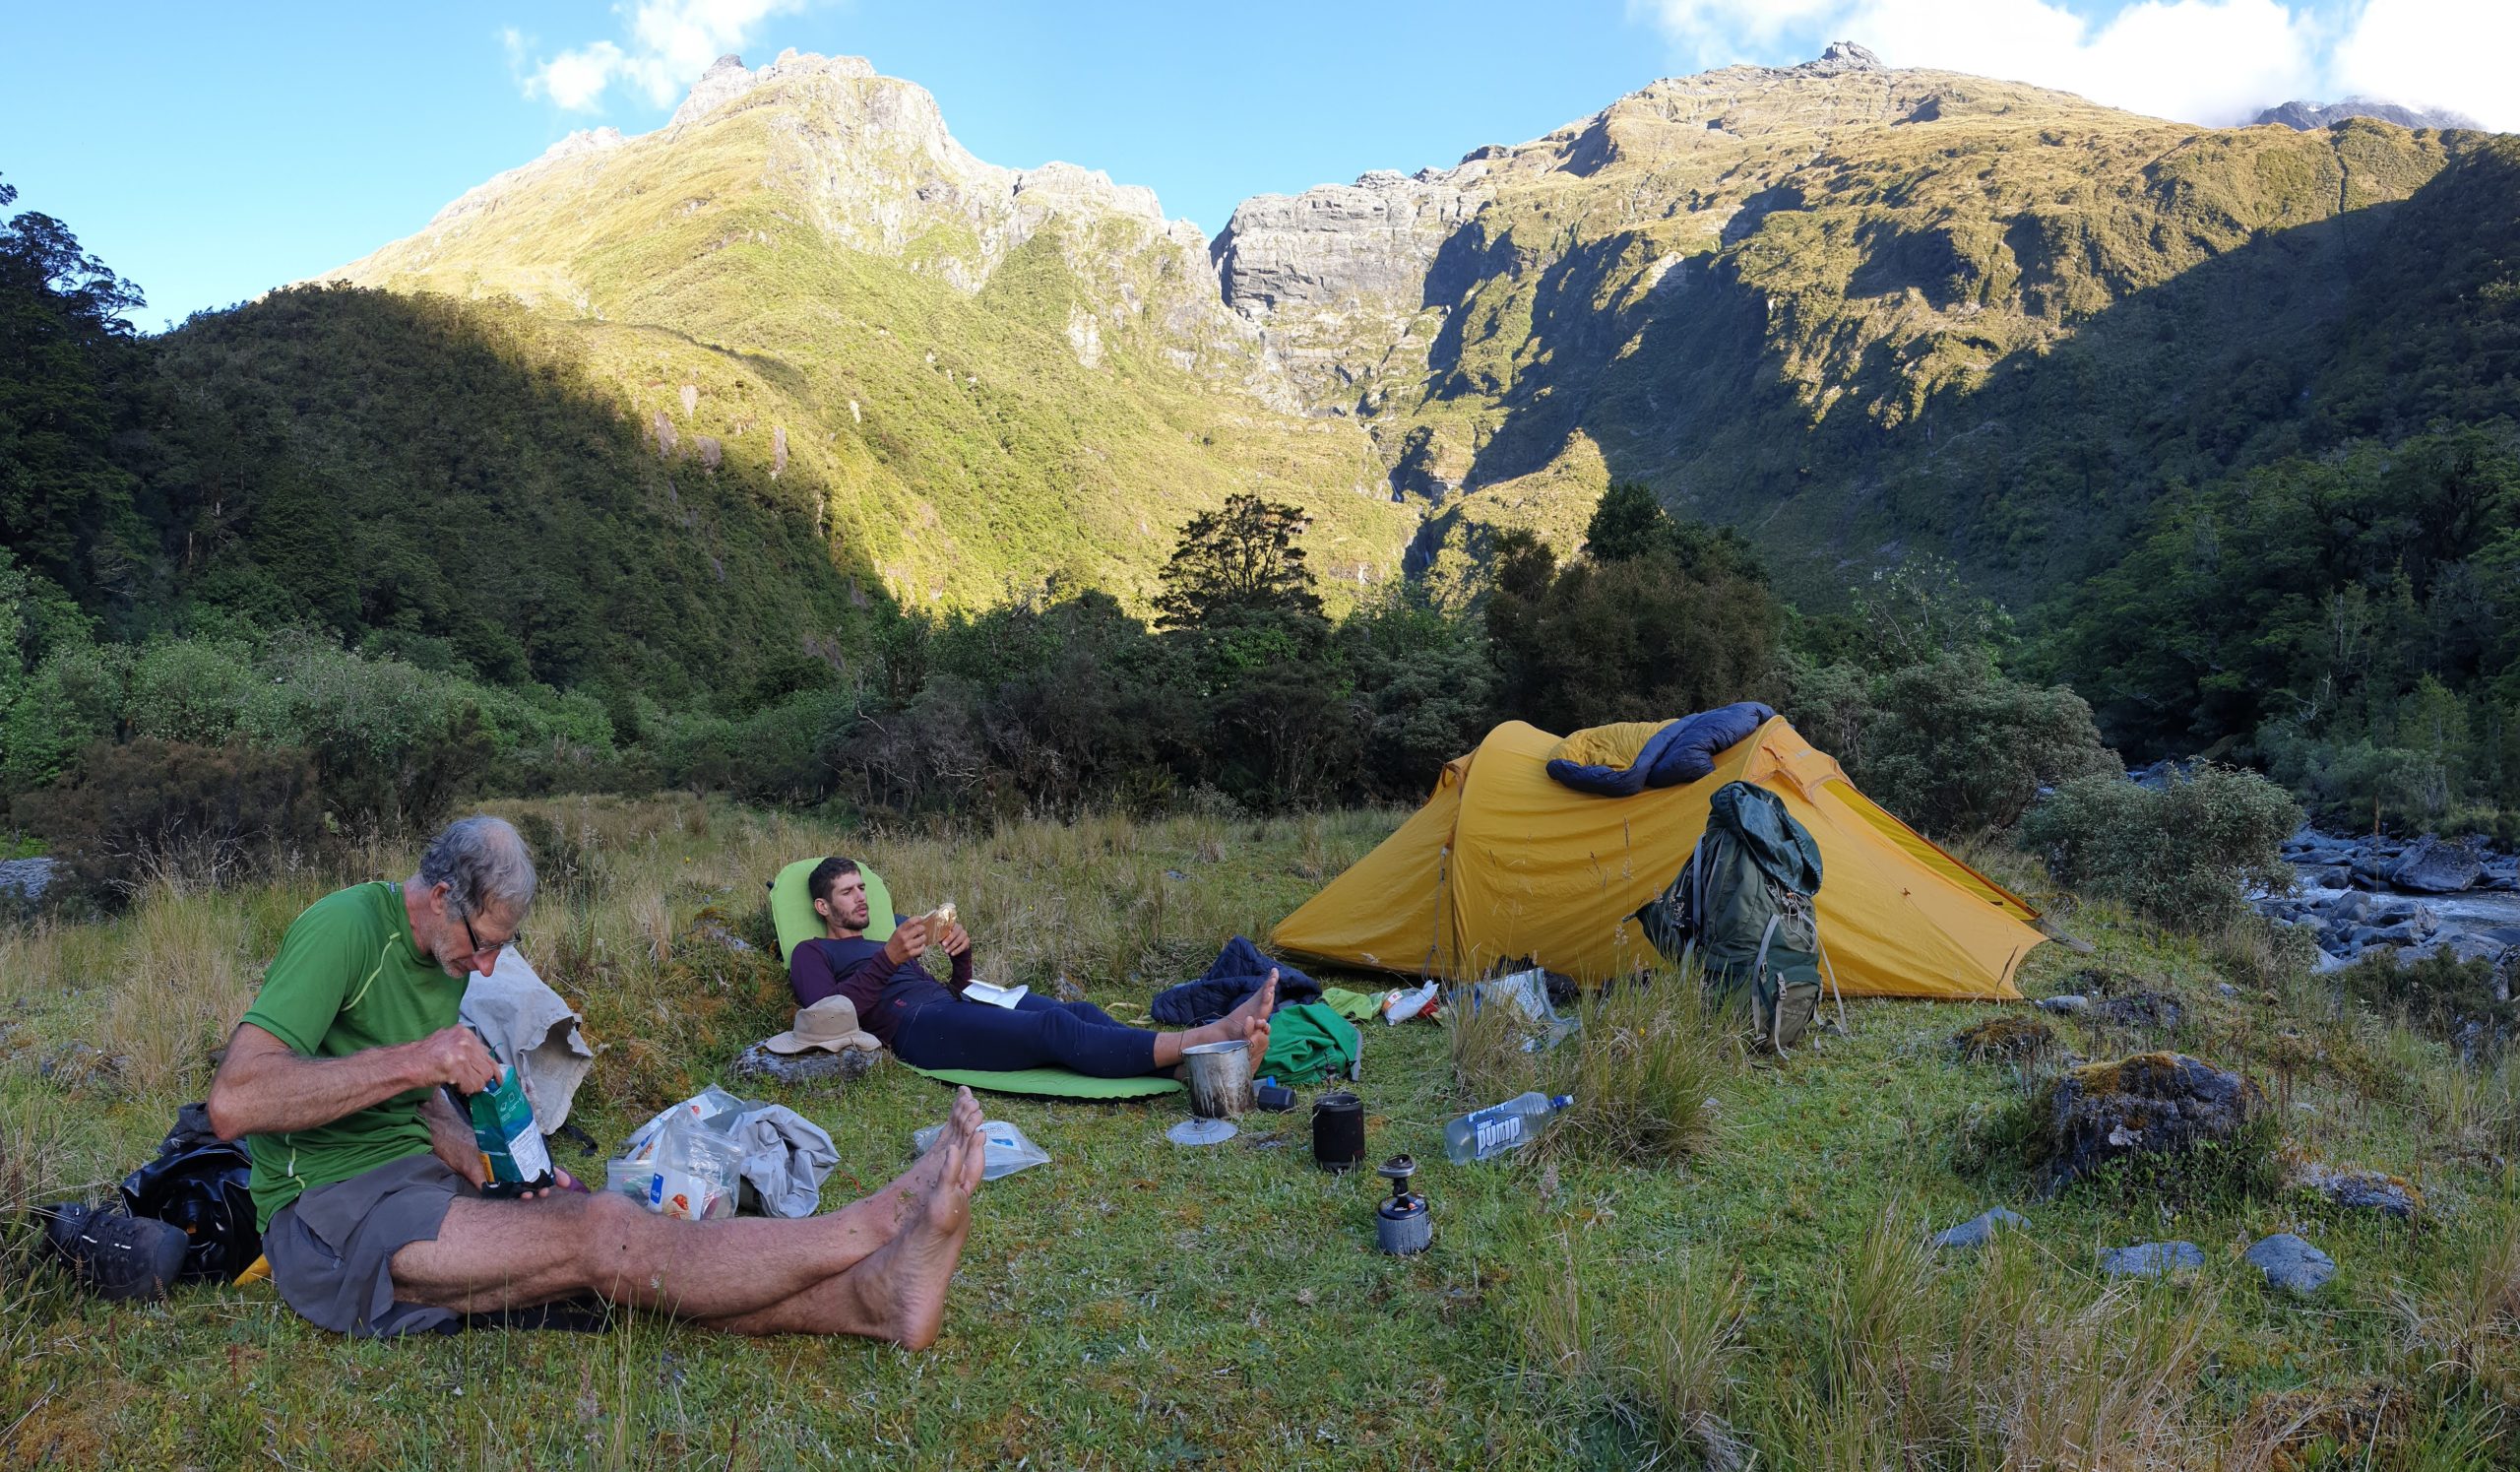
From here to the end of the trip is a comfortable 2 days: Not much would be gained by pushing on, other than being able strike camp directly into packrafting mode. So I suggest you stay at mid-Bettnie, its magic!
Mid-Bettnie to Ferny Flat: 10hrs
- 2hrs Mid-Bettnie camp to Waiatoto River
- 45mins to put-in
- 7hrs Paddling to Ferny Flat
It’s worth an early start today to be in a good camping position on the river tonight.
Pick your deer trail back to the saddle, then follow the spur up and over .704 and down the least steep line towards the Waiatoto. There’s some huge boulders to negotiate and honest bushbashing to be done. At the Waiatoto there are huge slip faces and bluffs, head down-valley until you can scramble down to the river.
Rock hop down river for about 45mins, admiring the grade V rapids as you go.
We put on opposite Lonesome Creek and went straight into grade III paddling until nearly at the Bonar River.
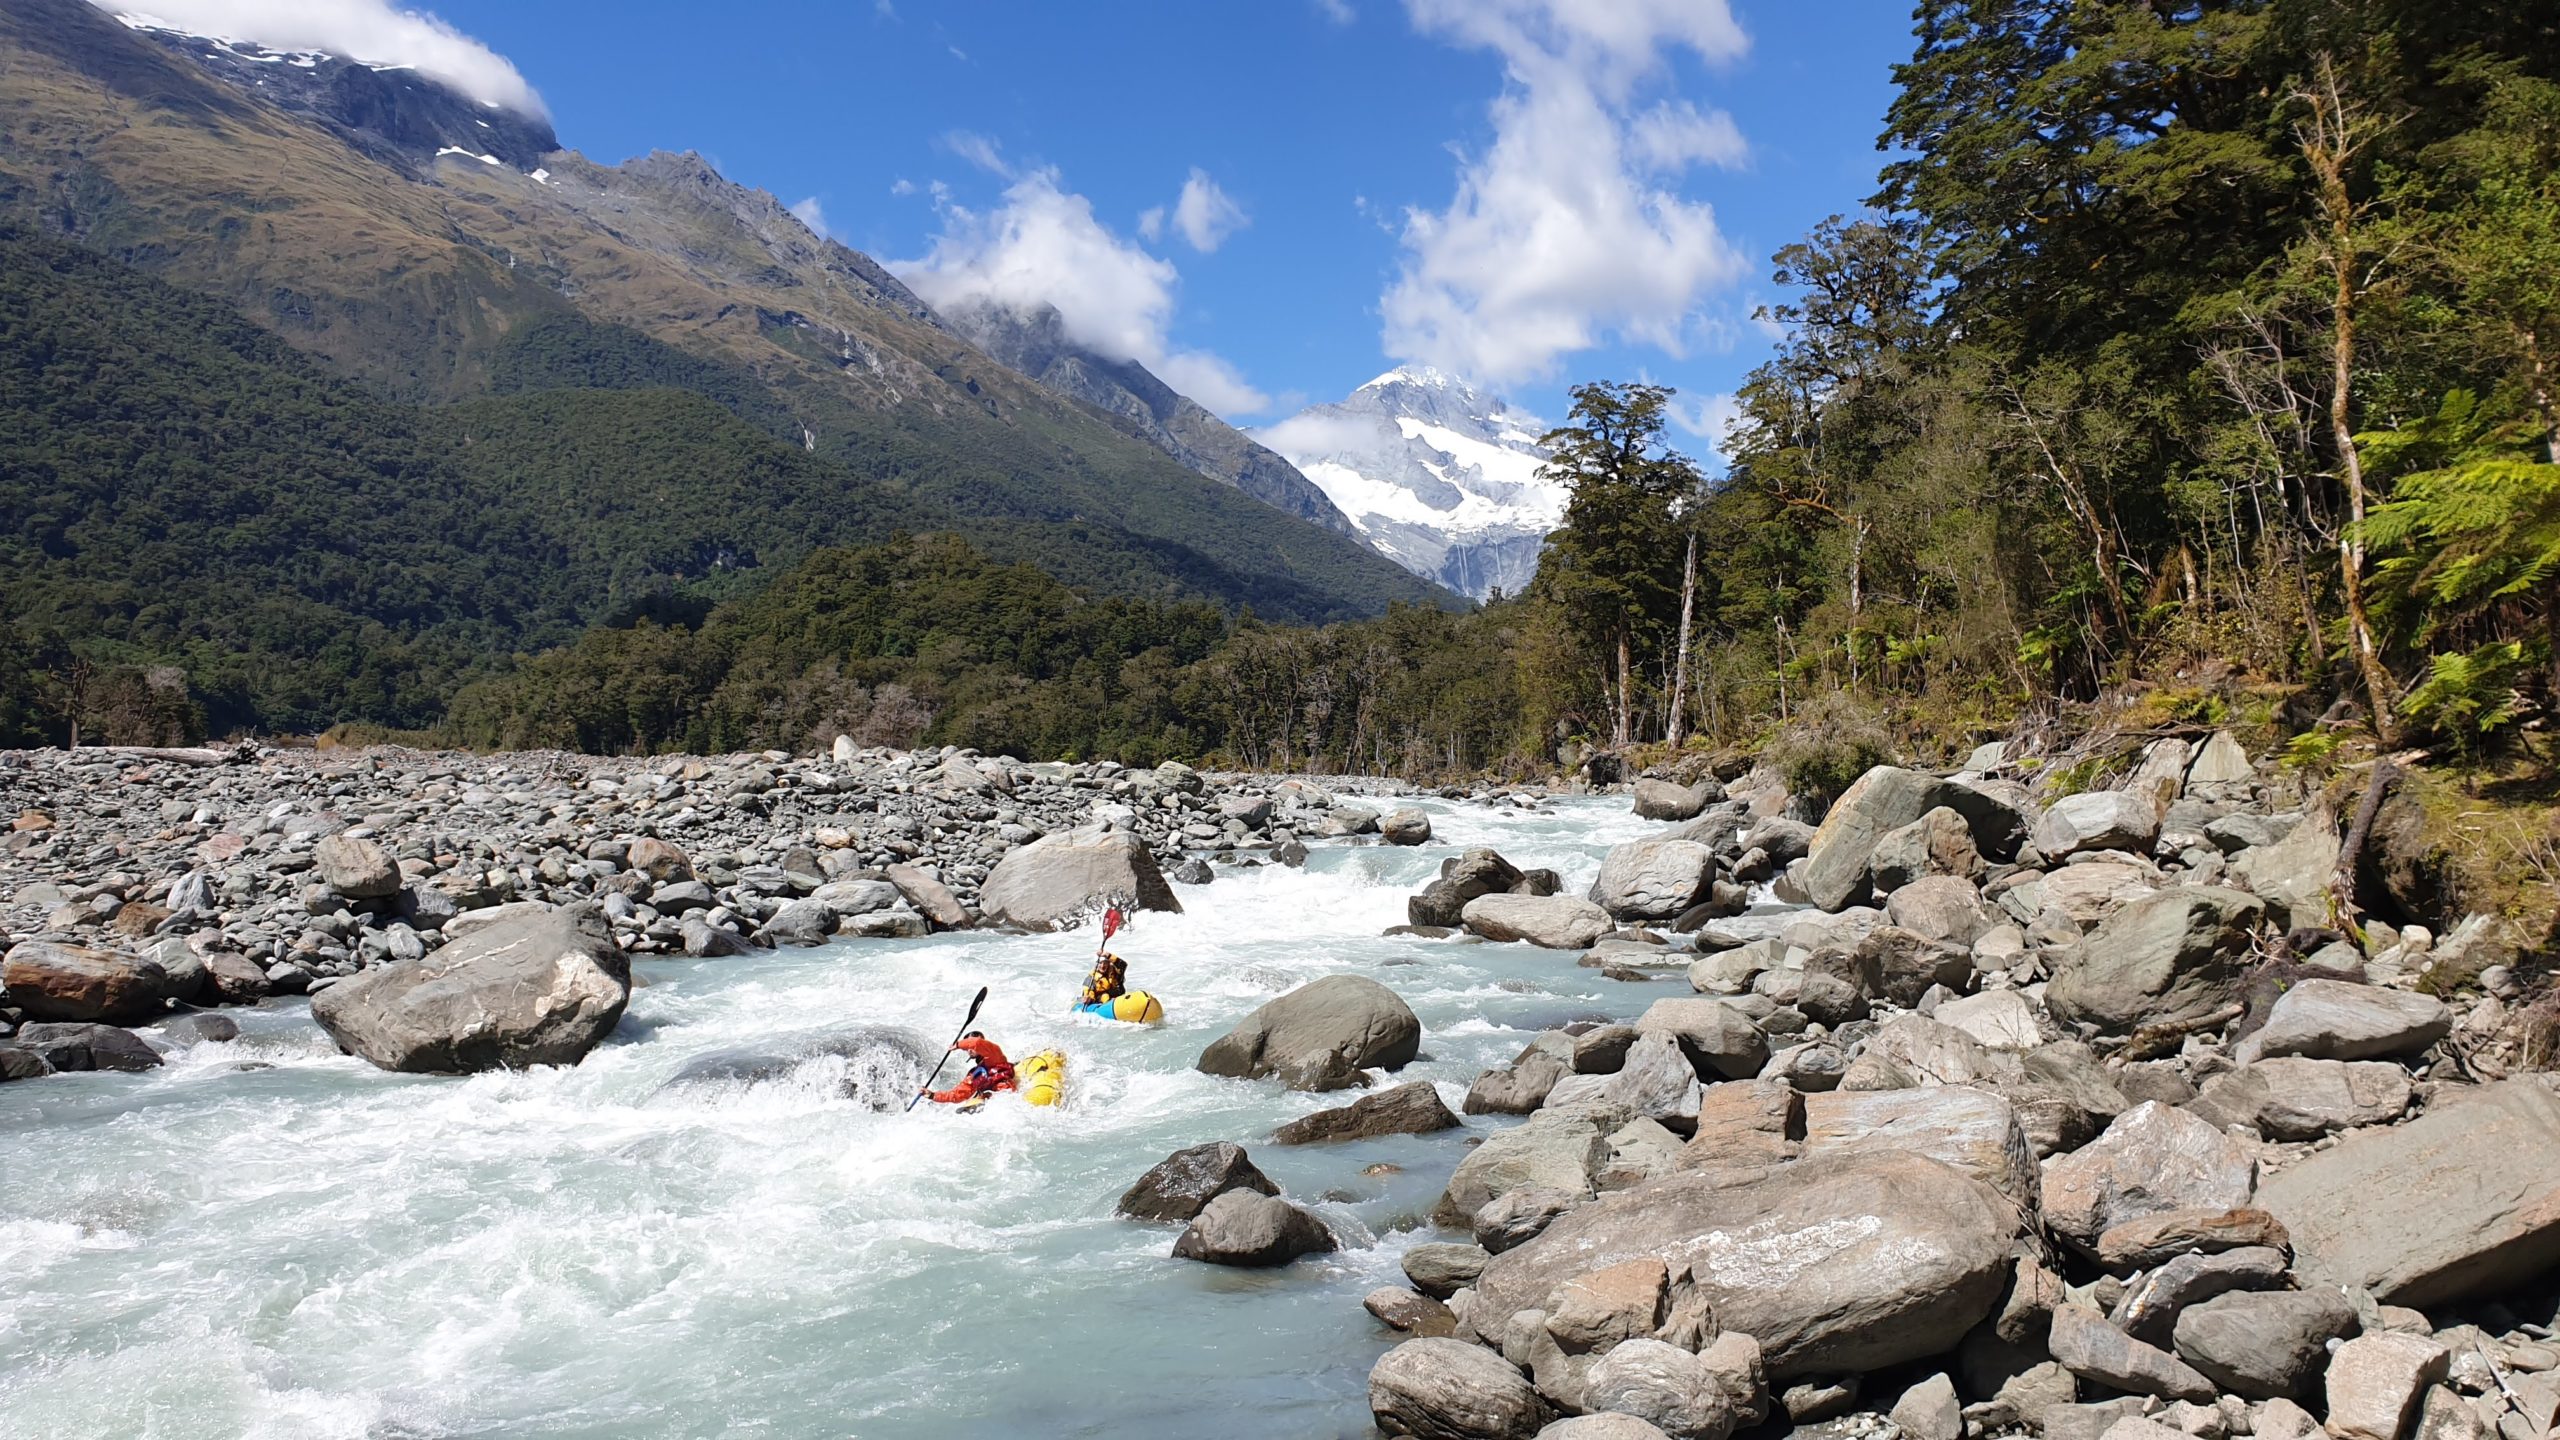
Then there’s looong sections of grade I/II water, with one or two grade III rapids.
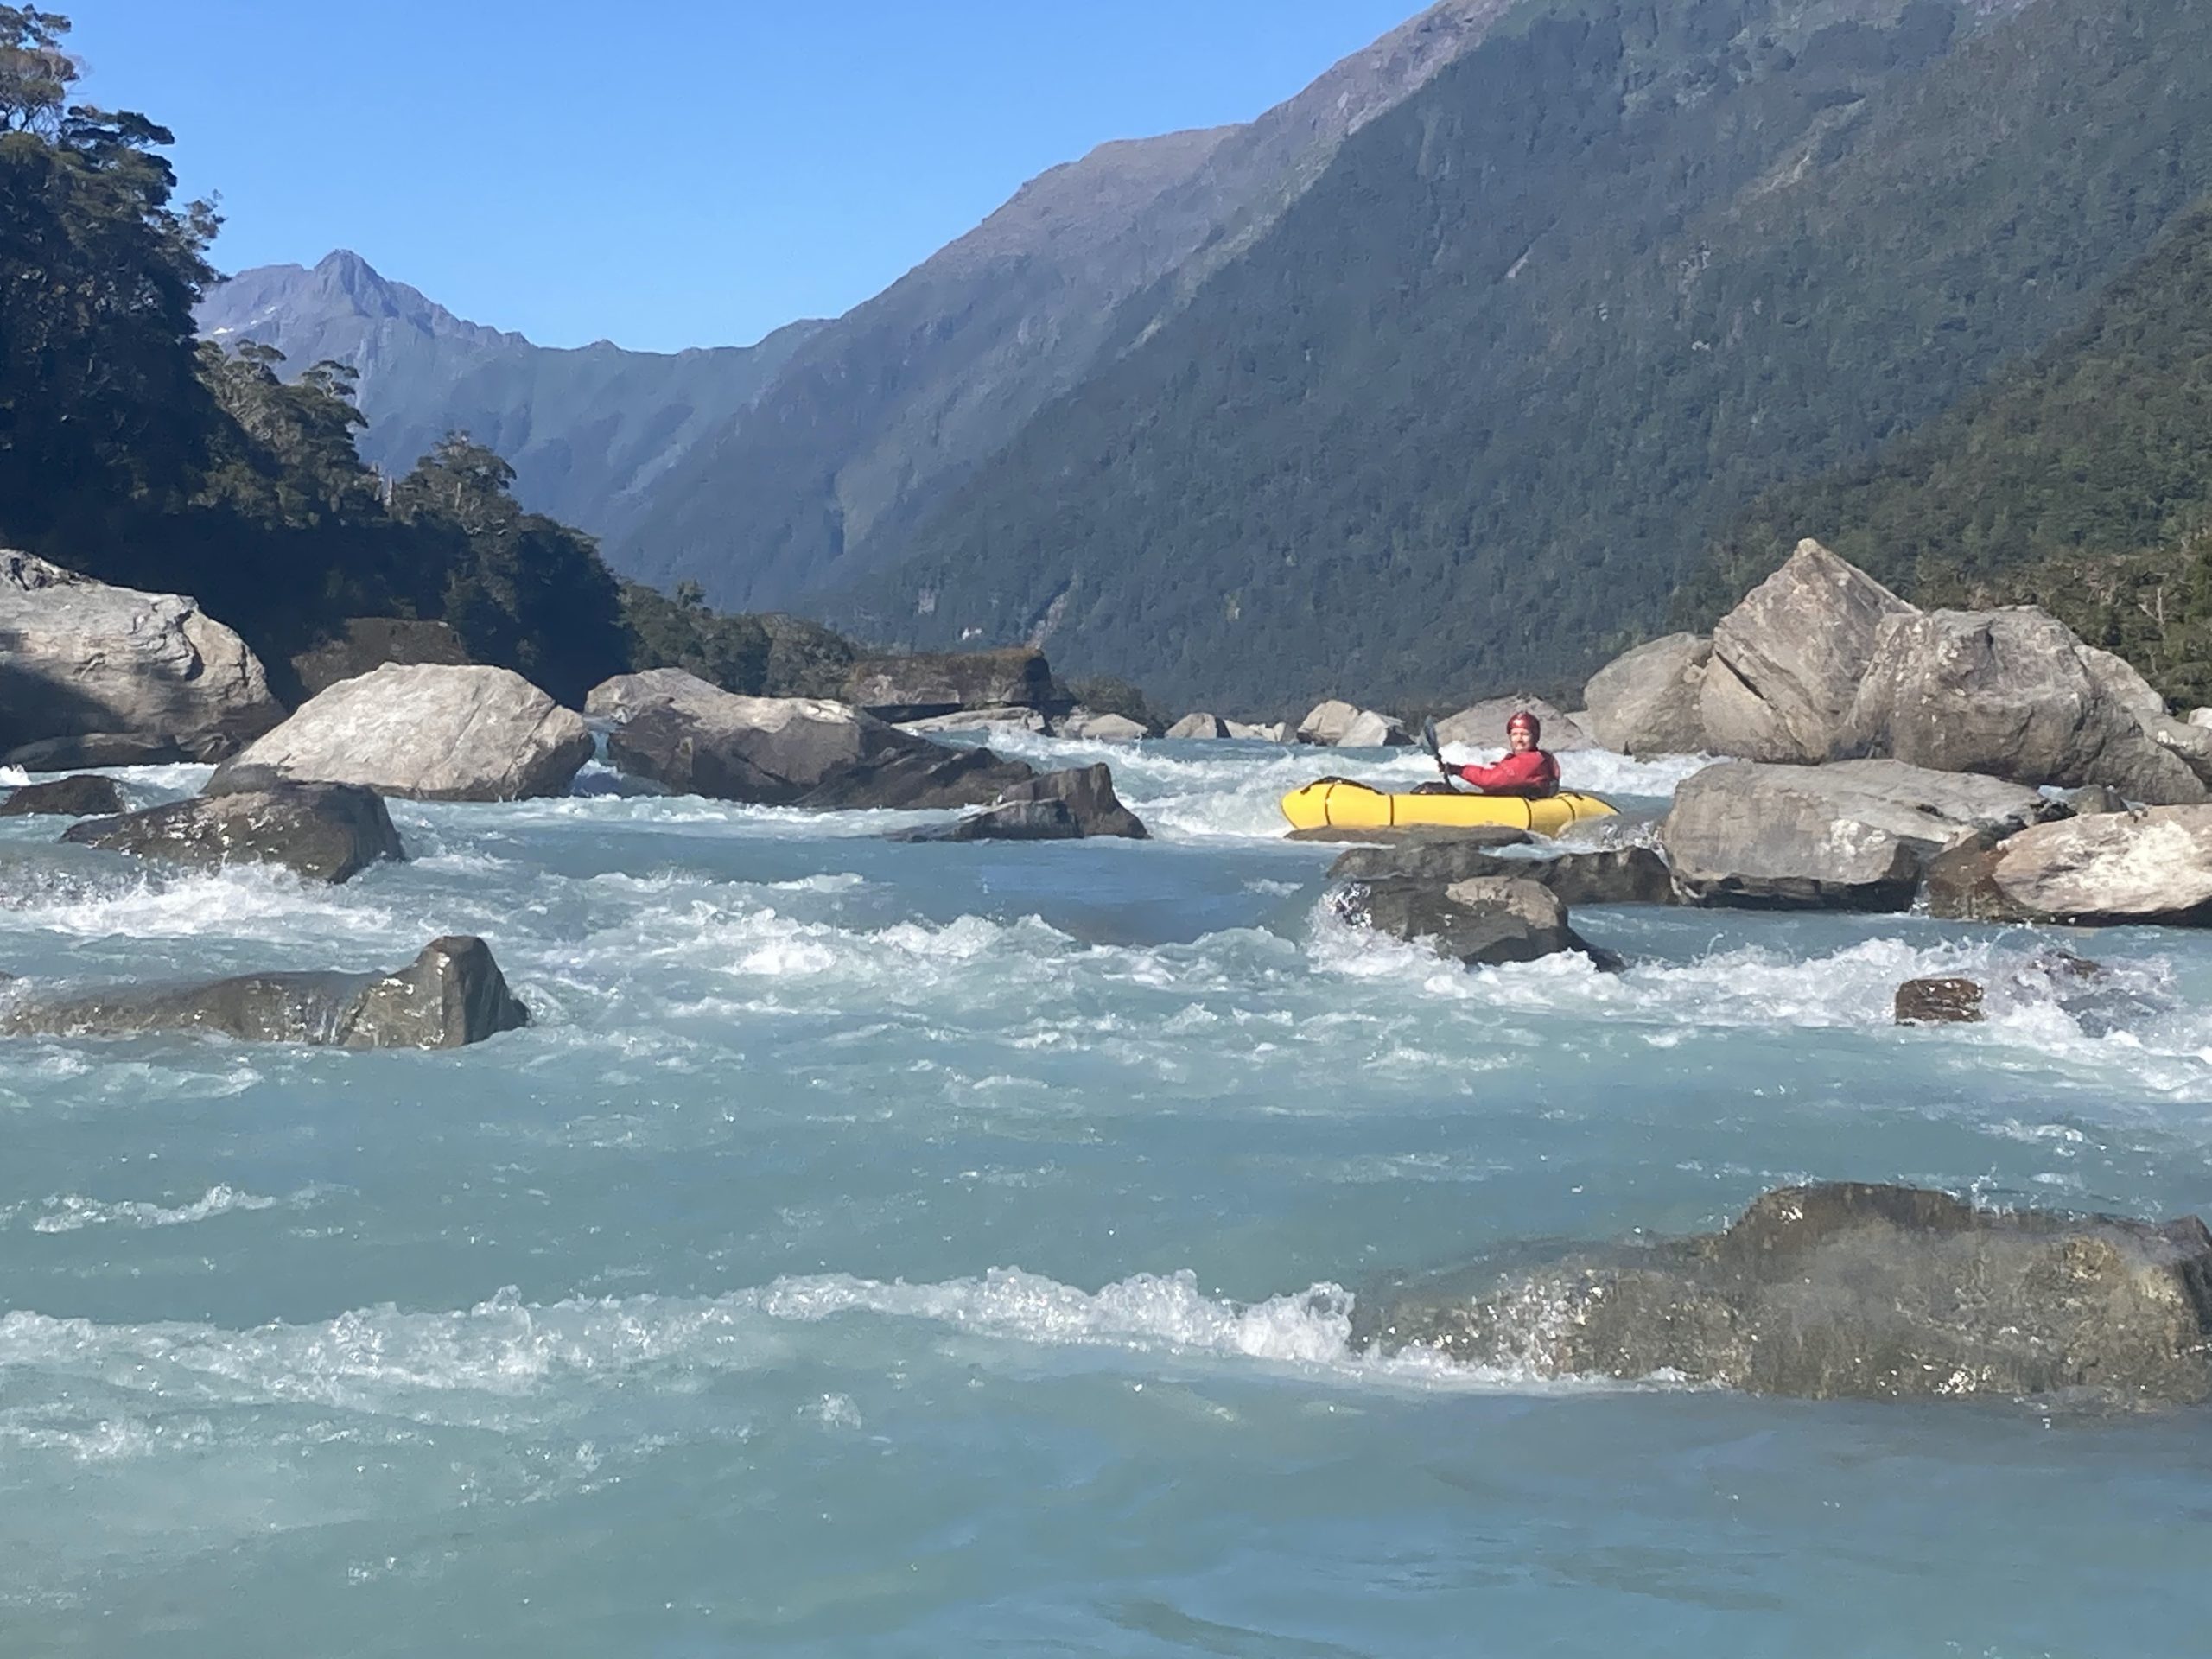
The Drake River heralds the start of the main part of the river’s whitewater action, starting with some grade IV action.
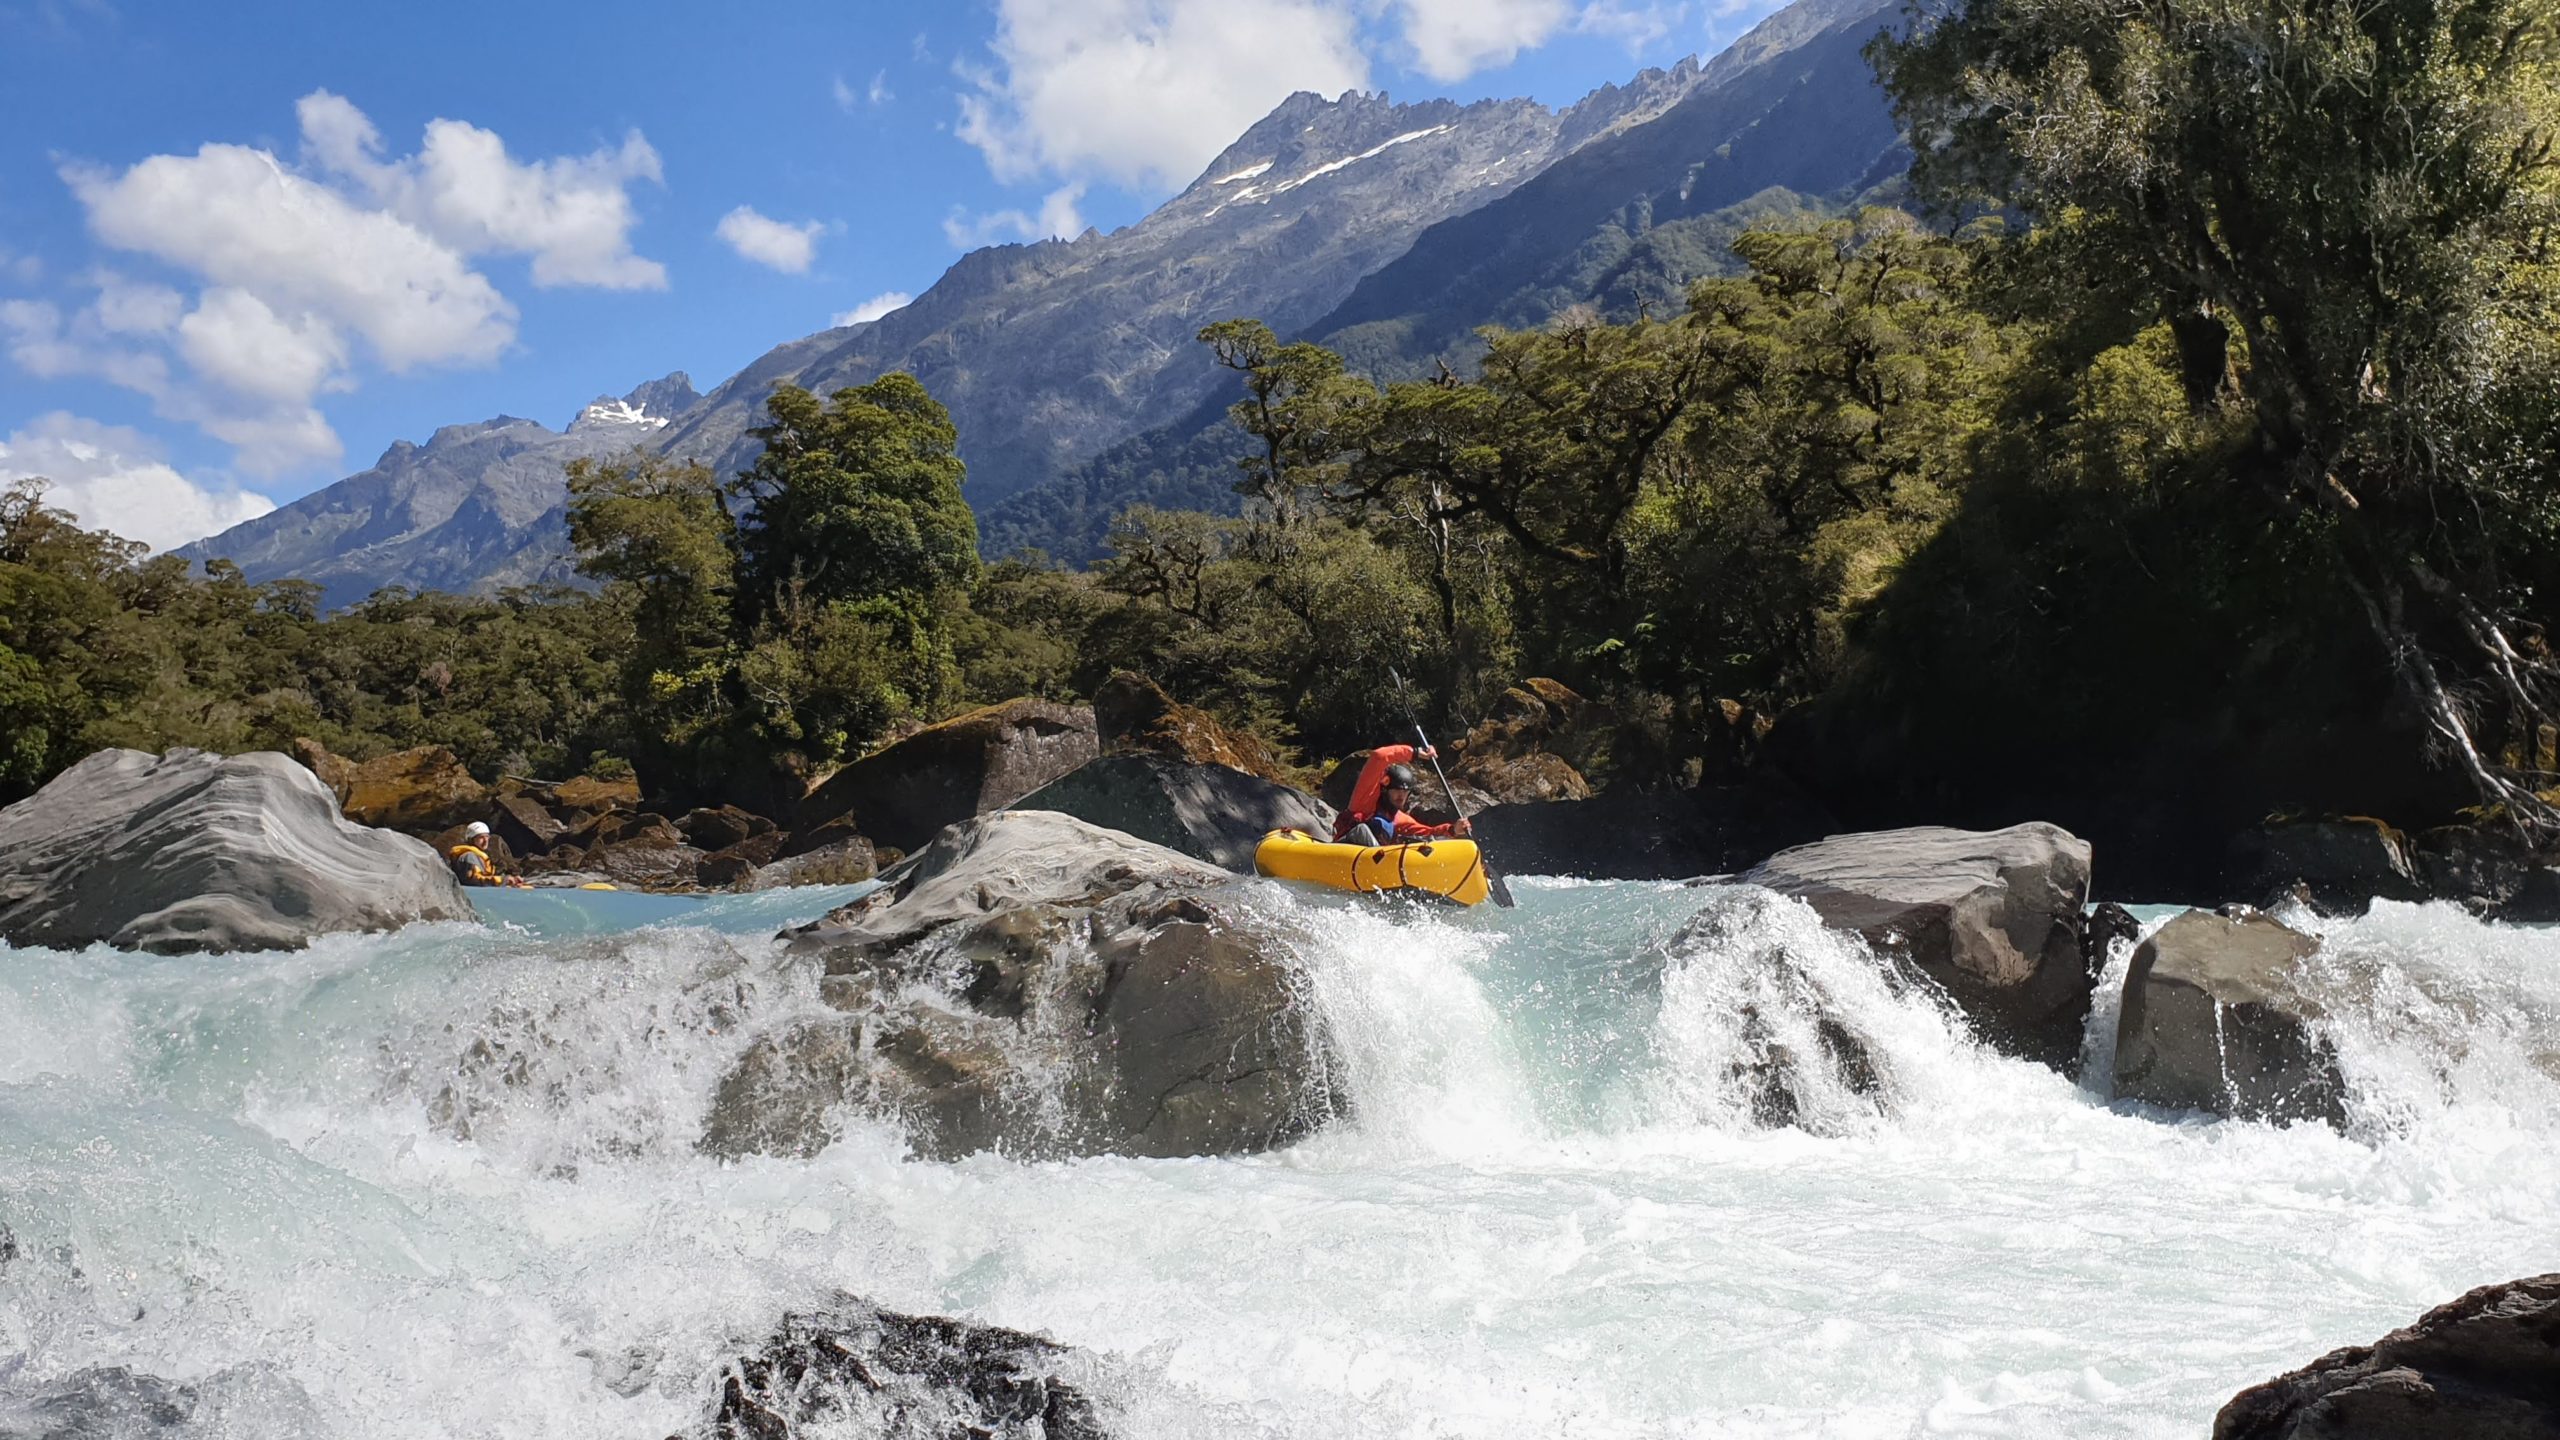
It then eases to III boulder gardens and relents to flat water by the Ferny Flat islands.
We’d had enough by this stage, so found ourselves a spot to camp on the northern island.
Another option could be to camp at Drake Flats to even out the travel time over these last two days, but it would make the last day a pretty solid river day.. Our paddling muscles were grateful we split the paddling into two relatively equal chunks. Plus it meant we had the time for a meal at the Hard Antler and a cruisy drive home.
Ferny Flat to take out: 6-7hrs
- 4hrs Ferny flat to Balustrade Cliff (whitewater section)
- 2-3hrs Balustrade to take out (flatwater)
Again, it’s worth a reasonably early start to make progress on the final flat water before the up-valley winds make it a chore.
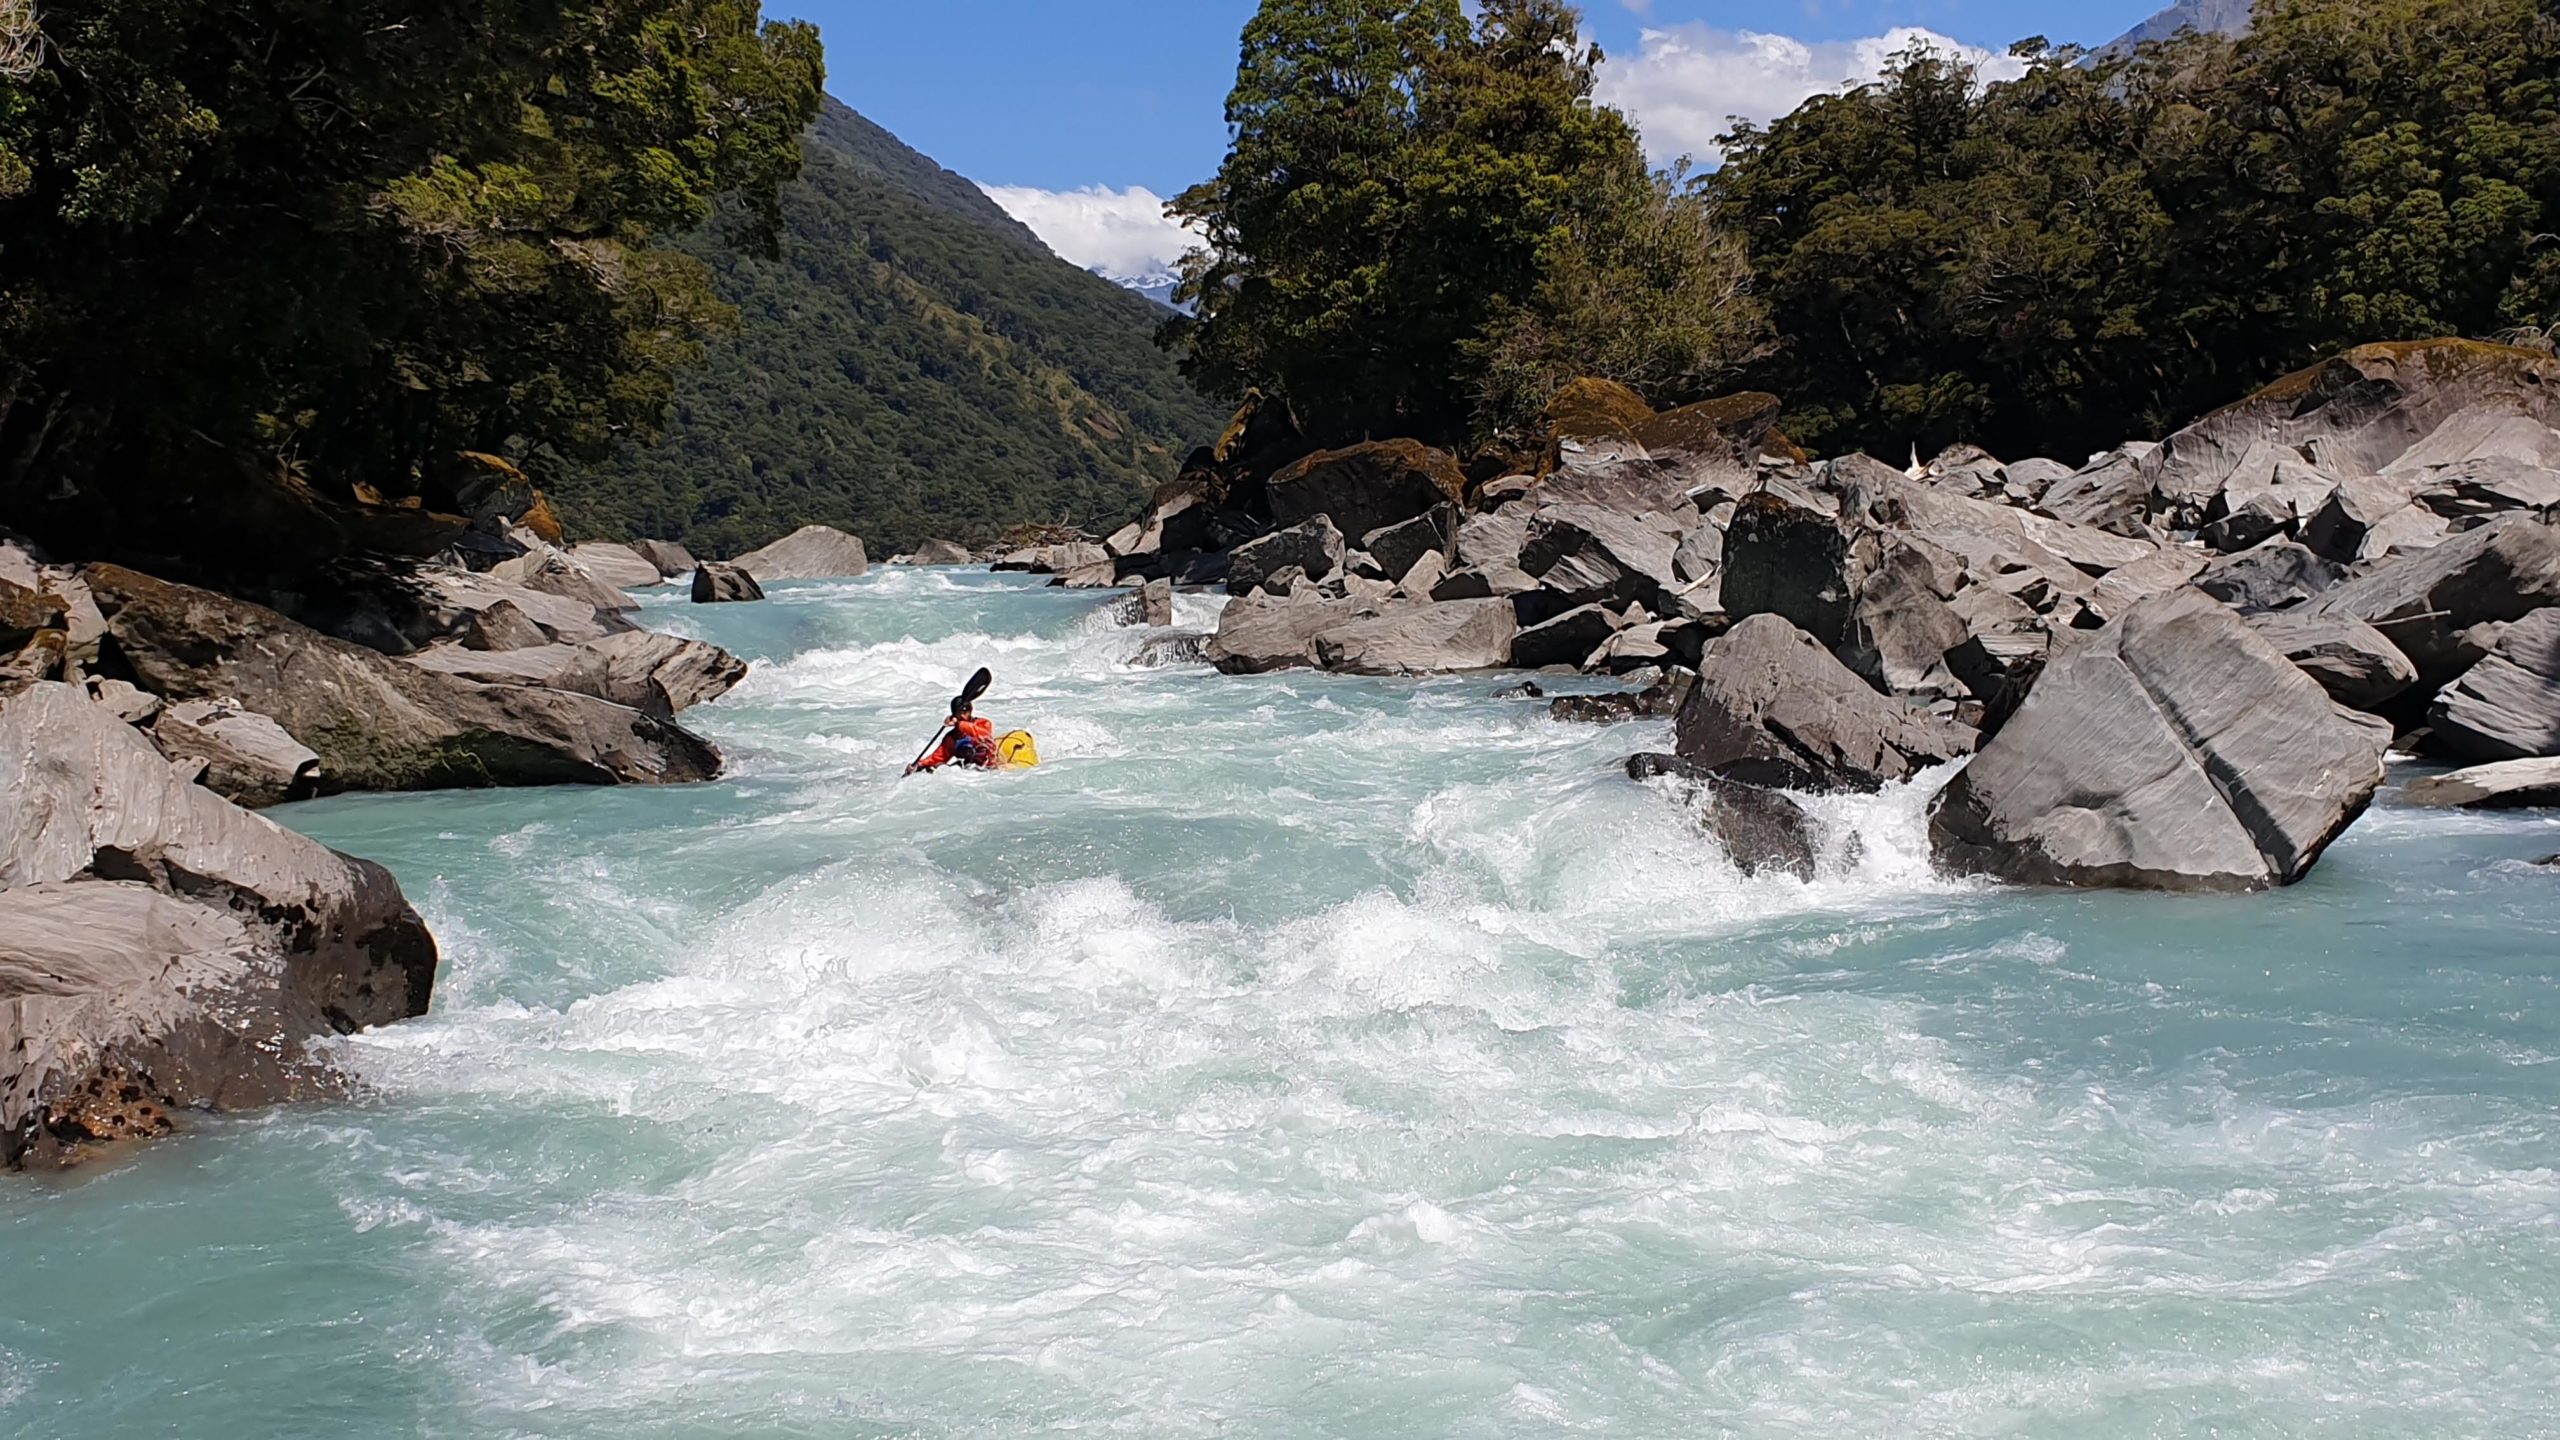
From camp, it’s straight back into the whitewater with solid III+/IV paddling.
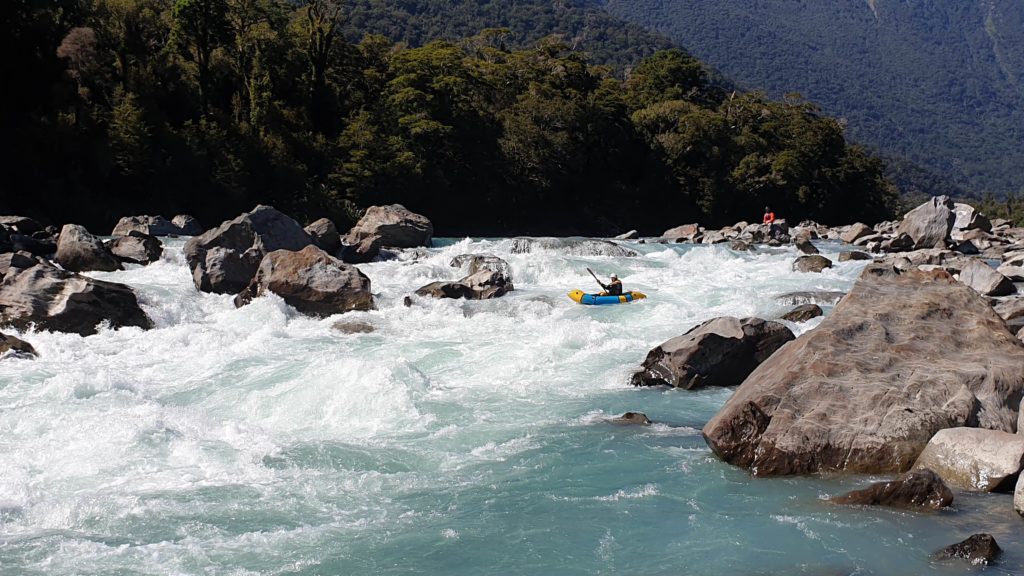
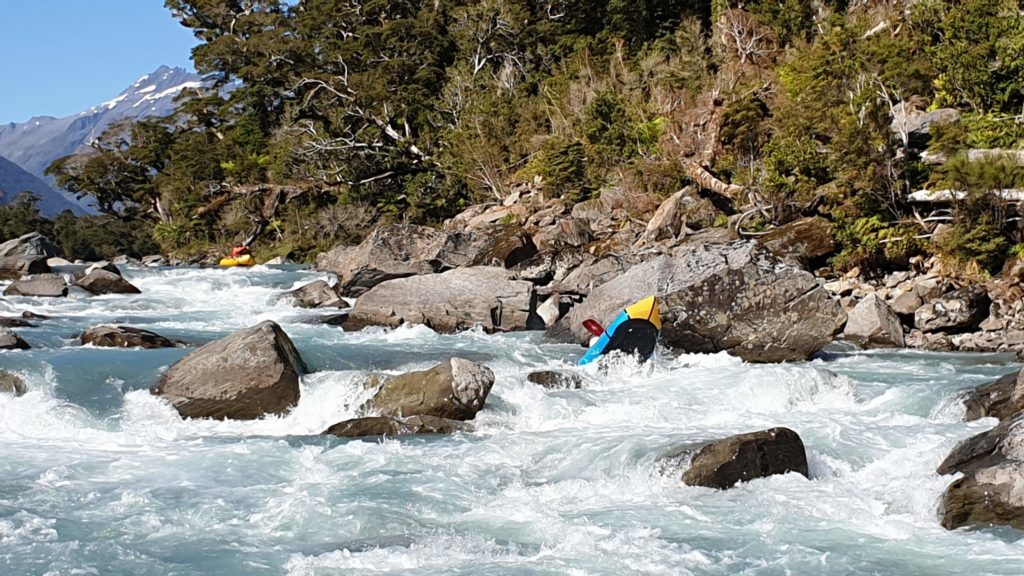
Then the river returns to its normal self: long stretches of I/II punctuated by sections of III and a few IV drops. As mentioned before, the harder rapids are all portageable with a little effort.
At the Balustrade Cliff, there’s a beautiful grade II/III gorge that marks the end of the whitewater. From here its a bit of a slog through to the take out, worse if you’re padding into the daily headwind…
Go smash a burger and beer at the Hard Antler.. You’ve earned it!
Fantastic trip!
Sad to count half a dozen cows standing and peeing in the river – there was even a cow right up near the head of the awa. Routefinding was clear; thanks for the beta! Endless amazing campsites. A good bit of bushbashing in the final walking day. Packrafted it in resonably low flow which helped with the rapids. Easily portaged some sections that were getting IV
Lost a red/blue dry bag with phones etc in the upper reaches of the river.
The long slow floats on the lower half of the Waiatoto could be nice after a bit of rain (maybe portaging the harder sections)