


Something for everyone on the Whataroa
The mighty Whataroa is a classic west coast paddling adventure: big flows, spectacular scenery and challenging whitewater, especially in the upper reaches.
Progressively getting steeper as you go further from the highway, there are three distinct sections that range from an arduous overnight adventure at the very top end of packrafting difficulty, through to a brilliant half-day trip for competent beginners.
Thanks to Elias Love for the first words and pictures for the lower section in 2017, Shane Orchard for the info and pics for the upper runs in 2025, and Dan Clearwater for editing and layout.
A note on kayaking and packrafting descriptions
The Whataroa is well-known to kayakers and rafters. These sections also described in Graham Charles’ New Zealand Whitewater guidebook and online at Riverguide.co.nz. The suggested kayaking flow ranges start around two to three times the volume of a low summer flow.
The grades and descriptions on this page are focused on the low summer flows that are likely to be the conditions of choice for most packrafters.
From top to bottom, the Whataroa sections are listed below.
The trip suggestions/time guides assume you hike in and put on at the top of the section, then paddle all the way out to the road.
- From Butler Junction (IV/IV+) Overnighter: 8hrs hike to a hut, full day paddle
- From Barrowman Flat (III+/IV) Long day trip 4-5hrs hike, day paddle
- From the Whataroa swing bridge (II/II+) Half-day trip. 2hrs hike, 1-2hrs paddle
View Larger Topographic Map
If you want a guide on this trip, ask West Coast Packrafting.
They offer instruction from beginner to advanced, plus guided trips from grade I to IV, 1 day to 6 days, on loads of rivers.
Check out this video, which gives a good overview of the whole run, including a section of the Butler River starting at Ice lake.
Preparation & planning
Trips to the higher sections are strenuous. Before we get started it is worth repeating the New Zealand Whitewater guidebook advice. Particularly for the upper sections, make sure you’re fully prepared for a long, cold and potentially arduous outing, and consider an early retreat if you’re finding that the first few rapids aren’t your cup of tea.
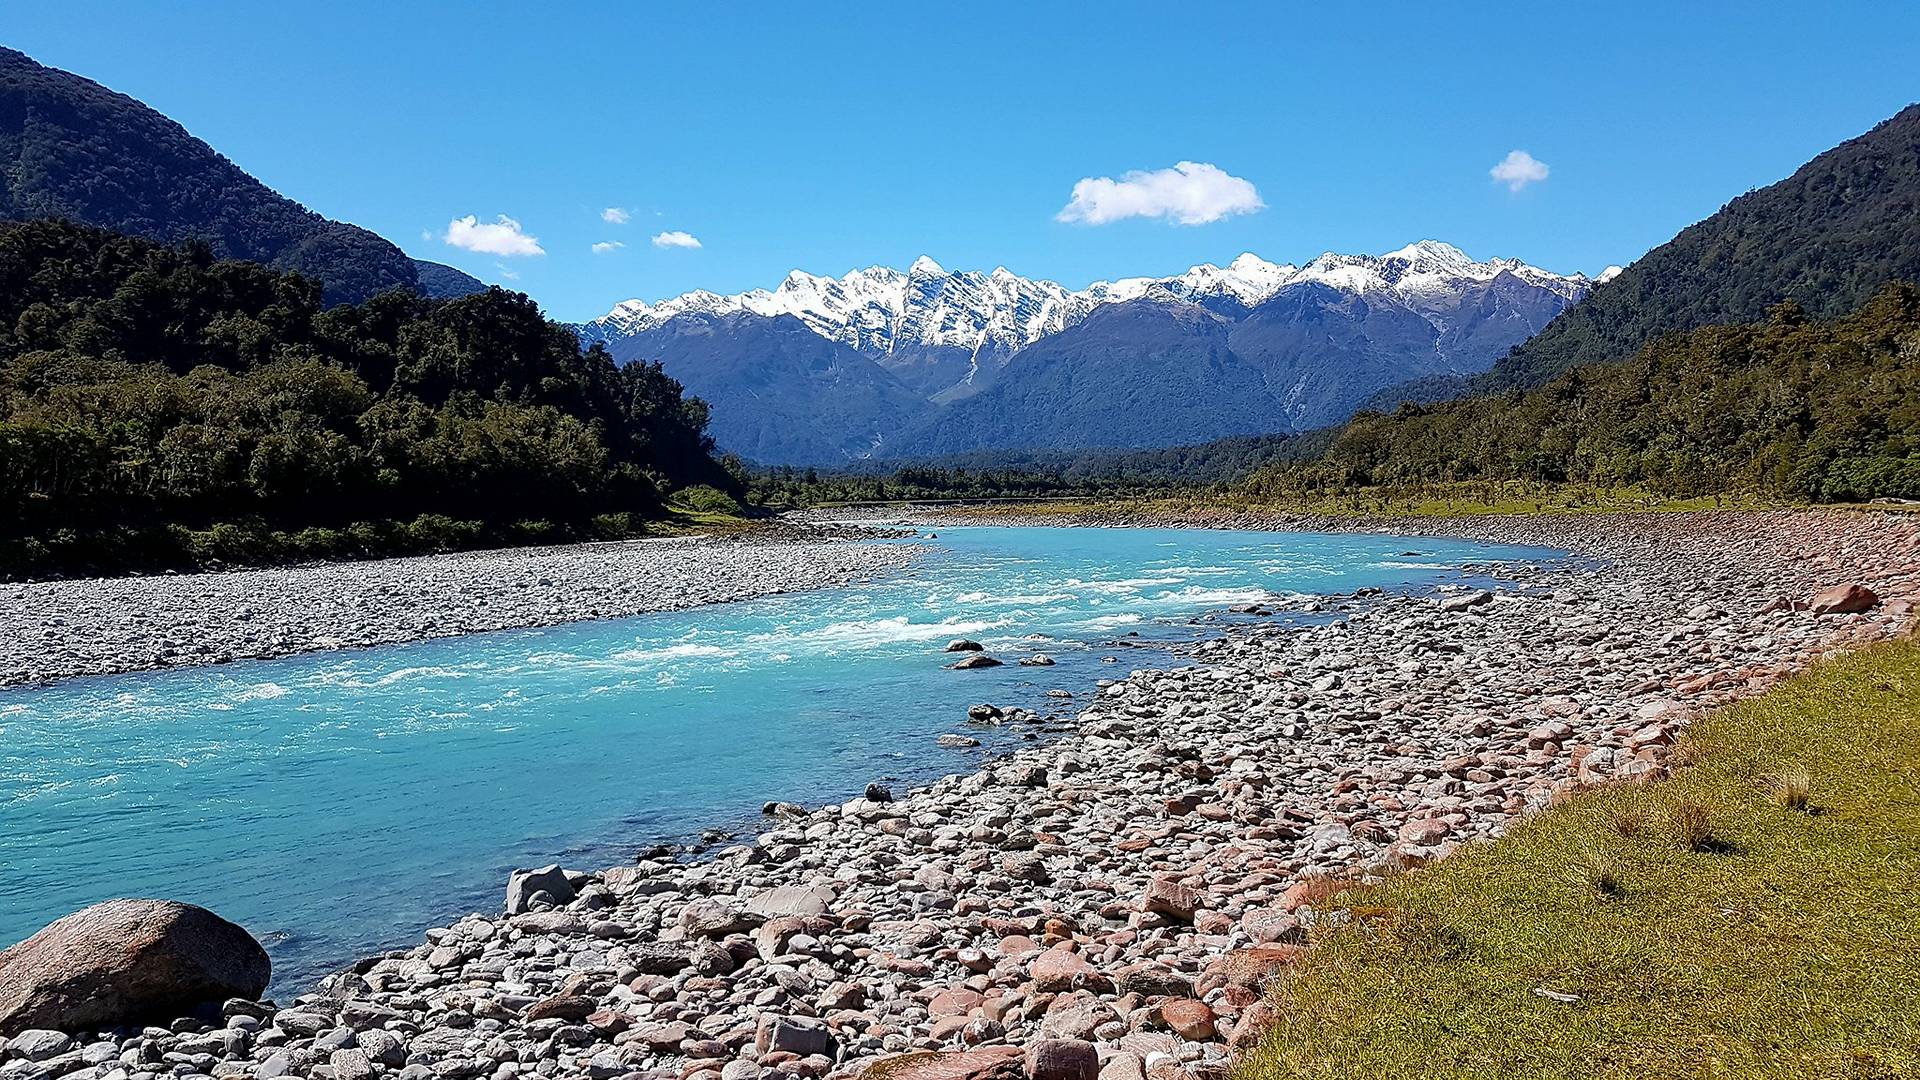
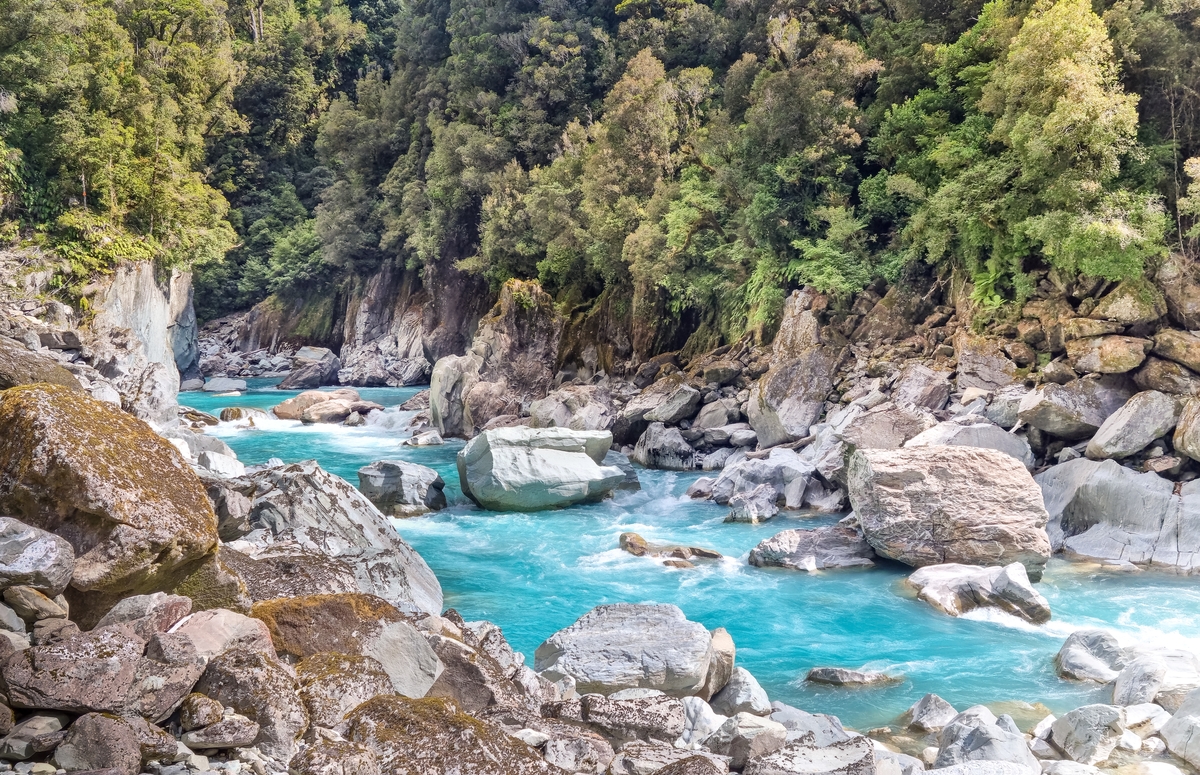
The river is fed by glaciers. The milky blue waters of the Whataroa remind you that even on a warm sunny day, you need to be prepared to cope with a very cold swim. Cold water quickly saps your strength and energy, making swims and rescues more difficult. On the plus side, in dry conditions, the Whataroa has enough residual flow, even when other rivers might be too low to paddle.
Gauge
Whataroa at SMB. (click the ‘Westland’ tab!)
- 20-30 cumecs – residual low flows* suitable for advanced packrafters.
- 40-70 cumecs – “low flows” for hardshell kayakers according to the Whitewater guidebook.
*A look at the long-term data shows that after rain events have flushed out, in the late summer season, residual glacial melt flows are between 20-30 cumecs on the gauge.
Approach on foot
The first kilometre or so of land from the site of the old SH6 bridge is privately owned; so you must contact the farmer before beginning this trip. The contact information, as well as a good description of tracks in the area on the DOC website page for the Whataroa, Perth and Butler valleys . Take time indication beyond the swingbridge with a grain of salt: this is the west coast, and the tracks are often more rugged and slow-going than many expect.
Highway to first swingbridge – 2hrs
Expect travel over loosely marked track and riverbed, which allows you to observe the river and any hazards.
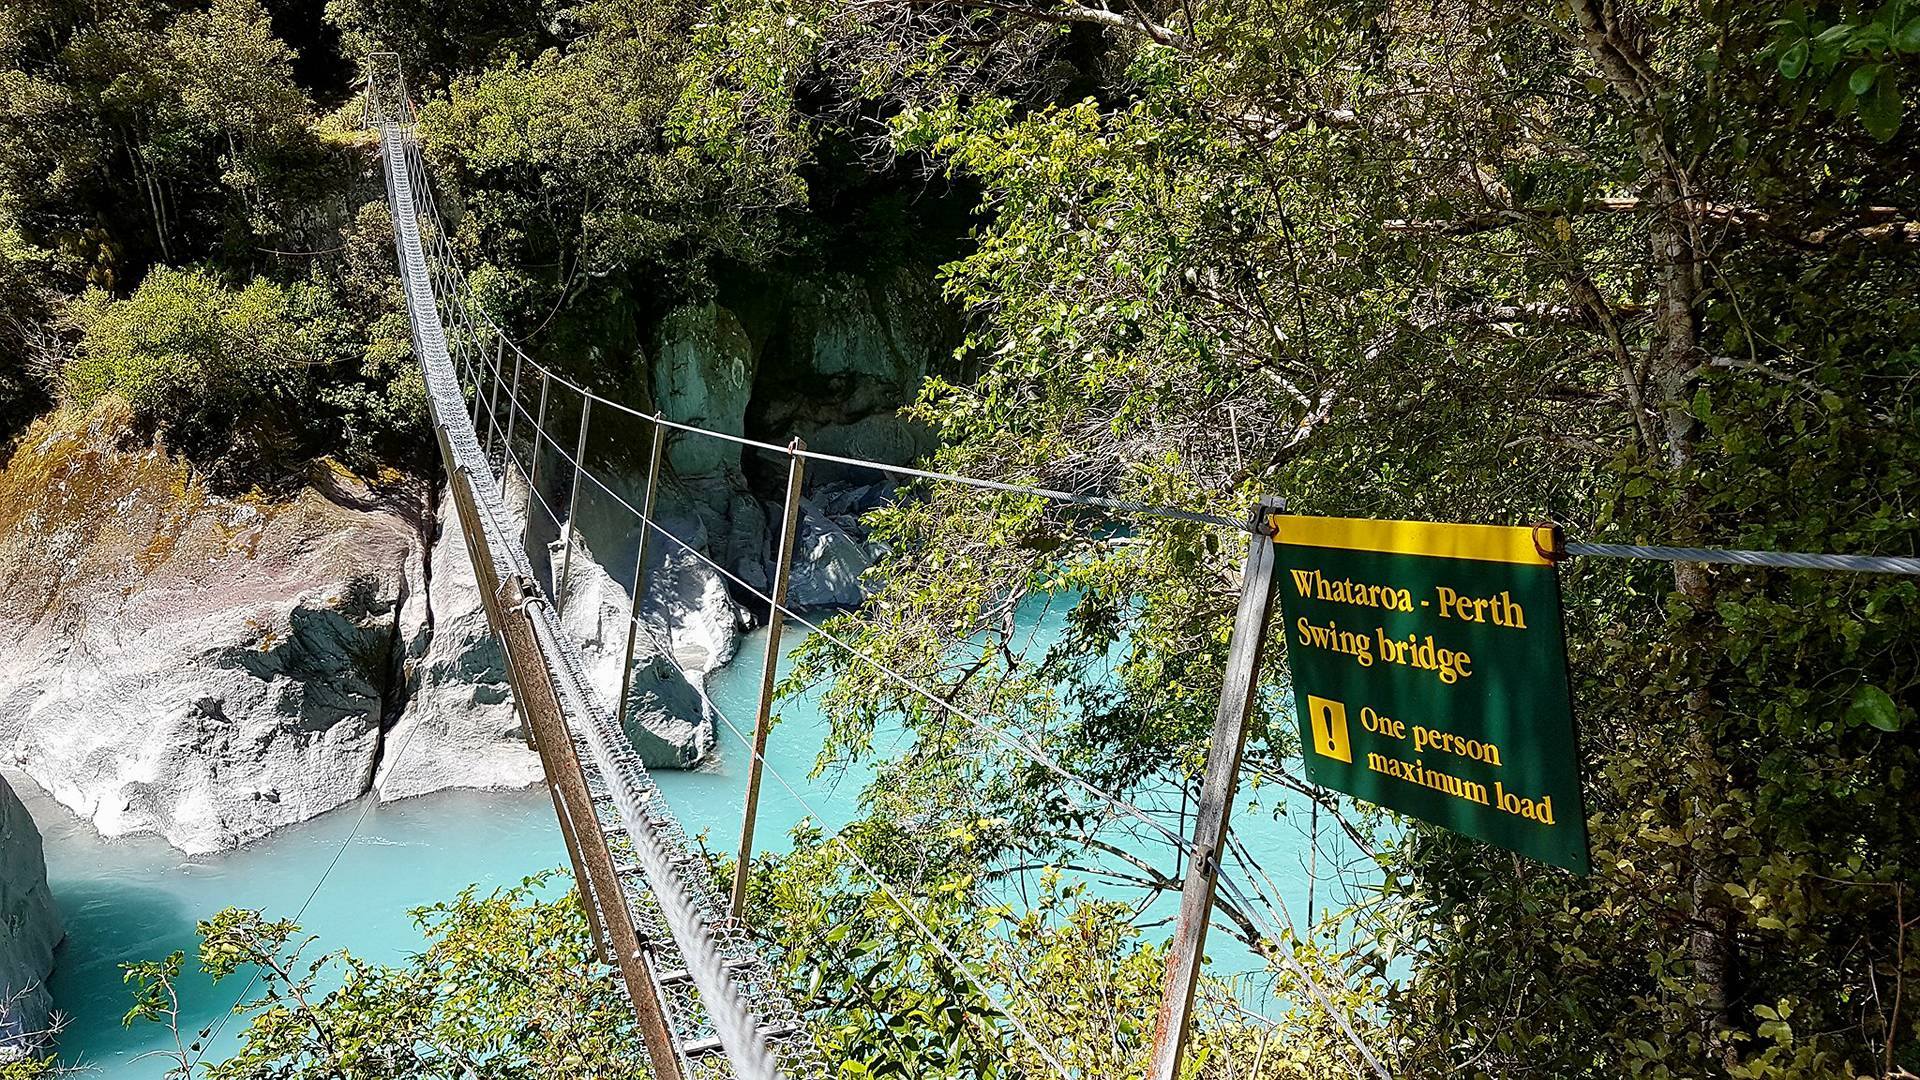
First swingbridge to Barrowman Flat – 1-2hrs
The track is mostly well-formed with steep climbs and descents around bluffs and gorge sections. Just remember that this prevents you from scouting the most interesting (and committing) parts of the run.
Barrowman Flat to Butler Junction Hut – 3-4hrs
The track gets harder going from here, with sidles, riverbeds, boulder hopping and creek crossings. Take note when the track is near the river: these points provide escape and bypass options if things are getting too spicy for you. In particular, note the bypass for the mandatory portage just south of Jacks Creek.
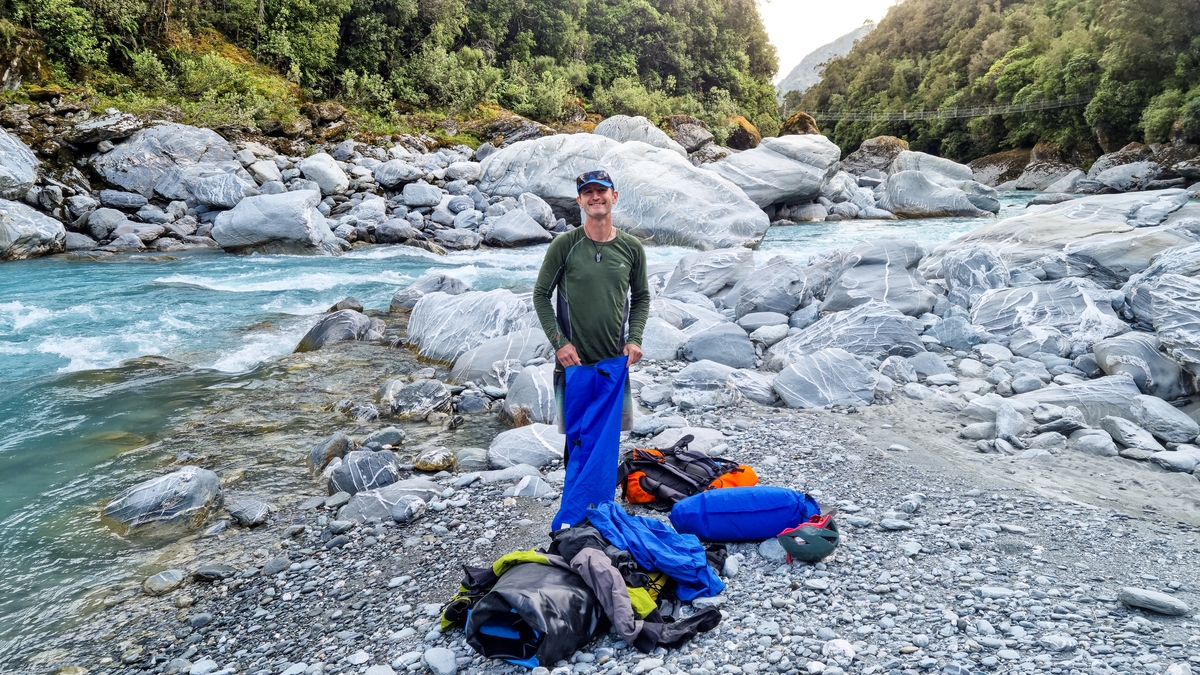
Butler Junction Hut (8 bunks) is a great place to rest weary bodies before a solid day of paddling and portaging back to the road.
Paddling the Whataroa River
The sections are described from the top down.
Butler Junction to Barrowman Flat (IV+ with mandatory portages)
This upper section is near the top end of difficulty and consequence for packrafting, requiring excellent paddling, portaging, rescue and decision-making skills. Teams paddling from Butler Junction generally make the trip an overnighter, staying at Butler Junction hut.
For those who paid close attention to the video, you’ll notice they began from Ice Lake. Apart from a short section beneath the outlet, most of the Butler is considered too steep for paddling.
There is a good put in about 50m downstream from the hut and from here the first few rapids provide a nice warm-up before things get serious from around Burrow Creek.
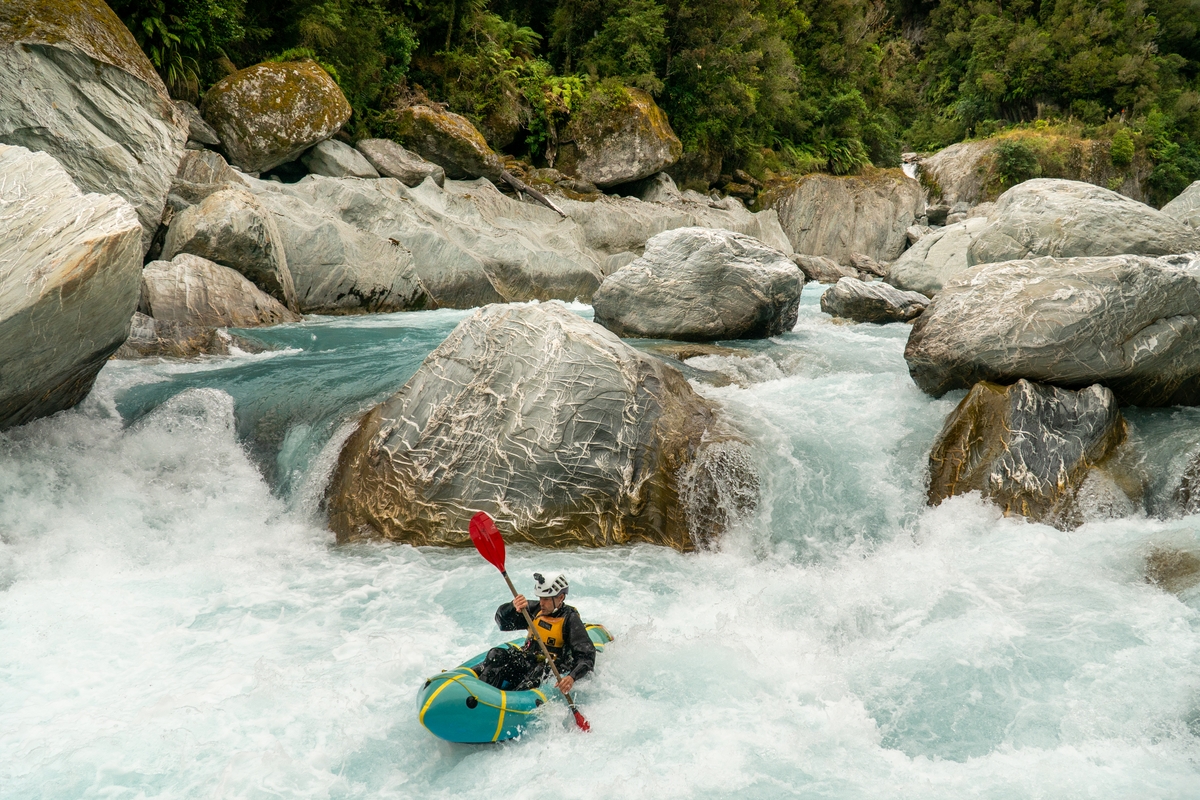
The paddling is characterised by huge boulder cascades with multiple drops and numerous sieves, which pose substantial objective danger.
This section is just a little over 2km in length but will likely take several hours to negotiate. It requires a lot of bank scouting, portaging, and safety support. Although some of the portages require complex routefinding, over, around and between large boulder, just about everything can be portaged in the river bed.
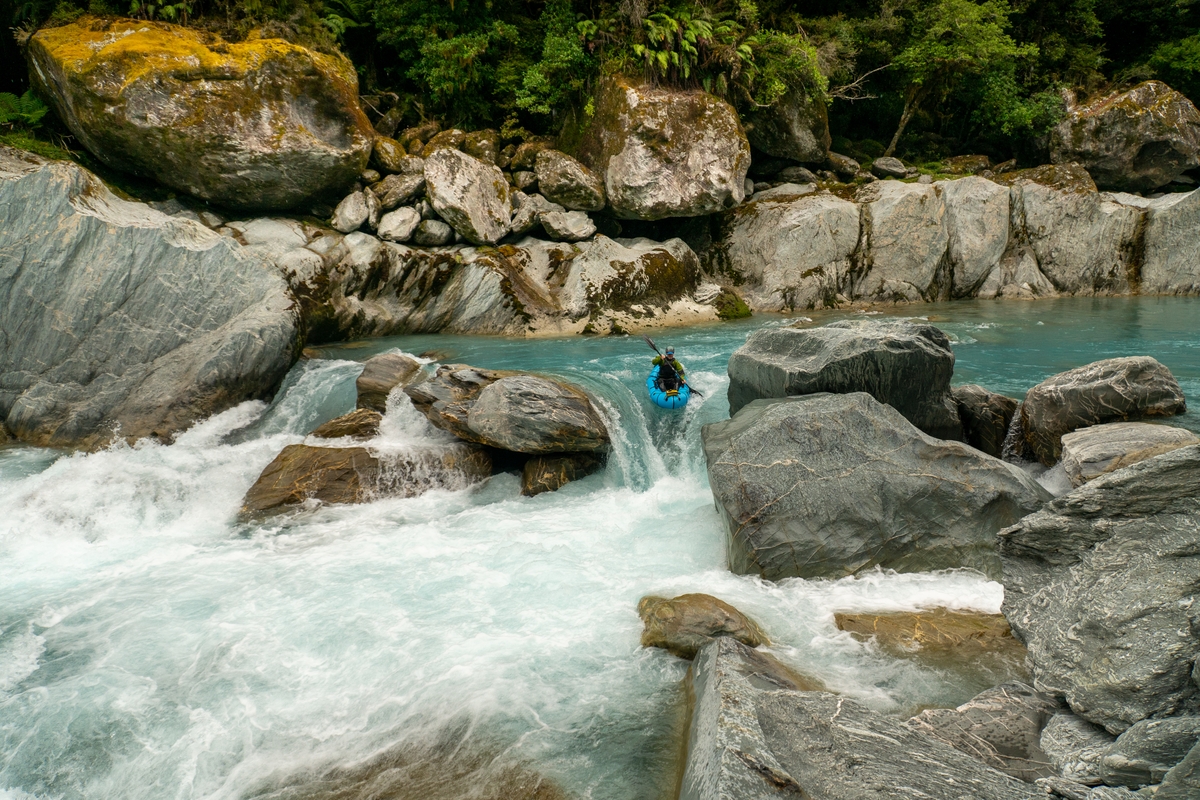
The one exception is just downstream of Jack Creek, where an unrunnable rapid drops through a short vertical-sided gorge. Because you took good notice of this spot on the walk in, you’ll know to take out at the mossy benches before this gorge and portage using the track.
At its downstream end, this gorge is just flat water with no hint of the rapid that lies upstream. Put in again here and taking a short paddle upstream through the canyon to see the final drop of the rapid.
Downstream from here the river opens up and a few more grade III/III+ rapids take you to the Gunn River confluence and on to the Barrowman Flat section as described below.
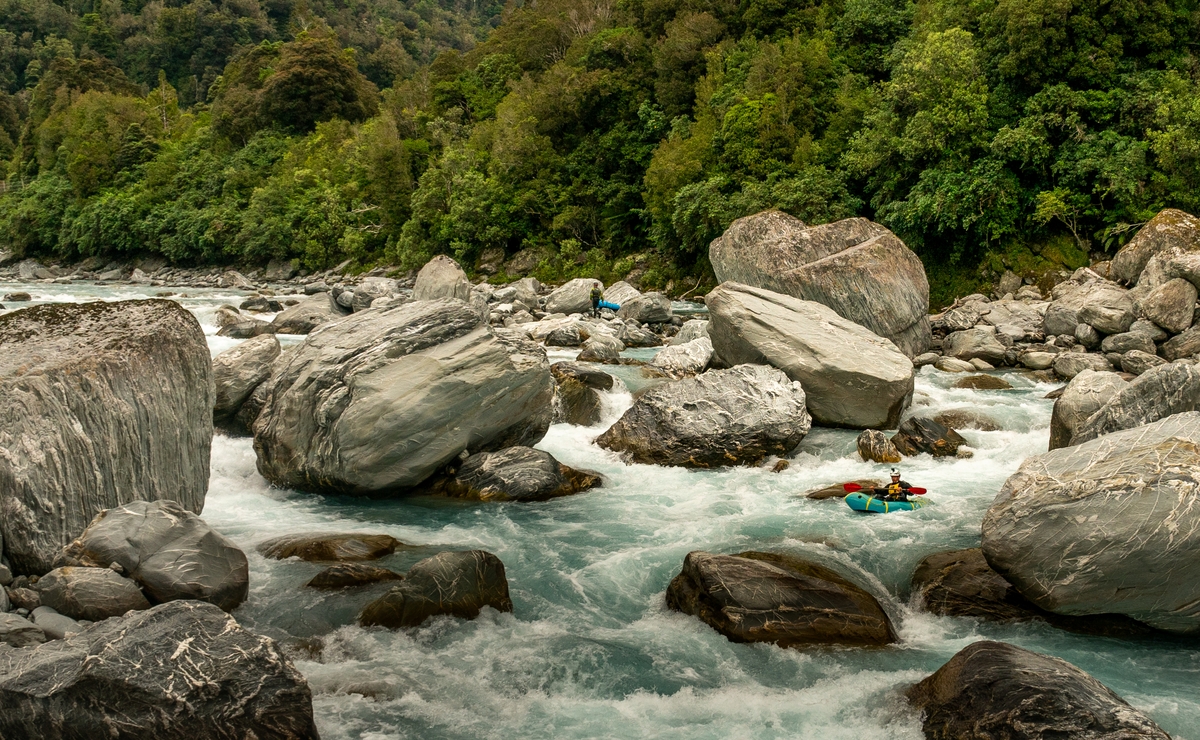
Barrowman Flat to Whataroa swing bridge (III+/IV)
The run from Barrowman Flat down to the car park is a popular heli trip for kayakers and commercial rafters, that is also feasible as a packrafting day trip from the road.
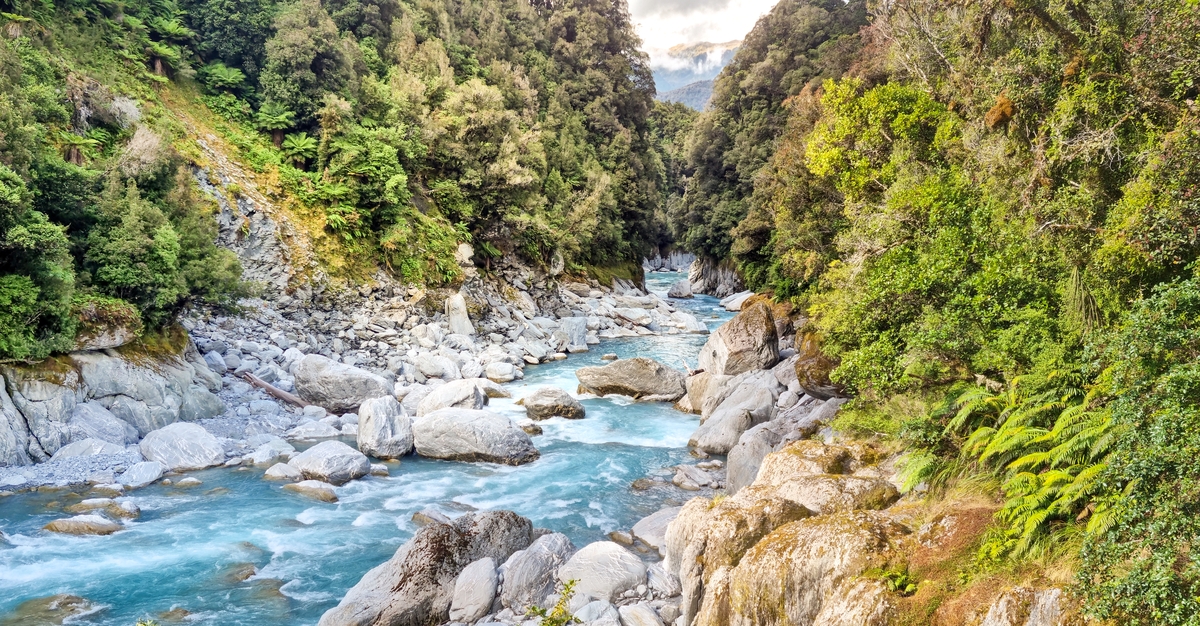
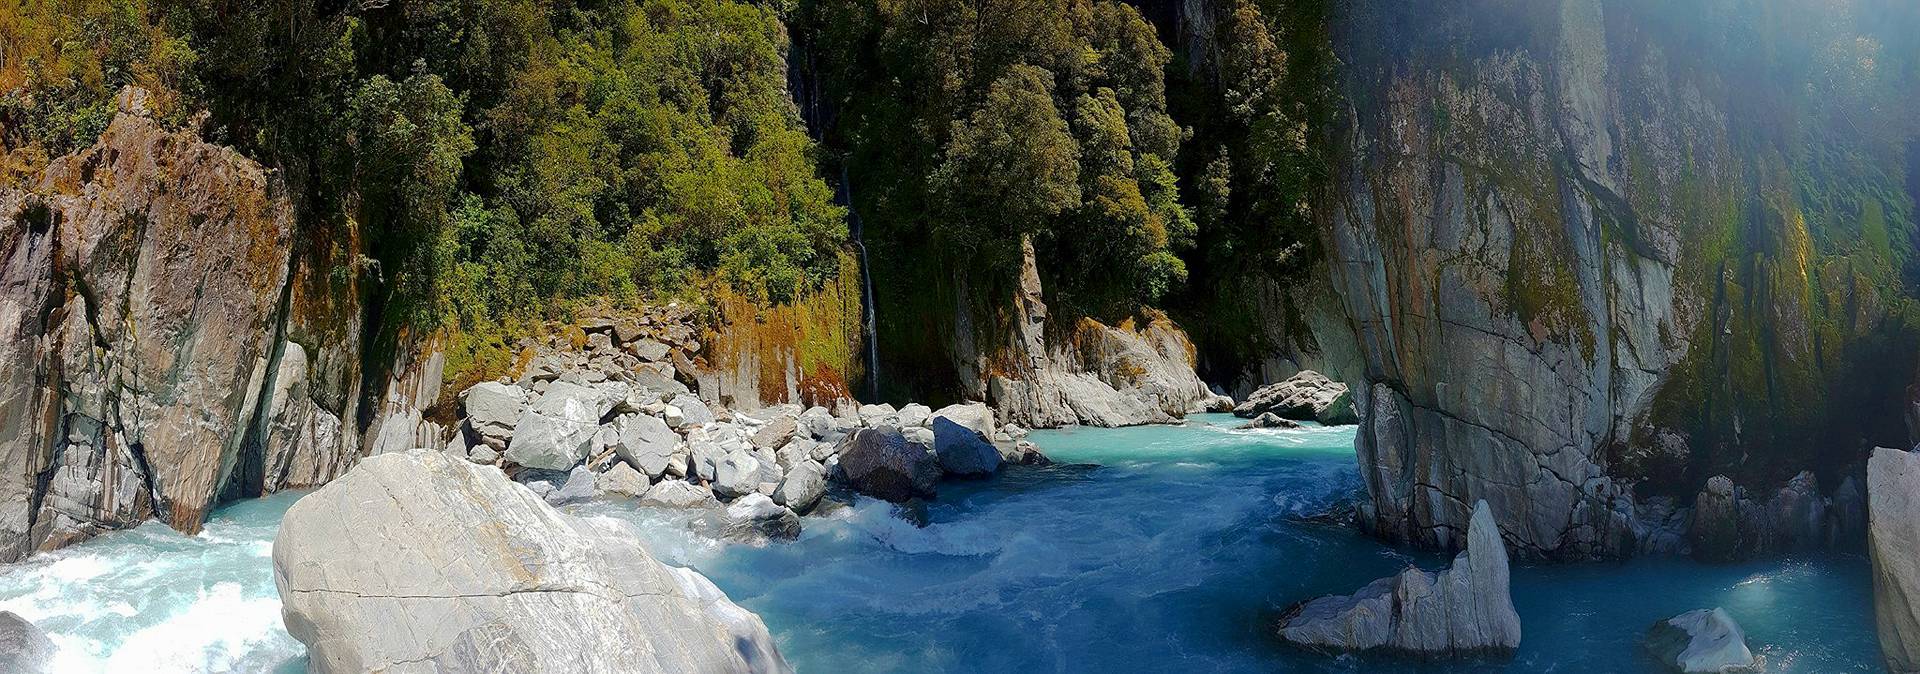
From Barrowman Flat there is around 4 km of stunning whitewater down to the Whataroa swing bridge. The rapids are varied and include some open riverbed and boulder gardens along with two schist gorges with vertical to over-vertical walls that will keep you guessing what’s around the bend.
At low flows the harder rapids are mostly grade III+ with two grade IV sections that are both portageable. At higher flows these will push into the grade IV+ range.
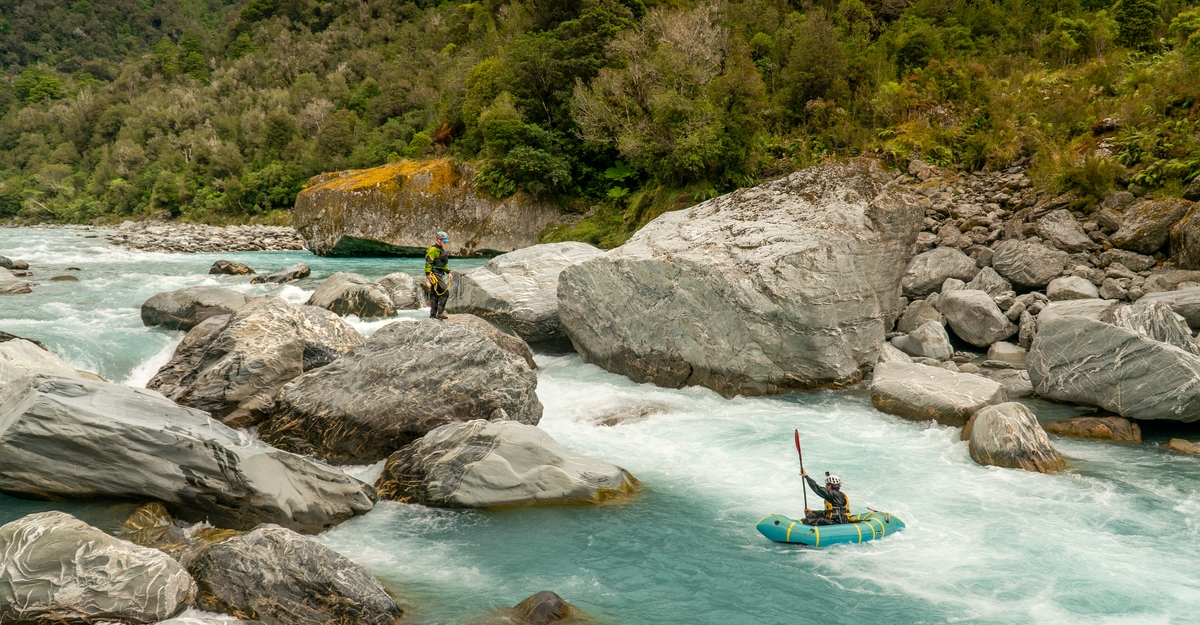
After a few warmup rapids the first grade IV crux rapid takes the form of a series of larger drops that can be scouted and/or portaged on river left.


A couple more grade III rapids then take you into the first schist gorge.
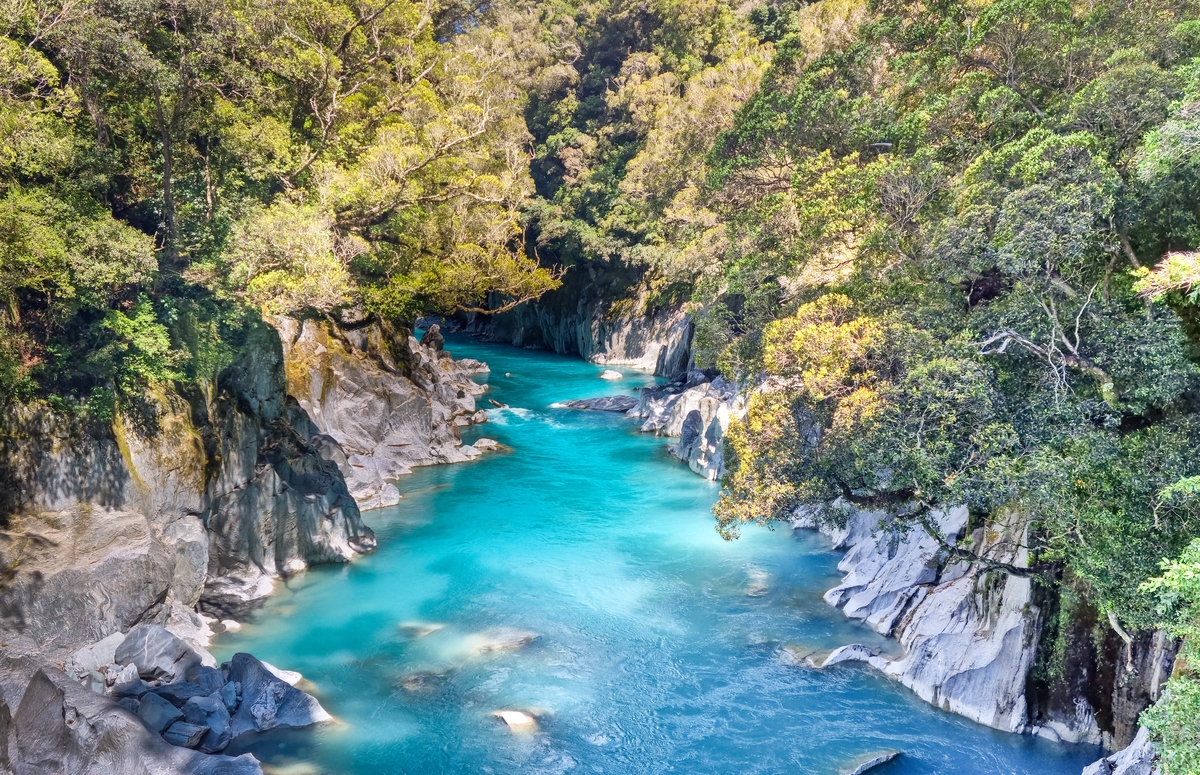
Inside the gorge, the gradient eases and you can take in the stupendous scenery overhead.
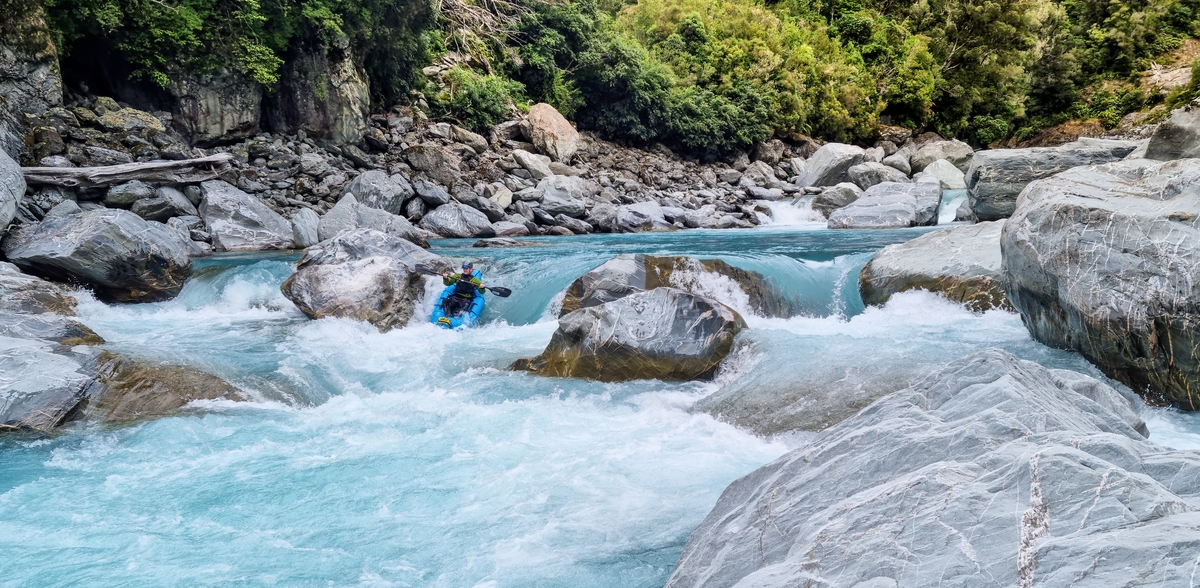
Easier rapids continue down past Reynolds Beach leading into the final gorge.
Here you need to decide on whether to run the entrance rapid, portage on the right at river level (likely requiring a rope) or portage via the track. The latter is the easiest option but will potentially require packing up the raft for the short but steep climb up and over a bluff. On low flows this first rapid is an S-bend leading to a blind drop with a large hole at the bottom, and the potential sneak route on the right (a narrow chute) is unlikely to have enough water to run. If taking the S-bend boof left off the drop to hopefully clear the hole beyond which is a large pool.
The remaining drops in this last gorge can all be scoped from the walking track on the way in and the last of these is the trickiest to negotiate.
A final stretch of flat water takes you under the swing bridge to the open riverbed downstream.
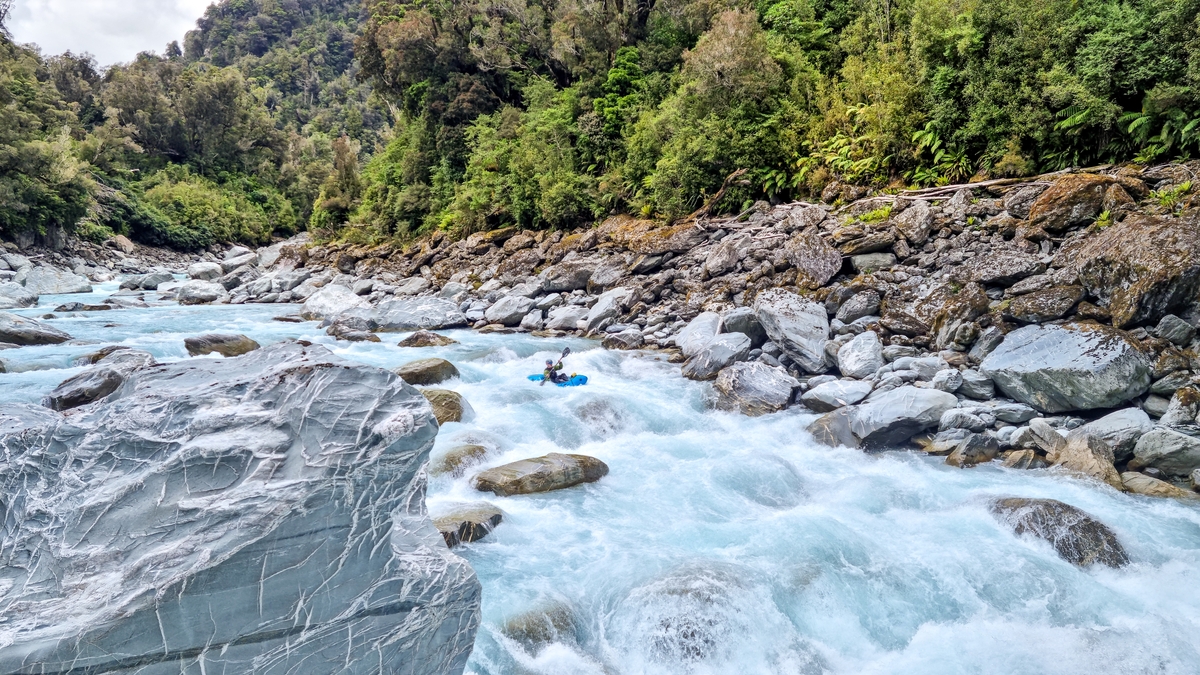
Swingbridge to old SH6 bridge (II+)
This lower section of around 5 km makes for a relaxing ending to the upper sections, or alternatively, a great half-day trip.
The riverbed is open throughout and nearly all the rapids can be seen on the walk-in. With the extra water from the Perth there is a relatively ‘big’ water feel and some great wave trains to be enjoyed. Most of the rapids are grade II with a few spicier grade II+ rapids thrown in. There are also several great play spots and isolated large boulders that create some crisp eddy lines.
Look out for the old SH6 bridge pilings that now feature some contemporary artwork at the takeout point!