


A beautiful, continuous alpine rain-run
The South Temple is a small stream, but when there’s enough water, it provides a fast and continuous packrafting trip along most of its length. The out-and-return trip style means you can easily choose your trip length, depending on your motivation, flow and paddling ability.
- An hour or less (II) From Temple Campsite to the main road.
- Half day. (II+/III-) from below the IV gorge to the main road
- One day (III/IV) from Temple Hut, portaging the IV via the track if you wish.
- Two or more days (III/IV) Above the hut at higher flow, a night in the hut, then paddle out
The river character is fairly narrow, very continuous and quite shallow. Pools are rare and eddies are small. This all means that a swim could be long and dangerous – paddle well within your ability, so the chances of a swim are as low as possible. This is a run for competent paddlers, not the place to ‘try’ class III….
The fast pace and limited eddies also mean trees or other hazards in the river could be very problematic. Fortunately, most of the lower part of the river can be scouted from the walking track – take special note of hazards (and how to eddy/portage with a margin) as you walk in.
This river usually requires spring melt flows, plus a little rain to come into condition. The paddling above South Temple Hut requires a bit more rain, but there’s no online gauge. This is a trip that requires an open mind, the flexibility to adapt to conditions and if you stay at the hut on a rainy forecast, enough food to wait out high levels.
Thanks to Dan Clearwater for the original info for the run below the IV gorge from 2017, plus Shane Orchard for updates about the entire run (and beautiful photos) in 2024. Photos credit to Shane Orchard collection unless otherwise stated.
View Larger Topographic Map
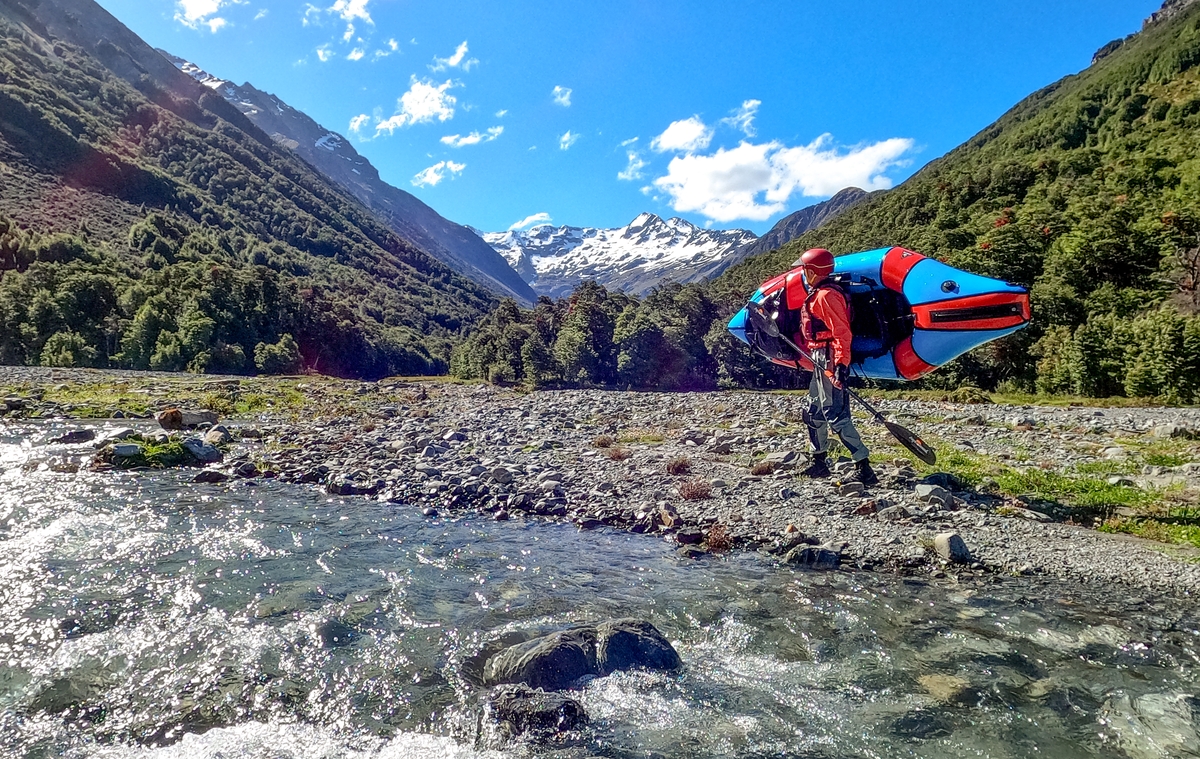
Approach via the South Temple track – between 2.5 & 4hrs
A 2WD can easily make it all the way to the Temple Campsite, which is the carpark for this trip.
You’ll drive over the Temple Stream just before turning off onto a side-road towards the carpark. At the bridge, take a moment to assess the flow. If there’s enough water to float over most of the rocks, that’s a good start. If it looks like it could be a bit bony and low, chances are it’ll be too low higher up in South Temple.
South Temple Track to South Temple Hut 2.5-3hr
The Temple Valley Tracks page on the DOC website has a little more info on the track. DOC suggest 3-4 hrs to reach the hut, although it can be reached in 2.5-3hrs for a fit party.
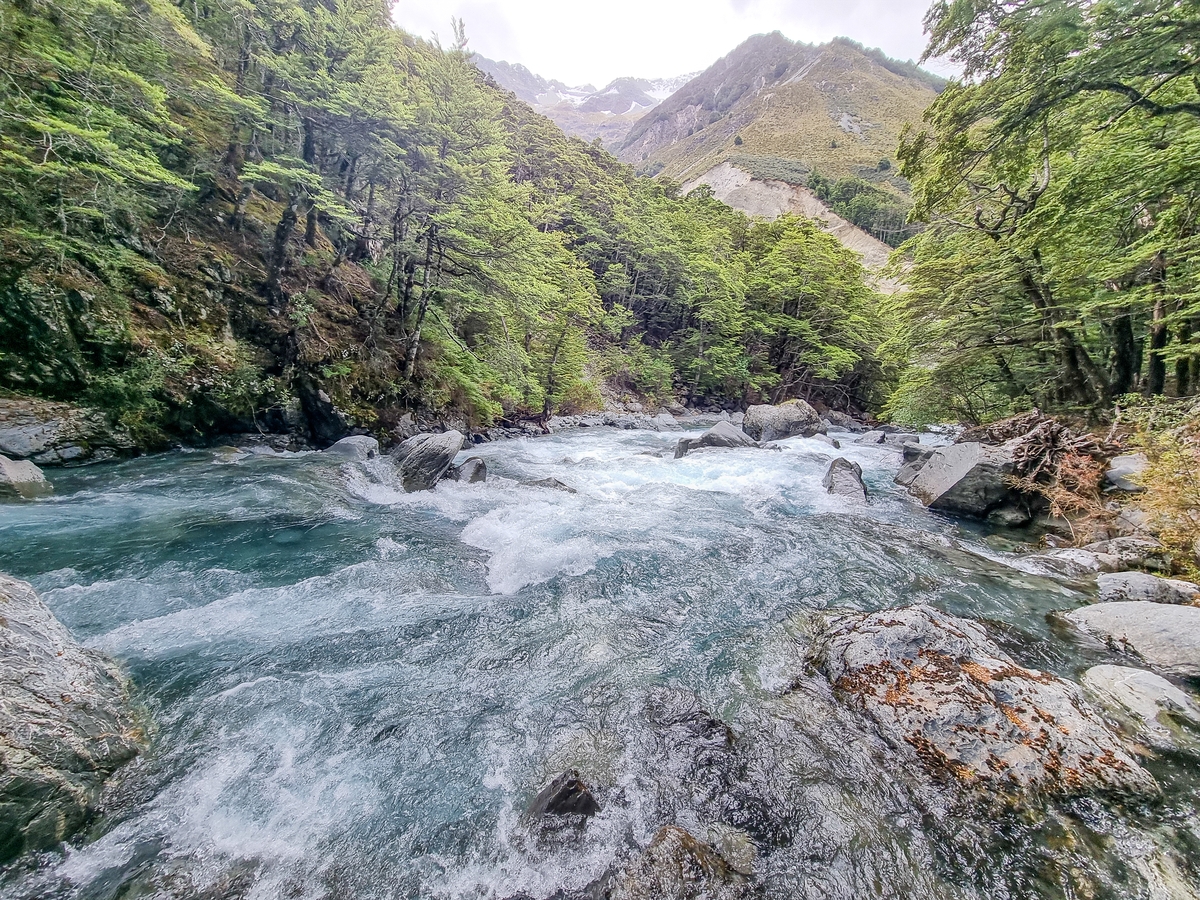
From the Temple Campsite, head up valley, then cross the North Temple Stream. The South Temple Track follows the true left of the river, with plenty of options to scout the stream as you go.
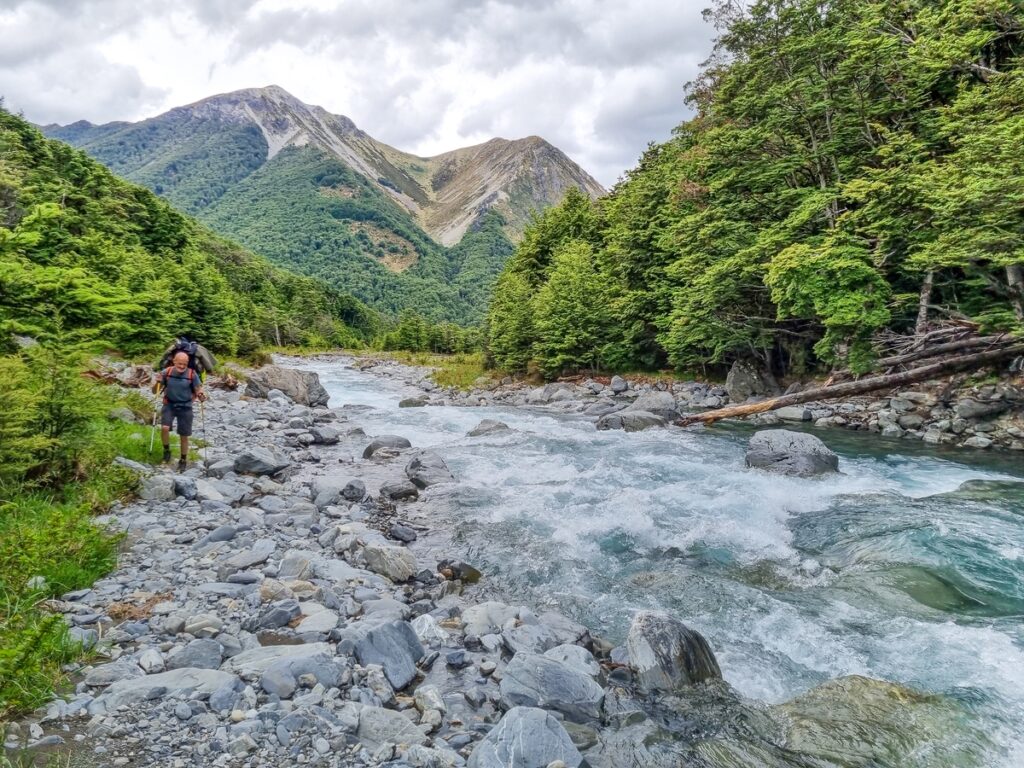
If you’re planning to portage the grade IV gorge, take note of the spot in the picture below. This photo shows the first major side stream coming in on the true left. Just above is the lengthy grade III boulder garden, and above that is the IV gorge.

The track then climbs easily up and over the short grade IV gorge. Get ready to observe, depending on your intentions for this gorge.
- If you’re planning to paddle, there are a few spots you can scramble down to water level for scouting.
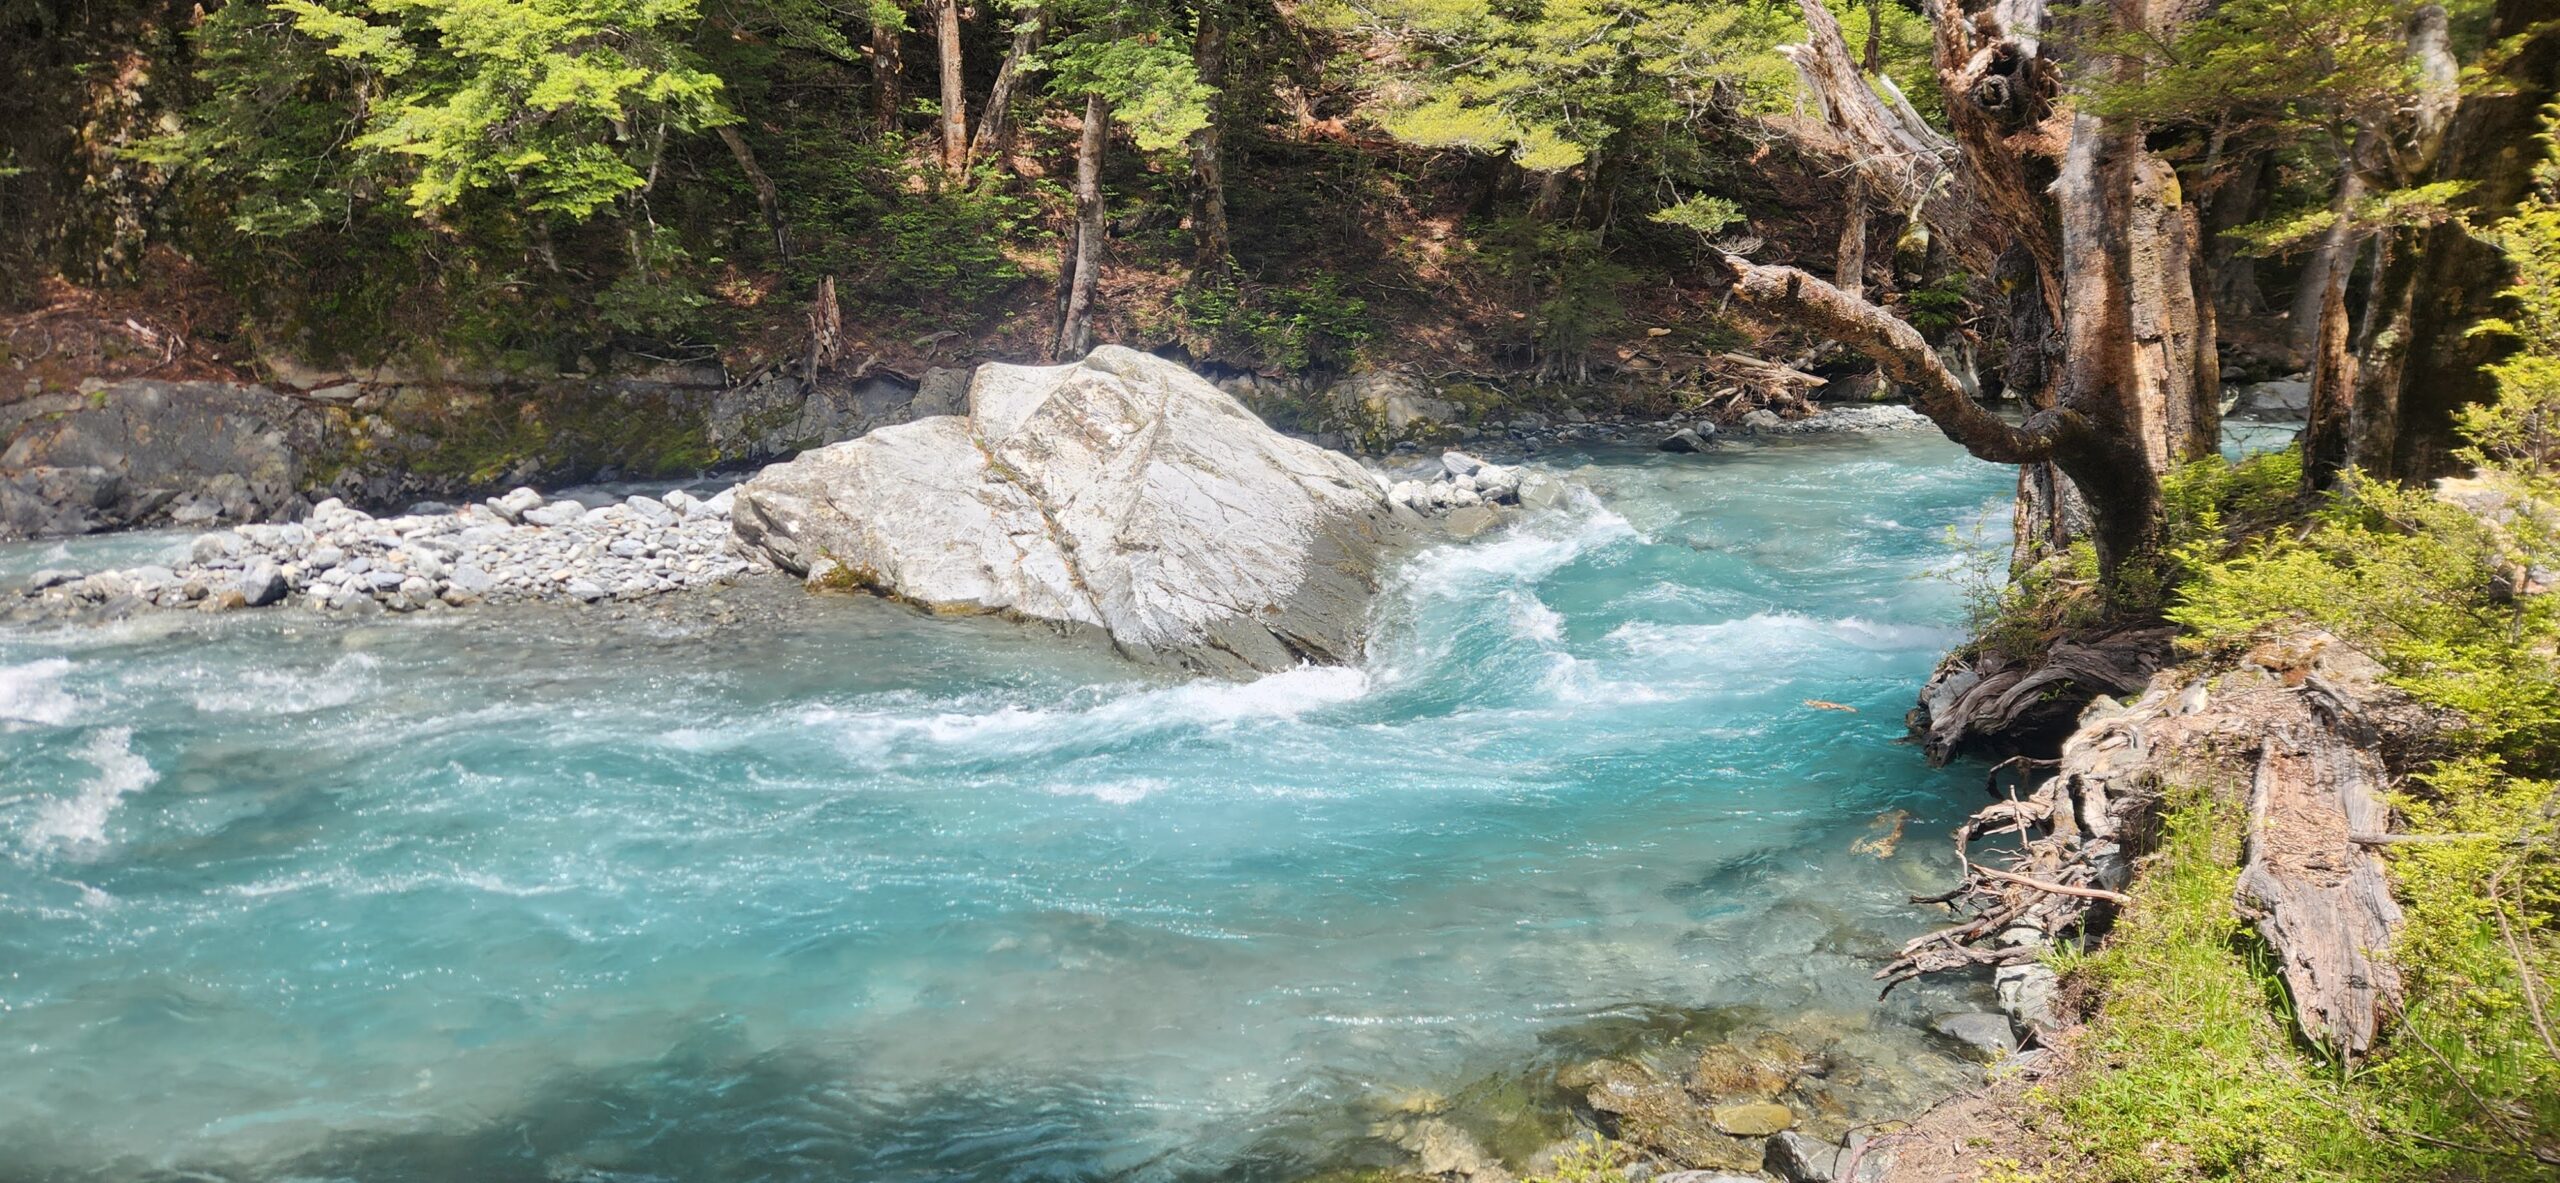
- If you’re planning to portage, take note when the track returns to the streamside. This prominent rock and pool is the portage take out. (see photo below).
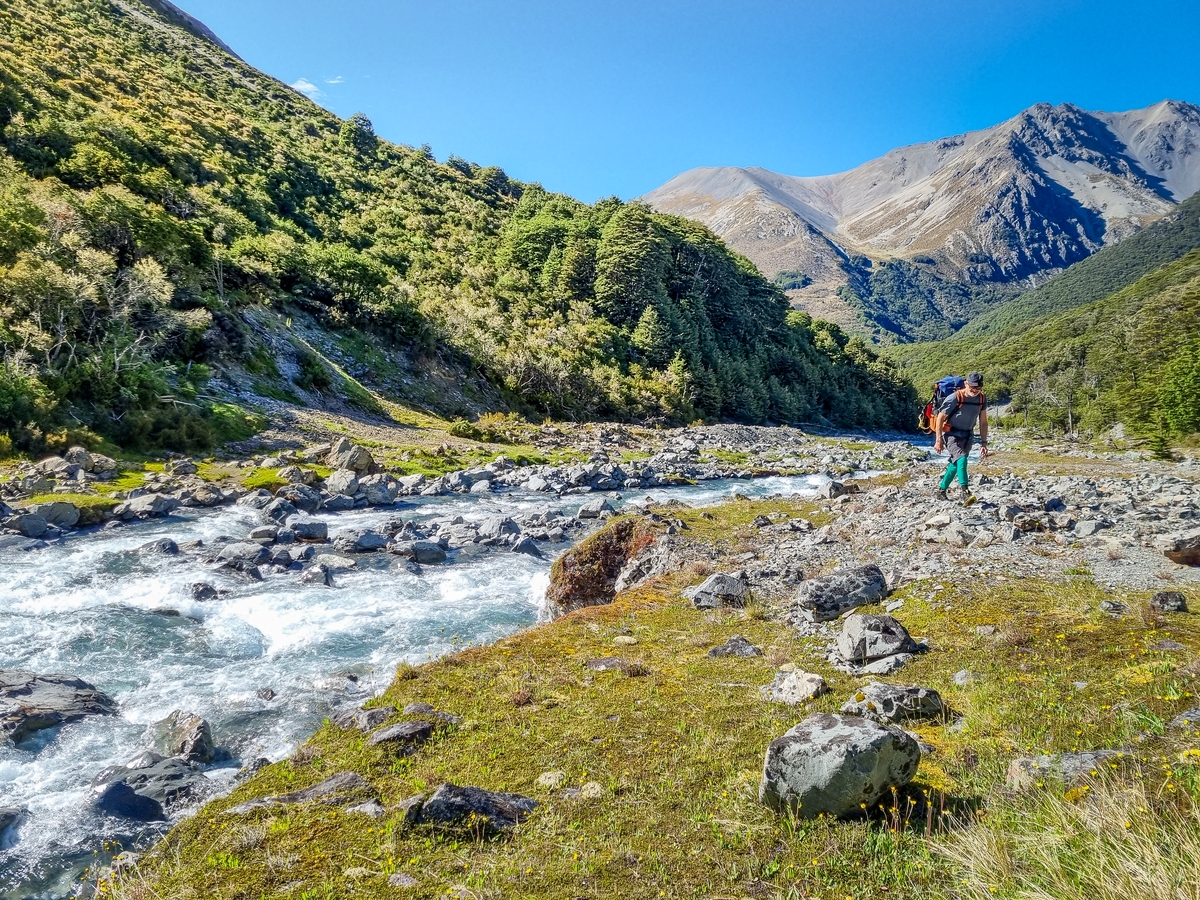
Between here and the hut, the track is sometimes at riverside and other times 100 or so meters away, so there’s less opportunities to see what you’re in for or notice any strainer hazards.
There is one mandatory river crossing at the South Temple Hut. There is no easy crossing point but the best one (a relatively even section of riverbed) is located 100 m downstream of the hut. Be prepared to deploy the pack raft to cross!
The height of this crossing is a reasonable flow gauge.
- If the flow here is thigh deep (just comfortable to cross using a mutual support method), the lower run will be at a good flow all the way.
- If it is a little too high to cross safely on foot (e.g., waist depth) the upper gorge run will be on.
A good strategy for the upper run involves getting to the hut prior to some incoming rain then paddling the upper run when it clears and either staying another night or continuing on out later in the day.
The South Temple Hut is a great place to spend the night but beware about being stuck here if it rains too much!.
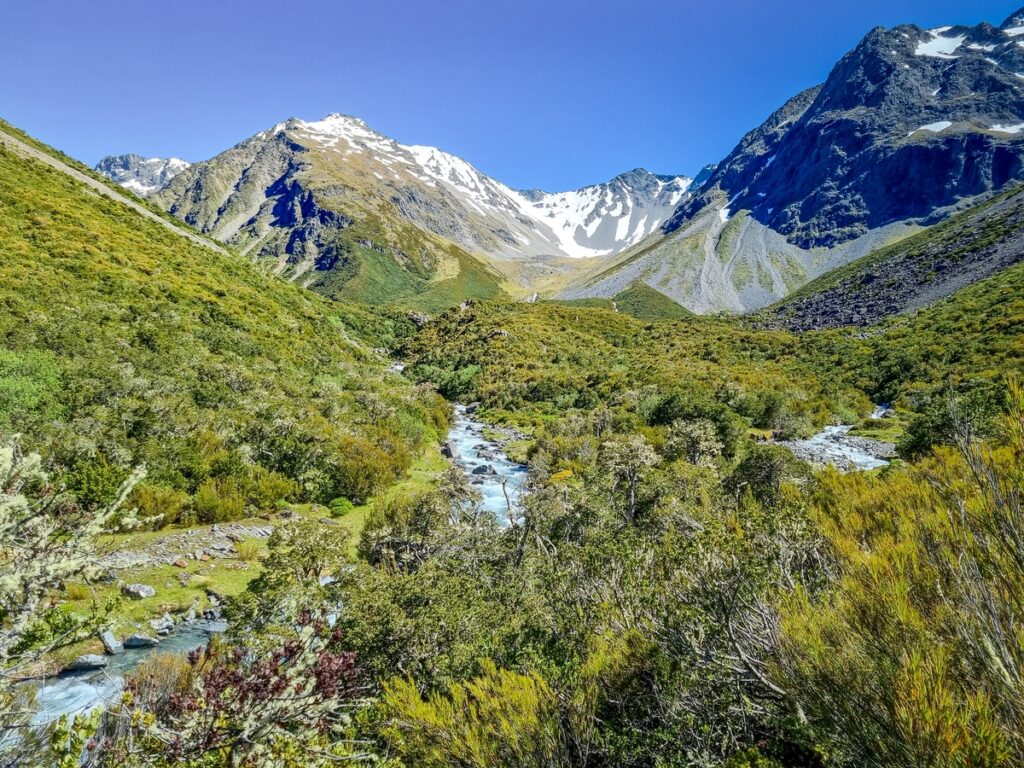
Upper South Temple route – hut to put on 1-1.5hrs
The track continues from the hut into the upper valley, mostly close to the river on the true right.
About 2 km from the hut, a prominent slip pushes the route down to the riverbed and a crossing is required. The crossing point is not immediately obvious but choose an appropriate spot towards the tail end of a steep rapid caused by the slip.
The slip rapid itself is a manky grade III boulder bash rapid that runs up against the same true right bank. This rapid is quite steep and has some bony parts that are easy to get pinned or wrapped on. Take note of this for the descent – you’ll probably want to be portaging on the paddle back.
The slip rapid marks a gradual increase in gradient as the valley closes in further upstream.
Once on the true left look for a track marker on the bush edge at the upstream end of the river flat. From here follow a lightly marked route up to the put-in point.
Beware that the subalpine scrub zone starts in this vicinity and there are a couple of places where it is easy to lose the track (or you may believe there is no track if it hasn’t been cut recently!). Thankfully a series of river flats begin another 500m or so further upstream which provides good travel. At the upper end of these flats (~3.5 km from the hut), the route as marked on the true right on the Topo50 map could no longer be found. Instead, a crossing to the true right was required to avoid a small gorge section, followed by another crossing back to the true left a little further upstream.
There is a logical starting point for this section at the Y shaped confluence of two prominent tributaries near the 1000 m contour, or alternatively at one of the river flats further downstream
Upper gorge (III)
From one of the starting points described above, expect narrow, busy and continuous alpine paddling. The stream is initially open at the start of the run and can be seen from the track along the river flats. At the downstream end of these flats the short upper gorge section begins.
The scrub comes in close, making for a committing feel even though the track is not far away. The character is tight and technical with numerous small drops and pools. Beware that several rapids are difficult to boat-scout due to bends in the river, so be prepared to catch regular eddies and break it down bit by bit. The character is very consistent throughout this upper gorge section with all of the rapids in the grade II+ and III range.

Don’t forget to take time to look upstream once in a while for some stunning views of the surrounding peaks.
The upper gorge comes to an abrupt end as the river takes a left bend and the riverbed opens up considerably. This announces the start of the ‘Slip rapid’ that many will choose to portage. This is usually the only portage on the run, provided the flows are suitable and the river is free of wood/strainers.
Getting back on the water expect a few more steep bouldery rapids before the gradient eases a little. Most of the remaining 2 km back to the hut is grade II, with several sections of braids. There are also a few harder rapids (II+) on the prominent corners. The section of riverbed is prone to considerable changes after floods and also features some fallen trees, so scope these out on the walk in.
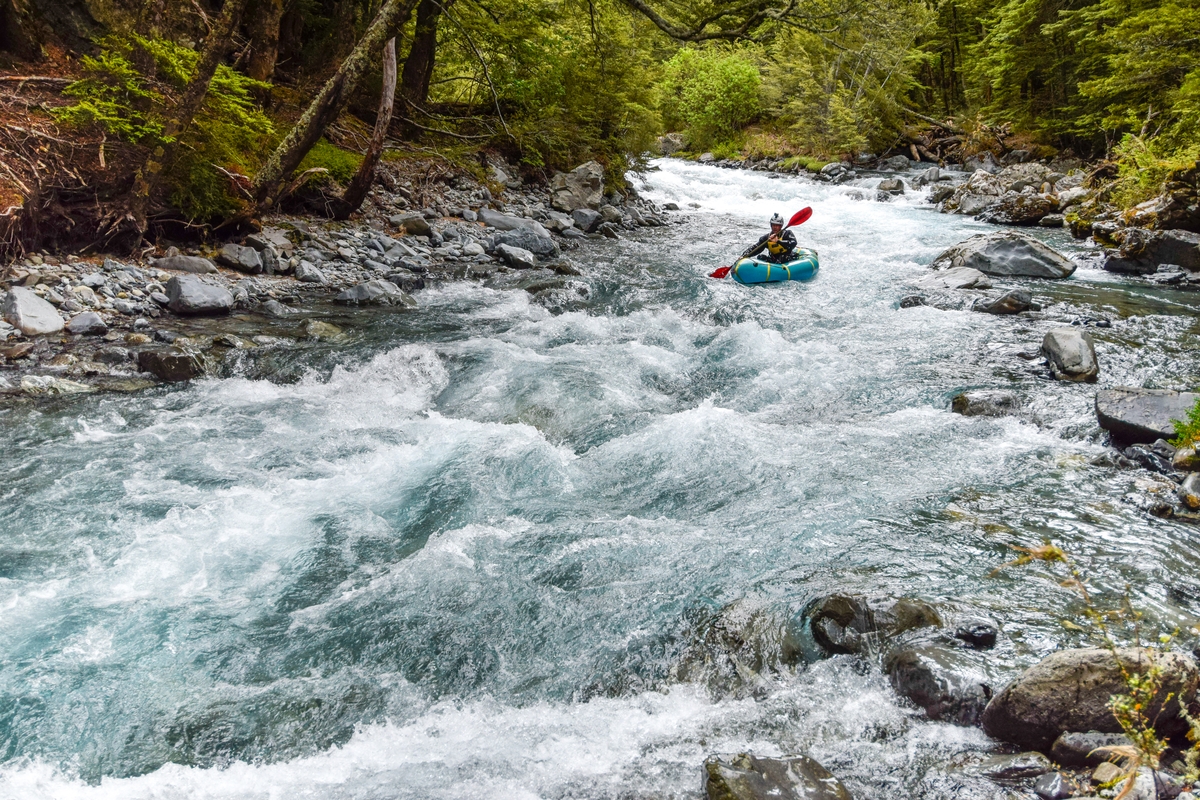
Hut to the middle gorge (II+/III)
From the put in directly below the hut, expect fast, shallow boulder gardens, requiring quick manoeuvring to navigate a suitable line. The boulder garden is very continuous – there aren’t distinct pools or big eddies, just a few very small eddies behind the bigger boulders and occasionally by the banks. There are also a reasonable number of log strainers at inconvenient places like blind corners and so on. With the wood and lack of big eddies, you have to be quite careful with scouting conservatively.
Remember the golden rule: always have an eddy you can reach in sight.
With more flow it’d likely be solid class III paddling. With modest flow (thigh deep at the put in) it is still continuous grade II+ with the occasional grade III feature.
When valley steepens on the river left, that is signalling that the IV gorge is about to commence. The river left take out above the gorge comes at you quickly from on the river. It is essential that you have your bearings as you are getting close (look for the large rock you scouted on the way in!). From here it’s a quick and easy portage via a good track to the next section below the gorge.
Middle gorge (IV)
To scope this gorge, use the walking track / portage route. There are several places you can peer over the lip a short distance through the bush from the walking track. There is also a place where scrambling down to river level is possible just around the first bend of the gorge. This is a useful option you have someone available to run safety from the bank as this access point is mid-way through the gorge, just after the first crux.
Overall, this grade IV section is quite committing and continuous, but there are some key eddies available that can help to break it down.
The entrance rapid features a series of small drops in quick succession and some have sticky holes to be navigated.
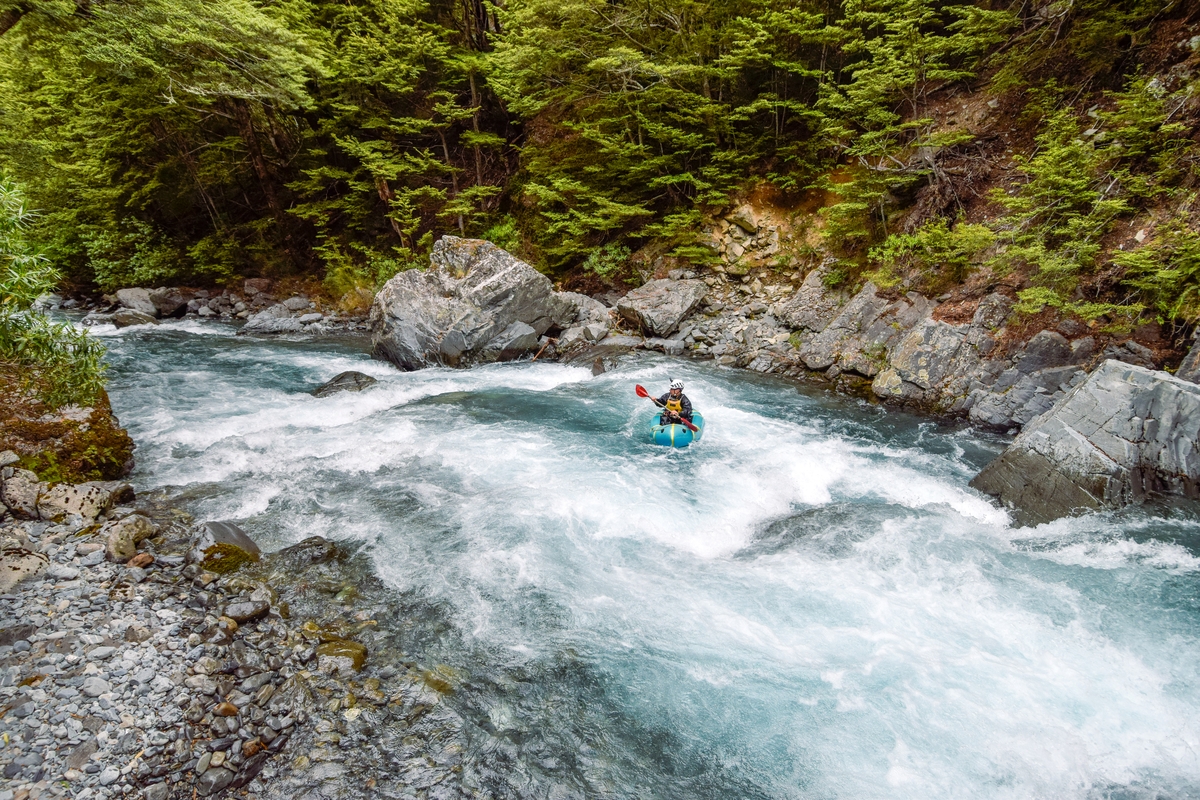
The river then turns to left just as the rock walls widen out. The next steep bouldery drop is the first crux with at least two runnable lines that come together in a powerful jet at the bottom. Catch the eddy below this rapid for a break – this pool is also the place where you can access (or escape) the gorge by scrambling up the bank on the true left.
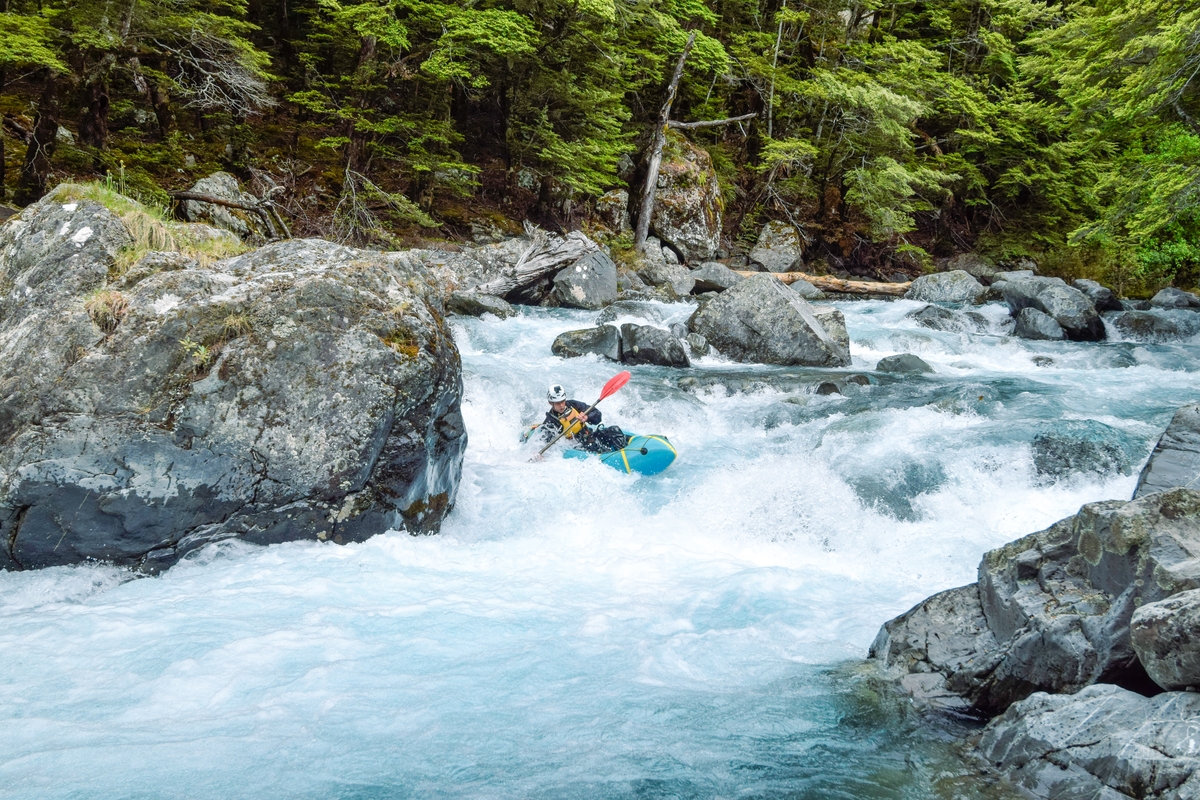
The next drop below here is the 2nd crux. Negotiate a tricky entry sequence then take a left turn into a 2 m drop.
Below here is the exit rapid is a busy grade III boulder garden with lots more tricky moves but gradually easing as the riverbed widens out.
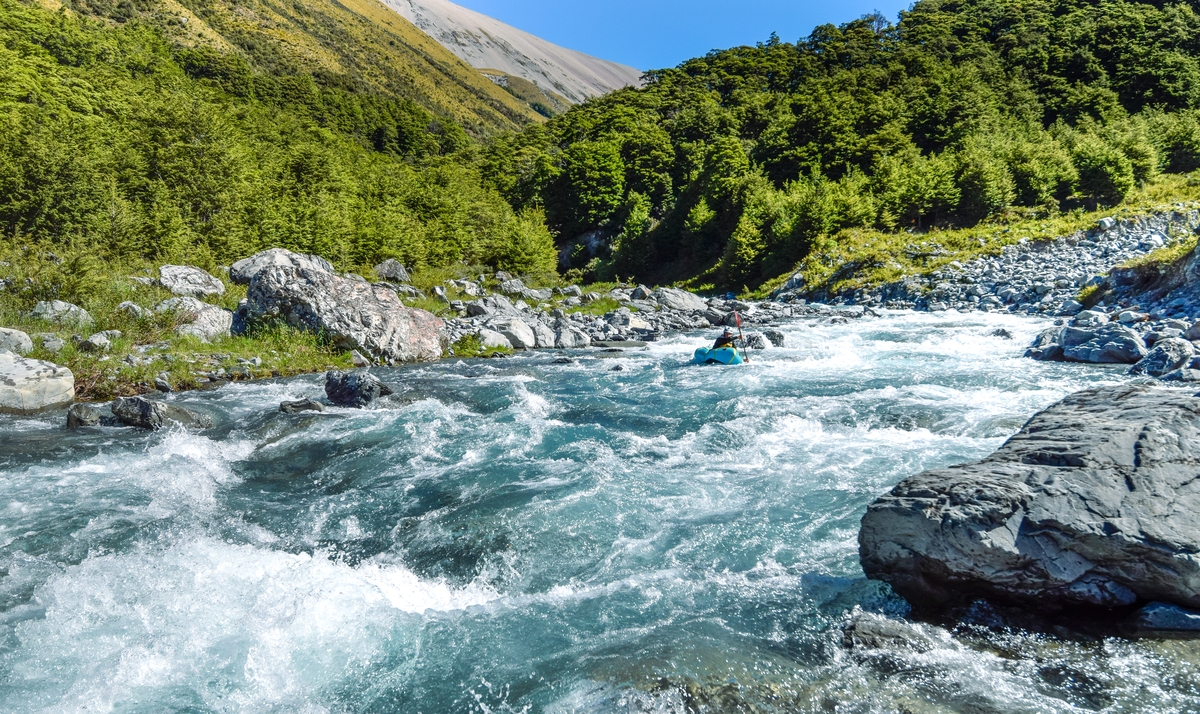
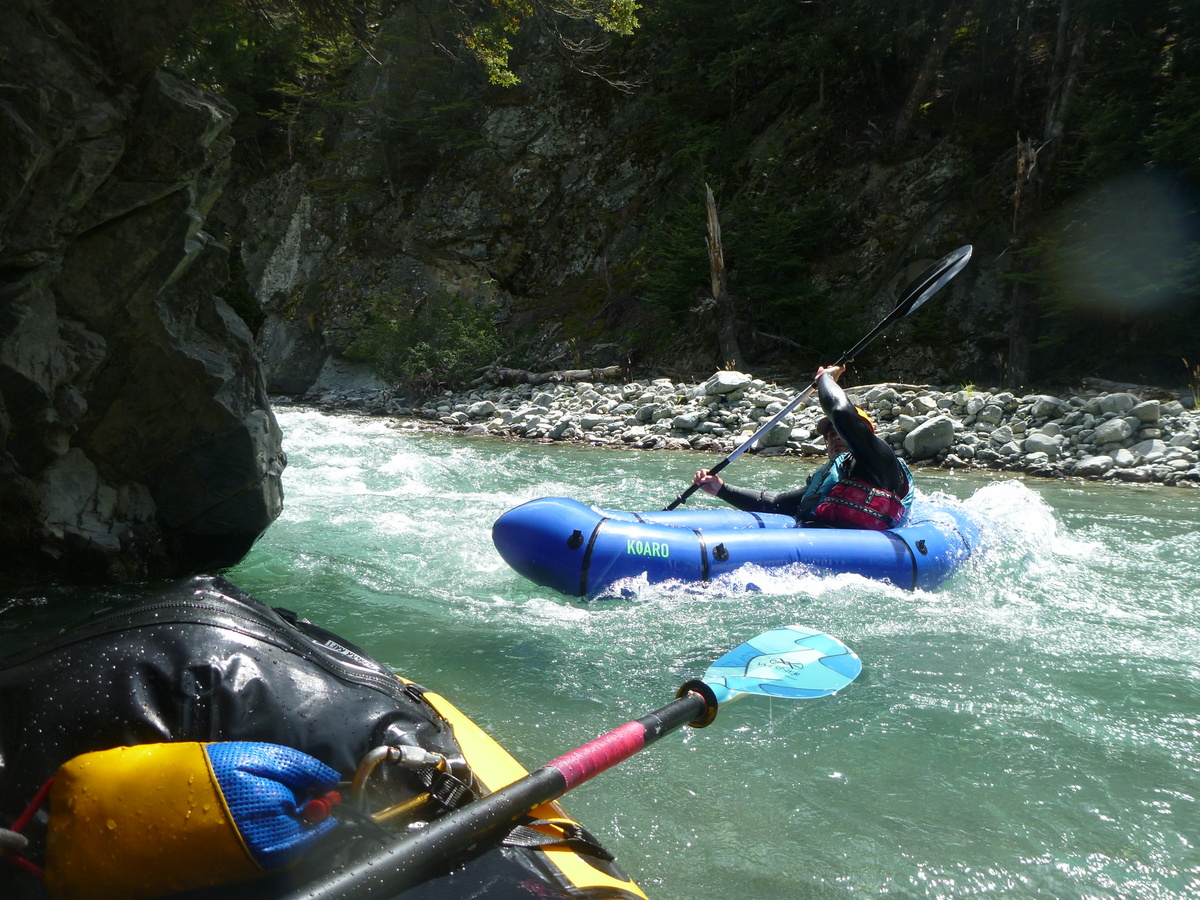
Below the middle gorge to the North Temple confluence (II+/III-)
From the rocky side stream on river left, the river returns to a similar character as above the gorge, although the riverbed is wider.
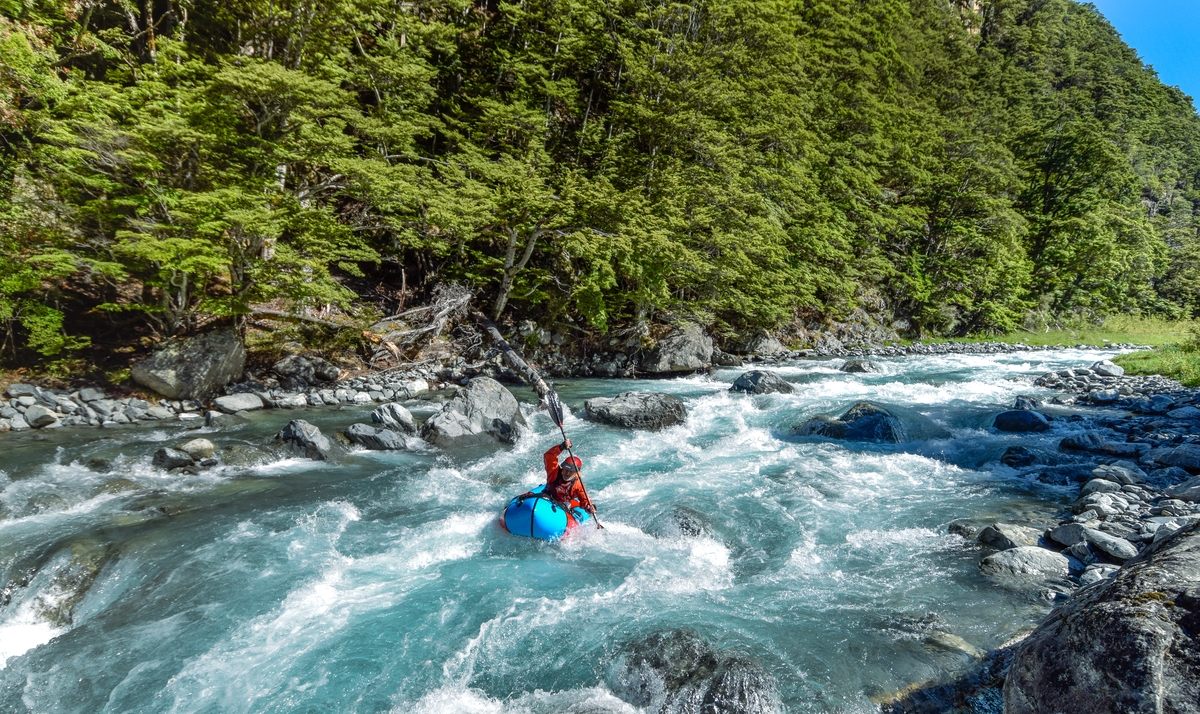
The first few rapids are busy boulder gardens (grade II+) followed by another solid rapid that features a powerful 1m drop (visible on the walk in). After this the gradient eases gradually before eventually mellowing into straightforward wave trains just before the North Temple confluence.
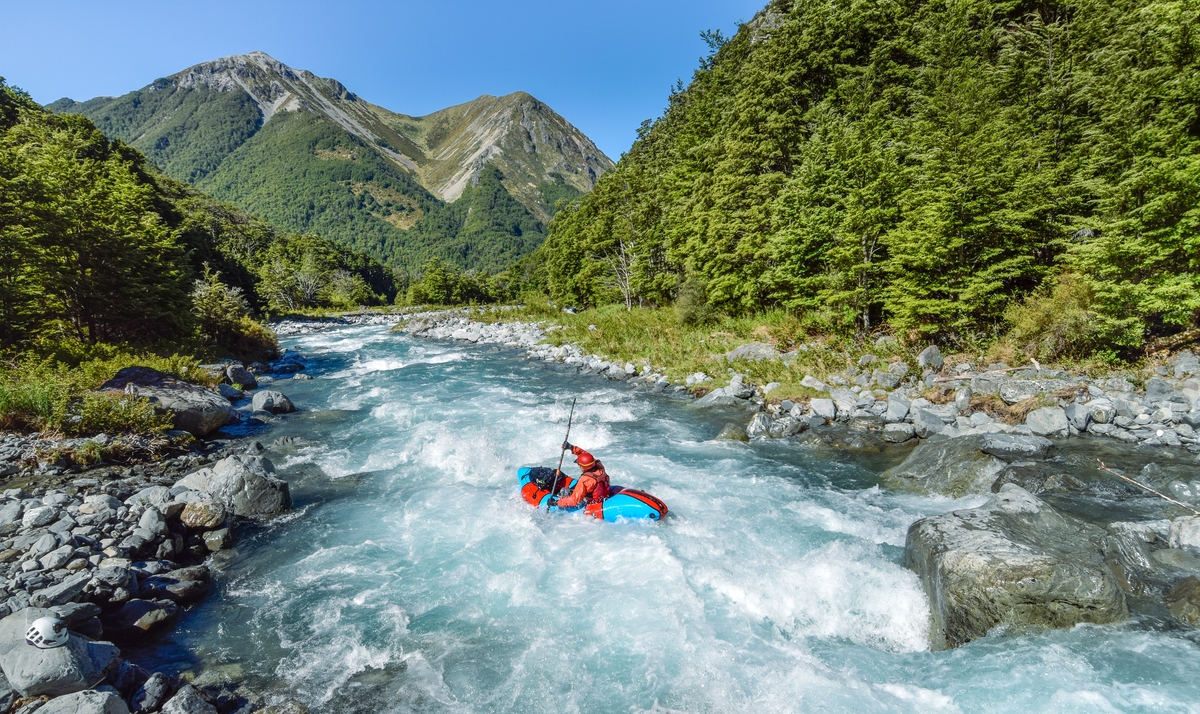
Confluence to the Hopkins Valley road (II)
From the North Temple confluence near the car park, it’s class II wave trains until the short lower gorge begins.
The gorge is also class II, with more distinct rapids and pools. The gorge walls are intermittent, so it would be straightforward to escape it if necessary, but it’s so short that it’d be unlikely you’d need to.
This gorge is very short and beginner-friendly.
The road bridge is not far downstream. Take out at the road bridge, then walk / bike back to your car.
Gauge
Visual.
Needs a bit of rain to bring it into condition. How much? I’d guess a decent evening’s rain, but probably not a multi-day storm. Springtime is generally a good option when there is likely to be some snow melt to keep the base flows up. Small rain events (e.g., 20 mm) can then create suitable flows with the water remaining relatively clear.
Check out the flow where the Temple Stream goes under the Hopkins Valley road bridge. You’re aiming for a flow where there’s just enough water to float over most of the rocks in the riverbed, which is relatively even at this point. Any less and it’ll be too bony. Any more and it’s up to you to decide. In any event, most of the lower part of the river can be seen from the walking track so even if you just stick to these sections you’ll likely find some good paddling at a suitable grade.
Could be worth checking out the Ahuriri at SH8. The Headwaters of the Ahuriri are close to the Temple, it should tell you if the rivers in the area are still in snow melt. Then you’ll need to wait for a bit of forecast rain with a clearance behind and prepare to get in there straight afterwards.
If there’s not enough water in the Temple, the nearby Huxley River (II/III-) has a larger catchment, and if all else fails, the Hopkins (I/II) will almost certainly have enough to float.
A group of six paddled from the South Temple Hut in early March 21.
The flow was only just sufficient to run from the hut to the gorge. It had rained several days before but not enough to keep the flow elevated. We paddled the middle gorge which had two drops, the first being 1m and the second about 2m. The last rapid at its base had a shark fin rock in its centre, we portaged this. The gorge in LOW FLOW added to the trip and was preferential to portaging and did not seem radically harder than other sections of the river lower down, although it certainly felt like it would be, in moderate to higher flows.
A great and technical river, lot`s of bang for the buck after a relatively short tramp.
Good spring flows observed this weekend (late Nov) with snow melt providing the top up needed.
We came in over gunsight pass (just tramping no boats) and it looked paddleable from the 1000m contour down.