


With fickle flows and long gorges, the Mid Waiohine Gorge has a fearsome reputation, with as many successful trips as aborted ones. It is a typical tight Tararua gorge with long pools and pool drops, horizon lines and boulder gardens. Like all Tararua gorges it is also flush with logs and every rapid and drop needs scouting
This is the pinnacle of Tararua packrafting. From Mid Waiohine down to Totara Flats you’ll encounter 40+ quality rapids, ranging from Class III to Class IV, with many rapids rising to Class IV and beyond at higher flows.
The run features long, continuous boulder gardens, bedrock chutes, big slip‑formed drops, and stretches of easier water between the main sections. Portaging becomes increasingly difficult as flows rise.
A strong party with reliable river‑running skills, good judgment, and Tararua backcountry competence is essential. It is the classic Tararua Gorging trip, and with the right flows a brilliant pack raft. It’s definitely not one to underestimate….
Updated 2026 by Martin Robertson
View Larger Topographic Map
Shuttle
Access to Holdsworth Road End
From State Highway 2 (Masterton area):
- Turn off SH2 onto Norfolk Road, about 2 km south of Masterton. This junction is well signposted for Tararua Forest Park.
- Follow Mount Holdsworth Road to the road end.
Distance is approximately 15 km from SH2 to the Holdsworth Lodge / carpark.
Access to Walls Whare / Waiohine Gorge Road End (Take‑out)
- From Carterton, turn into Dalefield Road
- Follow the yellow Tararua Forest Park / Waiohine Gorge signs until the road becomes Waiohine Gorge Road.
This leads all the way to the DOC campsite and suspension bridge. - From Greytown, drive north and cross the Waiohine River Bridge on SH2 Immediately turn left at the signs for Tararua Forest Park.
- Follow the winding, narrow Waiohine Gorge Road, which includes a ford crossing and ends at the DOC campground and road end.
On Foot
Reaching the Mid‑Waiohine put‑in requires a full‑day tramp across the Tararua tops, and should only be attempted in settled conditions.
From Holdsworth Road End, follow the well‑formed Gentle Annie Track to Mountain House Shelter, which takes around 2 hours for most parties.
Continue climbing through beech forest and onto the alpine ridge, reaching Powell Hut in a further 1.5 hours.
Above Powell Hut, the track climbs to the exposed tops of Mt Holdsworth, entering open, wind‑prone terrain. From here the route traverses the ridge toward Isabelle, before beginning a long, steep, and sometimes slippery 1,000 m descent into the Waiohine Valley. This section is slow going even downhill.
Treat the walk‑in as a full day, and carry gear appropriate for Tararua tops travel. Alternatively this can be broken up with a stay at Powell Hut (bookable). Given the very narrow flow window it’s hard to get the timing right for a walk-in and some might opt for a fly-in with Amalgamated Helicopters from Carterton.
The combination of elevated flow and low wind/clear visibility suitable for heli flying is pretty rare but generally follows a southerly front.
On the River
Mid Waiohine to Isabelle Creek
At Mid Waiohine, the river is, briefly, wide and gentle, with the first “warm‑up” rapid where the river divides around a gravel island. The intensity steadily builds through a series of Class II to II+ rapids toward the Isabelle Creek confluence.
Note we have used descriptive names as there are no known rapid names – if rapids have names let us know and we will update the write-up. It s mujch easier to relate rapid information and hazards when we use names – and if we all use the wrong names consistently for the same rapids – all is good!
Isabelle to Muir Creek
The first decent Class III (“Long Rapid”) is shortly after Isabelle Creek. It is a long (120 m) graveyard‑style boulder garden (i.e the boulders protrude from the current like tombstones). Note that a persistent theme is big boulders below major sidestreams or slips.
A complex collection of boulder gardens and bedrock‑wall rapids follow increasing the work rate and hinting at what’s to come. The boulder sizes here begin to approach “borderline West Coast” scale in places.
Muir Creek to Hector Forks
The intensity in these section kicks it up a notch and the next hour contains some of the best rapids of the trip.
Little Red
A distinctive steep 50 m boulder garden marked by a large red boulder mid‑rapid.
Big Red
Shortly after, on a right bend, lies Big Red — named for the numerous red rocks including a west coast size red boulder at the bottom. Despite the name it is a greywacke bedrock chute with several drops.
Scouting is possible on both sides. Note one kayaking video (Waiohine Ode to the redbull can) includes this rapid at three different timestamps – so don’t get confused.
The Jumble
After two smaller Class III rapids, the river piles into The Jumble (III+) — a chaotic, gravestone style 100 m boulder garden work-out ending in a bottom chute. With a bit of water this would get interesting in the Class IV realm.
A kilometre of easier water follows.
The Grey
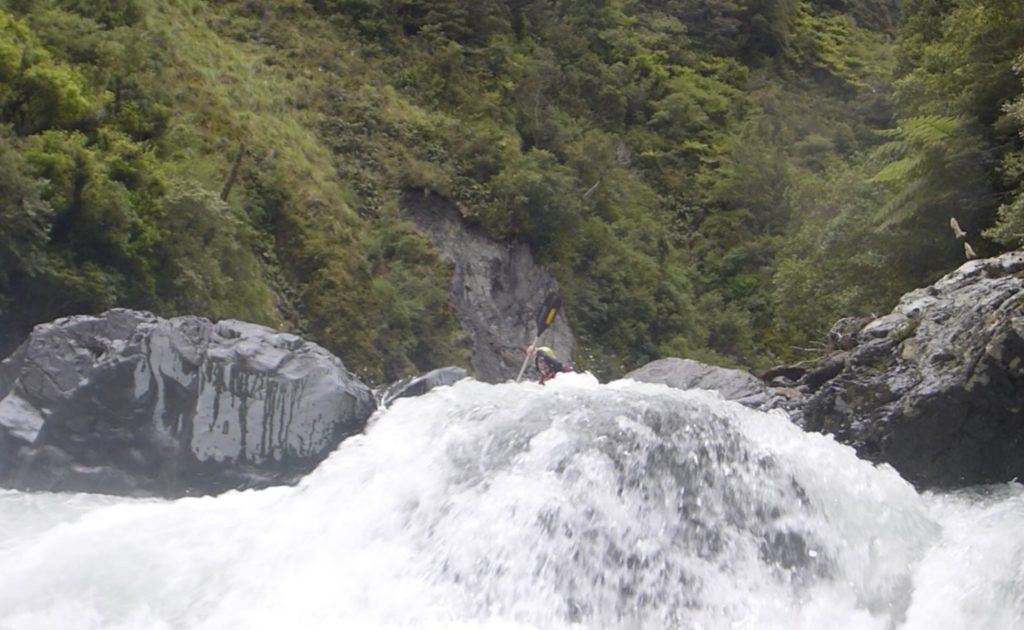
A small waterfall on river left signals The Grey — a 50 m boulder garden with a final chute into a large grey boulder or bedrock slab.
Horizons
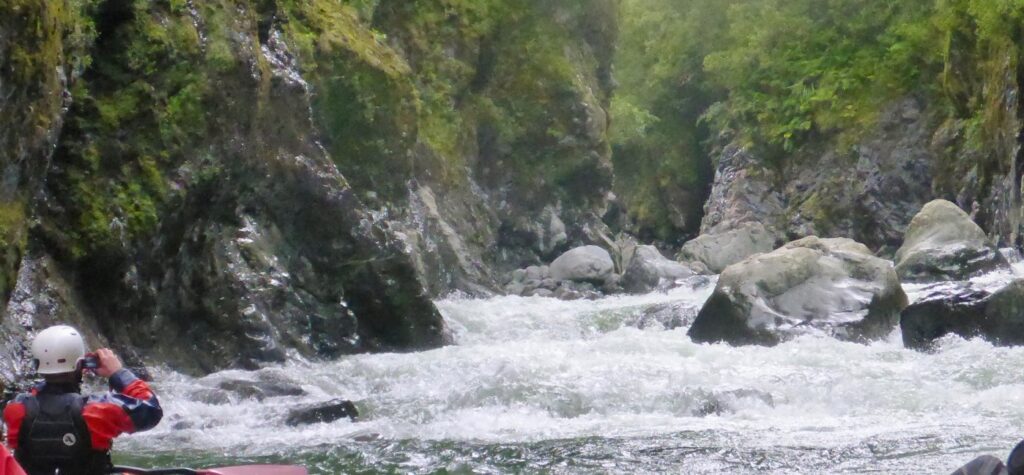
A short distance after The Grey a horizon‑line pool drop leads into a short bedrock gorge.
Downstream in quick succession lie half a dozen Class III–IV bedrock pool drop and chute rapids in a tight but short gorge, many difficult to portage at higher flows.
Hector Confluence to Totara Flats
The river swings east across the grain of the ranges, widens, and shifts character. After about 500 m, the gradient tightens again with slip‑formed rapids around the Hector confluence.
Slips dominate this section—active, old, and healing—producing some of the biggest rapids of the day with the extra push of the extra, Hector river added, flow. Some of the bigger ones might have been earthquake triggered and a number look like they would have formed temporary dams across the gorge.
Rockpile Drop & Lower Rockpile
At the base of a huge active slip, these two substantial rapids stand out.
Below them lies about a kilometre of easier Class II boulder gardens.
Slip Rapid, The Brothers, Rocky, Chunky, The Squeeze
Another sequence of Class III+ rapids follows. Names include some from Egarr but may not be correctly attributed.
As the river nears Totara Flats, the gradient softens and the spaces between rapids increase. Roughly 700 m below the last named rapid, the Totara Flats swingbridge appears.
From Totara Flats Swingbridge
Option 1 — Continue to Waiohine Gorge Road End
Allow 2.5 hours of easy Class II paddling with two notable II+ rapids at Makaka and Clem Creek respectively.
Option 2 — Exit at Totara Flats Swingbridge
Walk back to Holdsworth Road End in 4–5 hours.
Emergency Exit Notes
Many tubing parties have abandoned tubing trips above Hector Forks – there are a few do-able but challenging routes.
Muir Creek Confluence Slip (River Left)
- Climb the slip opposite Muir Stream to spot hight 814 and Flaxy Knob ridge.
- Then choose:
- Backtrack over High Ridge and the tops to Holdsworth/Powell Hut (very exposed)
- Drop down a faint, sporadically marked route to Totara Stream, then onward to Totara Flats Hut or the road end
Hector Forks Exit
- Climb from the confluence to Cone Ridge
- Walk back down to Totara Flats Hut
Still a steep and serious exit, but the most practical before reaching Flat.
Totara Flats Swingbridge
The first reliable, straightforward exit.
Flow
Firstly a caution – Nigel Parry (ex President WWNZ) kayaked the river at 27m3 (on the Lower Waiohine Gorge gauge) and advises it contained a number of Class IV rapids and drops that would be “no place for a packraft” at that flow. Flows of around 10m3 are likely to be too bony and 20 m3 may be too much. So there is a narrow window in between these flows where packrafting (with lots of portages) will be possible for experienced paddlers. Packrafting kayakers will choose higher flows.
Gauge: Waiohine at Gorge
Because the gauge is well downstream, the flow at Mid Waiohine will be lower, and the flow at Totara Flats will be somewhere between.
Approximate Flow Translation
Above Hector Forks: at least ½ of the Gorge gauge
At Totara Flats: at least ⅔ of the Gorge gauge
Example:
Gauge reads 25 m³/s Mid Waiohine ≈ 12–14 m³/s
Totara Flats ≈ 17–18 m³/s
Using Hutt Gorge as a reference as it will be familiar to Tararua packrafters – this probably produces paddling comparable in push to Hutt Gorge at 20 cumec, but on steeper gradient with much larger boulders and greater risk.
Reported Good Flows
Bill Thomson, Sandra Hyslop and kayakers Nigel Parry and Peter Mitchell report excellent, Class IV paddling around 25 m³/s (Gorge gauge). Note these paddlers are experienced Class IV and higher kayakers who also packraft.
Recommended Flows
20-25m³/s on gauge:
Only for very experienced teams. Numerous Class III+/IV rapids, limited portaging options.
~15 m³/s on gauge:
Likely runnable (not fully confirmed). Expect bony but highly technical boulder gardens, similar in challenge to a low‑flow Hutt Gorge (10 m³/s Kaitoke) but steeper and more committing.
<10 m³/s on gauge:
Typical summer tubing flows. Long trip walking boney rapids but easygoing; tubes reportedly take ~8 hours or more from Mid Waiohine to Totara Flats.
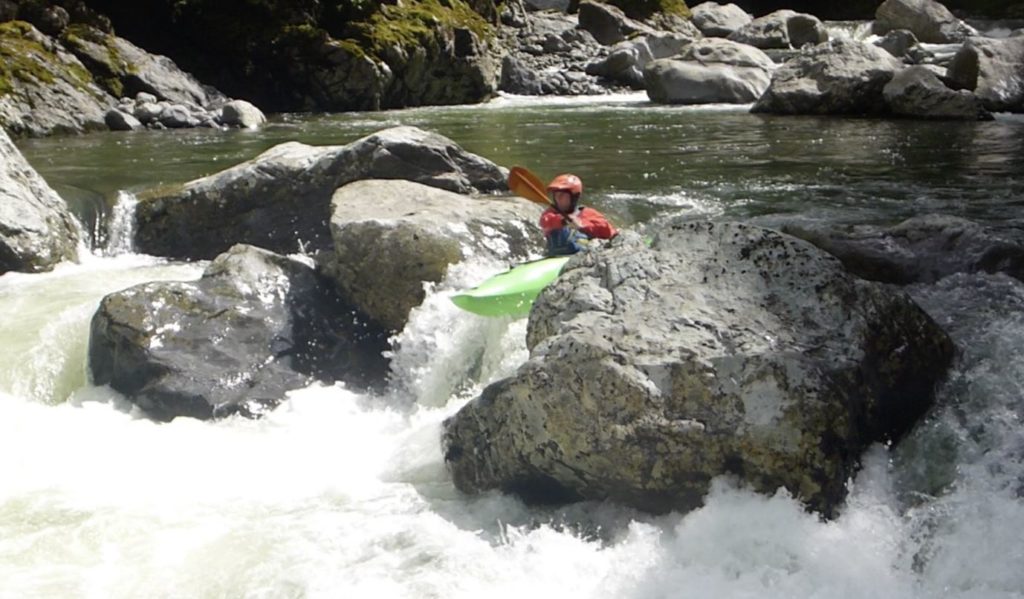
Sandra Hyslop – an extremely capable kayaker – ran the Waiohine and captured the action for us! She did not video Big Red rapid but captured most of the rapids to just below the Hector confluence where she ran out of battery. Allow more time than Sandra as her boat scouting is top notch.
Hazards
This is classic remote Tararua country: steep catchments, fast response to rain, and limited escape options.
Rapid Changes in Flow
- The Tararuas are known for rapid unpredictable rises in nor’westerly rain.
- The safest paddling window is usually after southerly rain, which:
- clears more predictably
- drops steadily
- falls mainly on the eastern side of the range
Slip‑Formed Rapids and Wood
Below the Maungahuka stream gorge section and especially after Hector Forks there are enormous active slips which can change hte bnature of rapids and dump trees which end up in unexpected places. The descriptions are general and rapids will change so scout thoroughly.
Limited Portaging in Places
Several of the Class III+/IV rapids in the reach below Muir Creek offer:
- difficult scouting access
- steep walls
- dense vegetation
- no viable portage at medium/high flows
Commitment
Once on the river, you’re committed to long, continuous stretches of bouldery water with only two meaningful emergency exits before Totara Flats.
Here’s a blogpost and youtube vid about a packrafting trip of this section at around 22-20 cumecs for the first day from Mid Waiohine to Totara Flats and lower for the second day from Totara Flats out. 20 cumecs would be about the minimum I’d want for packrafting, much lower and you’d do a lot of scraping and portaging, it could take a bit more and still be very manageable for competent paddlers. I did a couple of portages (2 or 3 from memory, but none were compulsory).
Timings for a relatively fit hiker and very confident Grade III/IV boat scouter were:
Walk 3hrs to Powell Hut – 8km
Walk 2hr 30min Powell hut to Mid Waiohine Hut – 6km
Paddle 2hr30min Mid Waiohine to Totara Flat – 10-12km
Paddle 2hrs Totara Flat to Waiohine Campsite -10km
https://www.ilikekayaking.com/blog/waiohine-packrafting